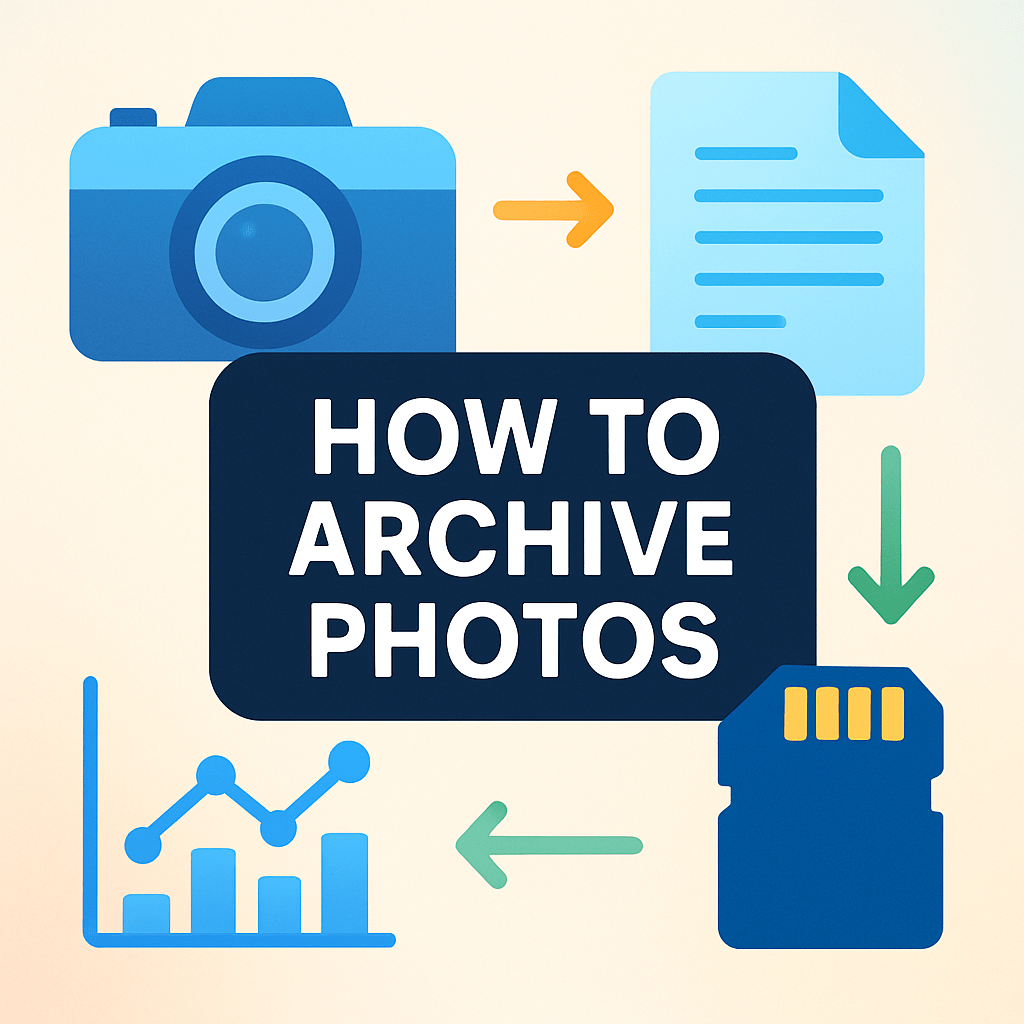
How to archive photos so they survive hard drive crashes, accidental deletes, and changing technology?
This guide gives a clear, step-by-step plan for how to archive photos. You will learn to gather every source, make a single master archive, and remove duplicates.
Then you will set naming and metadata rules, catalog files, and build a 3-2-1 backup system with checksums and verification. I also cover scanning old prints, migration schedules, tool recommendations, and copy-ready templates.
Whether you are a pro protecting client work or a parent saving family history, this guide makes archiving practical and fast. Read on to start your archive in minutes.
Why Archiving Your Photos Is Important

Your photos are fragile in ways you rarely see. Hard drives fail, phones drop in water, formats go obsolete, and files silently rot over time.
I watched a colleague lose an entire wedding season when a RAID failed and his only copy vanished. A family I know found their favorite baby photos locked inside an old laptop that would no longer boot.
Archiving protects both business and personal stakes. Pros safeguard client deliverables, licensing opportunities, and business continuity, while families preserve history, identity, and future stories.
A good archive also unlocks findability and reuse. You can search, remix, and deliver within minutes instead of hunting for hours across devices and apps.
Quick start for tonight: gather your phones, memory cards, and old drives, pick one master drive, copy everything into a single “_ToSort” folder, start a cloud backup, write a short README, and set a monthly reminder. Tomorrow, continue with the workflow below and learn how to archive photos without stress.
How to Create a Digital Photo Archive
This is how to archive photos in a clean, repeatable workflow. Follow the steps in order and keep your masters safe while you work.
1. Inventory and gather: list every source, including phones, cameras, memory cards, old PCs, USB sticks, DVDs, and social accounts. Export full-quality copies, and use tools like Google Takeout for online platforms.
2. Consolidate to one master location before changing anything. Create a temporary master folder or drive and copy everything there so you can see the full picture.
3. Cull duplicates and trash in two passes. Do a quick visual cull first, then run a dedupe tool such as dupeGuru or similar; do not delete originals until backups are verified.
4. Decide your master policy up front. Keep camera RAW with sidecar files, or convert to archival DNG or TIFF, then create separate derivatives for editing and sharing.
5. Choose a clear folder structure and a file-naming standard. You will refine it in Organizing Your Files, but decide a simple rule now so new photos land in the right place.
6. Embed metadata in the files, not just the catalog. Batch write creator, copyright, date, location, and keywords using Exif/IPTC/XMP with Lightroom Classic, Photo Mechanic, or ExifTool.
7. Catalog and index so you can search fast. Use Lightroom Classic, Photo Mechanic Plus, or digiKam, and let the catalog reference your masters without moving them.
8. Implement a 3-2-1 backup plan now, not later. Create checksums for masters, verify copies after transfer, and set automated schedules; see Backing Up Your Photos for details.
9. Document the archive so future you understands it. A simple README explains the folder structure, naming rules, where backups live, and any passwords or encryption notes.
10. Schedule maintenance every month and every year. Do small culls, verify backups, and migrate media every three to five years so your archive stays alive.
If you manage huge libraries, skim industry best practices and adapt them to your space, budget, and risk tolerance. Small, consistent steps beat big bursts that never finish.
Recommended tools keep you fast and accurate. Lightroom Classic handles cataloging, Photo Mechanic speeds ingest and captions, ExifTool manages deep metadata, duplicate finders remove clutter, and rclone or ChronoSync automate syncs.
Troubleshooting tips save heartbreak. If files look corrupt, stop writing to that drive and try PhotoRec or a professional recovery service; fix wrong capture times with ExifTool, and correct time zone mistakes with a batch offset.
A real-world example: I consolidated nine years of client folders scattered across three laptops and six drives. A single master, consistent names, and verified backups turned chaos into billable re-licensing within a week.
Organizing Your Files
Good organization is the heartbeat of how to archive photos. Use names and folders that sort themselves and tell a story at a glance.
Start file names with YYYYMMDD so they sort chronologically. Avoid spaces, use underscores or hyphens, add a short descriptor, a sequence number, and a camera ID if needed.
Two ready-to-copy templates are easy to use today. Try 20251103_paris-eiffel_0001.CR2 and 20251103-clientname-project_v01.JPG to see how clarity follows your work.
Your folders should mirror how you search. A simple chronological tree could be Photos / 2026 / 2026-11-03_Paris / RAW / Edited / Exports for hobby or travel work.
Client projects often prefer a client-first hierarchy. Use Clients / ClientName / 2026_BrandShoot / RAW / Selects / Deliverables, then add “Licenses” or “Contracts” next to Deliverables if helpful.
For mixed collections, a hybrid helps. Try Archive / Year / Month-Event / Originals or Scans, then Edited and Exports so digital and scanned work live in one clear map.
Fill key metadata fields every time. Title, Caption, Keywords, Creator, Copyright, Location, and Date make images discoverable; use a controlled vocabulary and stick to useful, repeatable terms.
Build hierarchical keywords for power searches. Person|Family|Ava or Place|France|Paris|Eiffel-Tower keeps tags tidy and lets you find people, roles, and places in one search.
Use face recognition and geotagging with intention. They speed searches, but consider privacy for kids and clients, and strip sensitive data before public sharing.
Catalogs versus folders is not a fight you must pick. A well-structured file system plus a catalog like Lightroom Classic gives you speed, previews, and portable intelligence.
Automate repetitive steps so you never fall behind. Ingest presets, batch renaming, ExifTool scripts, and Photo Mechanic templates save hours and keep your data consistent.
For more ideas on smart organization and archiving, study how pros group projects and name files. Borrow what fits and keep it simple.
If you visualize processes, sketch a small folder tree diagram and a Lightroom ingest screenshot. A one-page checklist infographic turns your personal system into a repeatable habit.
Backing Up Your Photos
The 3-2-1 rule is non-negotiable: three copies, on two different media, with one off-site. Without this, how to archive photos becomes a game of luck.
External hard drives are cheap and spacious but have moving parts that wear out. SSDs are fast and rugged for active work, though cost more per terabyte.
A NAS like Synology or QNAP centralizes storage and adds RAID for local redundancy. It still needs backup, because RAID protects hardware failure, not deletion, theft, or malware.
Cloud backup adds off-site protection and automation. Backblaze, Wasabi, Amazon S3 or Glacier, and iCloud or Google Photos vary in cost, features, and restore speed; pick what matches your risk and budget.
For long-term, offline protection, consider LTO tape or M-DISC. These cold-storage options shine for irreplaceable archives and disaster resilience.
Use a practical flow: keep the master on your computer or NAS, mirror it to a local external drive or second NAS, then send an encrypted backup with versioning to the cloud. Schedule automatic jobs with rclone, Arq, ChronoSync, or Synology Hyper Backup.
Integrity matters as much as copies. Create and store checksums like MD5 or SHA256 for your masters, verify after transfers, run annual restore tests, and replace drives every three to five years.
Encrypt every off-site copy and any portable drive. Keep passwords and recovery keys in a reliable password manager so your archive is safe and still accessible.
Common mistakes include relying on a single copy, thinking RAID equals backup, turning off file versioning, and never testing a restore. Avoid them and your backups will actually save you.
If you need a quick refresher on practical setup, learn how to safely store your photos and adapt the ideas to your tools. Small daily automation beats heroic weekend copies.
Archiving Old Photos
Prioritize fragile and unique items first. Fading prints, one-of-a-kind albums, and family slides deserve scanning before duplicates or low-value images.
For prints, scan at 300 to 600 ppi; use 600 ppi when you might crop or reprint large. For 35mm negatives and slides, aim for 2400 to 4000 ppi to capture real detail.
Scan masters in 16-bit color and save as uncompressed or lossless-compressed TIFF. Use a wide-gamut space like Adobe RGB or ProPhoto RGB and embed the ICC profile; export sRGB for web.
Choose the method that matches quality and time. Flatbeds are economical for prints, dedicated film scanners excel on negatives, and pro services are fast but cost more.
Handle originals gently with a blower and microfiber cloth, and wear cotton or nitrile gloves. Store in acid-free sleeves and boxes in a cool, dry, dark place.
Name scans with the same rules you use for digital captures. Add a physical ID like Box03_Sleeve12 so you can match files to the original item later.
Use your phone only for quick wins when quality is not critical. Apps like Google PhotoScan are handy, but they are not archival replacements for true scans.
At a glance, recommended settings are simple. Prints: 300–600 ppi, 16-bit, TIFF, wide-gamut profile; 35mm film: 2400–4000 ppi, 16-bit, TIFF, wide-gamut profile; share copies as sRGB JPEGs.
A family example shows the payoff. We scanned three shoeboxes of prints at 600 ppi TIFF, tagged people and places, and now every grandchild can find birthdays by name and year.
For deeper technical reading, look up ExifTool documentation for metadata, the Backblaze blog for backup strategy, and established scanning best-practices like FADGI guidelines. These will sharpen your choices as your archive grows.
What People Ask Most
What does it mean to archive photos?
Archiving photos means moving them out of your everyday folders into long-term storage to free up space and keep memories safe. It’s a way to organize and protect pictures you don’t need to access often.
How do I archive photos on my phone or computer?
Back up your pictures to an external drive or a trusted cloud service, then move organized folders out of active device storage. Use simple folder names and dates so you can find them later.
How to archive photos for beginners?
Start by sorting photos into dated folders and deleting duplicates, then copy the folders to a second location like a hard drive or cloud. Keep one backup offsite for extra safety.
Will archiving delete my photos from my device?
Not always—archiving usually moves photos to storage but can also remove local copies depending on your app settings, so check before you delete. Make sure a full backup exists before clearing space.
How often should I archive photos?
Archive photos whenever your device gets full or after big events like trips, which is often every few months. Regular archiving prevents pileups and makes future finding easier.
What are common mistakes when people archive photos?
Common mistakes include not keeping a backup, skipping organization, and relying on one storage method. These errors make it hard to find or recover photos later.
Is it safe to archive photos to the cloud?
Yes, cloud storage is safe if you use a reputable provider, enable two-factor authentication, and use strong passwords. For extra security, keep an offline backup as well.
Final Thoughts on Archiving Your Photos
Whether you’re starting with 270 images or decades of family prints, a proper archive turns scattered files into a searchable, usable library that survives device failures and time. It makes your work and memories easy to find, reuse, and pass along, rather than trapped on a forgotten hard drive, and saves you a lot of stress later.
That said, an archive needs attention: expect regular maintenance, periodic migrations, and verification so your copies stay reliable. Remember the opening example of a lost wedding album — this guide walked you through a step-by-step workflow, naming templates, backup strategies and scanning settings so you can avoid that exact outcome.
If you follow the simple workflow and the 3-2-1 backup rule we laid out, you’ll build a resilient system that benefits photographers, small businesses and families alike. Keep it practical and steady, and your archive will become a calm, long-term resource you can trust as the years go by. You’re building something that will outlast devices and trends.


0 Comments