
How to photograph furniture that looks professional and true to life?
This 2026 guide shows simple steps for cleaning, lighting, angles, and editing. It promises clear tips you can use today.
You will learn how to prep pieces, choose a clean background, and control reflections. These steps cut retouch time and keep colors honest.
I explain using natural light, easy studio setups, and the best angles to shoot. Plus you get a printable shoot-day checklist, shot list template, and gear picks for three budgets.
Clean the furniture
The first secret of how to photograph furniture is simple: start spotless. Prep removes distractions, shows the true finish, and saves hours of retouching later. A clean piece photographs more expensive and more trustworthy.
Do a full pre-shoot pass. Assemble the item and tighten all hardware, then pull stickers, labels, and protective films. Vacuum cushions, lint-roll seams, steam or iron fabric, dust and lightly polish wood, clean glass, and wipe fingerprints from metal.
Match the method to the material. For wood, use a dry microfiber first, then a whisper of polish; too much product creates glare you cannot fix on set. For leather, apply a gentle cleaner and conditioner, and buff to an even, low sheen.
Fabric loves steam. A small hand steamer relaxes creases, and a lint roller lifts fuzz along piping and tufts. Use a streak-free glass cleaner for mirrors and tabletops, and give high-gloss finishes a final wipe right before you press the shutter.
Build a small cleaning kit so you never scramble. Pack microfiber cloths, a lint roller, a hand steamer, compressed air, neutral cleaning solutions, small brushes for corners, tape or clamps for loose fabric, and a touch-up kit for tiny scuffs. Avoid over-polishing and colored cleaners that can add a color cast you will fight in post.
If you want a printable “prepare the piece” checklist, write the steps above on one sheet and tape it to your cart. It keeps the set calm and makes every assistant a quality controller. A clean, honest surface is the foundation of how to photograph furniture well.
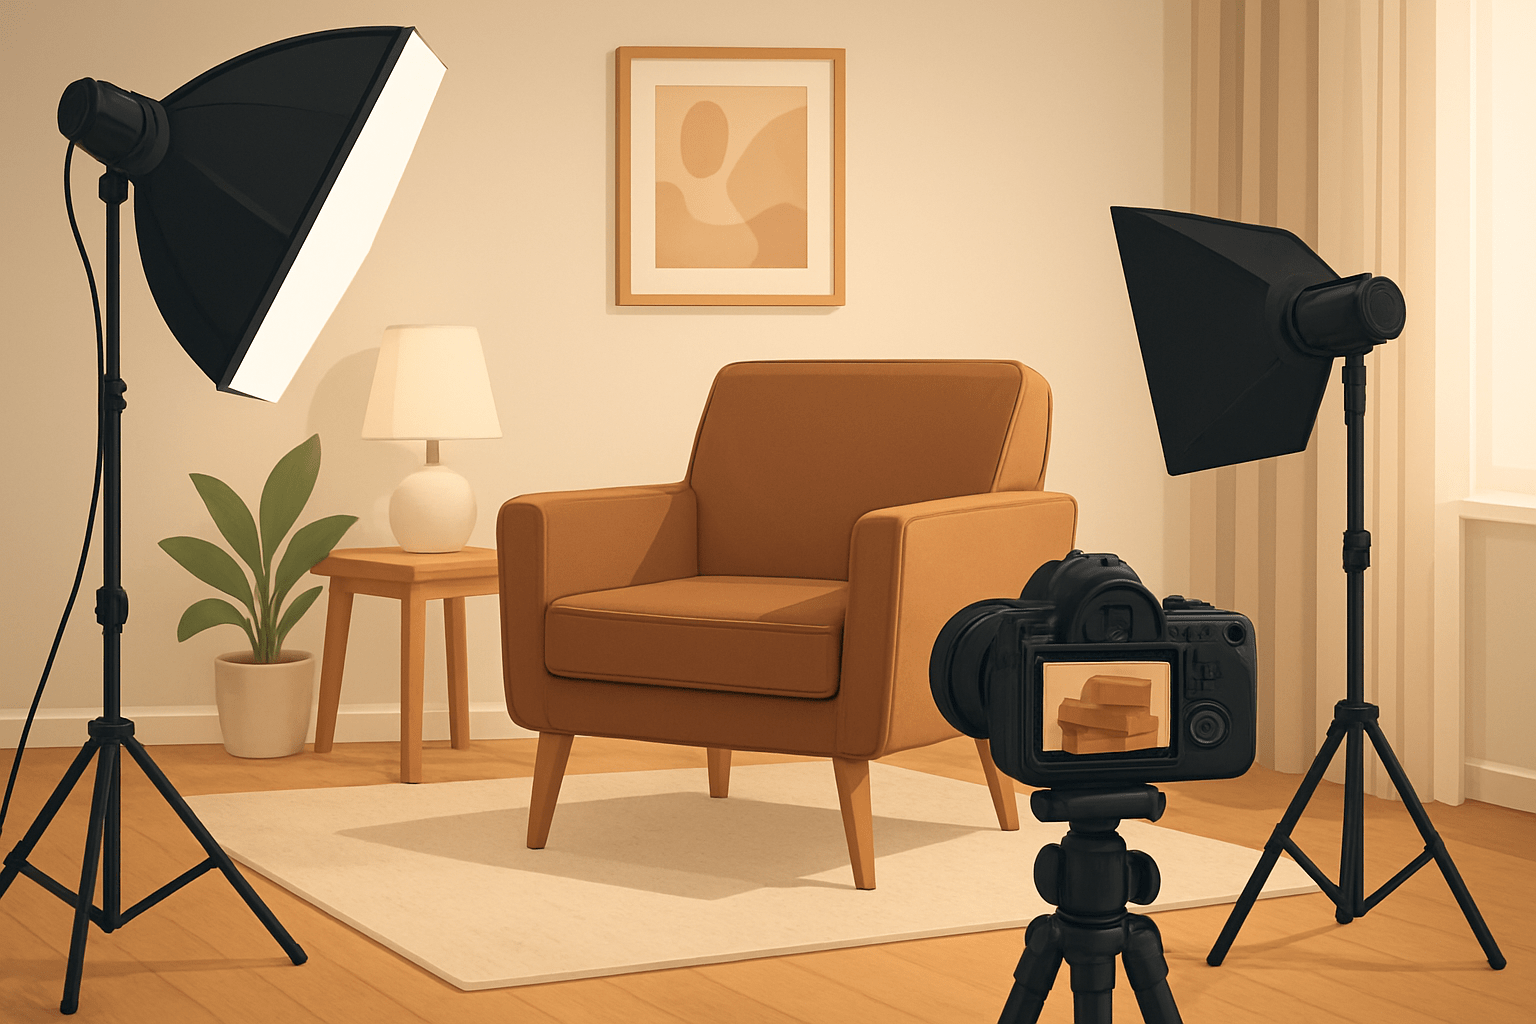
Prepare uniform, bright, and color-neutral background
Choose a background that supports your goal. A neutral sweep is best for e-commerce and catalogs, while an environmental scene adds lifestyle context and scale. Keep the look consistent so your brand feels reliable from product to product.
For sweeps, seamless paper, foamcore, a painted wall, or a matte floor work well. Place the furniture about 1.5–3 m from the backdrop to avoid harsh shadows and color spill, and light the background separately if you need pure white. Aim to keep the background about 1–2 stops brighter than the subject for clean whites without haloing.
Consider color and contrast. When the piece is white, shoot on neutral gray or soft off-white so edges hold shape. Avoid saturated backdrops that cast onto finishes, and use negative fill with black cards to add separation for light-toned furniture.
Mind reflections under legs and plinths by using matte surfaces or a thin, low-sheen sheet on the floor. Keep framing and camera distance consistent across a line so images align on your site. Consistency reduces returns and strengthens trust.
If you want deeper background know-how from product pros, skim these expert tips before you shoot. Small tweaks to backdrop distance and brightness make a huge difference. You will spend less time fixing edges and more time creating images.
Use Natural Light
Natural light is soft, flattering, and free. It shows texture in wood and fabric without harsh edges. Its downside is that it changes fast, so planning is key.
Shoot near a large, diffused window, with north light ideal in many places. Avoid direct midday sun, and hang sheer curtains or add a diffusion frame to soften the source. Cloudy days are perfect, and golden hour can add warmth if your style calls for it.
Control the light and the shadows. Use a white reflector to fill the dark side and black flags to stop spill on glossy parts. A polarizing filter tames glare, and a sturdy tripod lets you stay at ISO 100–200 with long exposures.
Use a quick settings cheat sheet and keep it simple. Start at ISO 100–200, f/5.6–f/11 for depth, and let shutter speed float on a tripod. Shoot RAW, set a custom white balance with a gray card, and bracket exposures when the window is much brighter than the room.
Build simple lighting recipes you can repeat. Window-only: place the piece about 1.5 m from the window behind a sheer, add a black flag opposite for shape, and expose to protect highlights. One soft LED plus reflector: set a large softbox at 45° above the main face, bounce with a white board on the other side, and gel to match window color. Two-light studio with background light: use a big key at 45°, a gentle fill or negative fill for contrast, and a separate background lamp about 1–2 stops brighter to keep the sweep pure.
Before you press the shutter, run a short shoot-day checklist. Confirm assembly and cleaning, verify the background and lights, take a few test frames, set white balance, lock the tripod, bracket key shots, and back up as you go. For more detailed tuning, this guide can help you optimize your shots on any set.
What Angle Should I Photograph Furniture?
If you wonder how to photograph furniture for clarity and appeal, start with a few reliable angles. Shoot a front-on image to show true shape without distortion. Then capture a 3/4 view to reveal depth, silhouette, and texture.
Add the side profile and the back so buyers see the whole story. For tables and benches, include a clean top-down frame that shows edges and grain. A low angle adds presence for tall pieces, and functional shots with drawers or doors open prove usability.
Keep lines straight and believable. Use your camera grid and keep verticals parallel and perpendicular to the frame. For sofas and chairs, set the camera near seat height, about 45–50 cm or 18–20 inches; for tables, try slightly above the surface, about 90–110 cm or 35–43 inches.
Pick lenses that respect proportions. Avoid ultra-wide for full-item shots and aim for 35–85 mm on full frame, with 50–70 mm a sweet spot. Use a 100 mm macro for texture details, and on crop bodies choose focal lengths that match those views.
Plan a simple shot list for every product so you never miss a must-have frame. Capture at least 6–12 images: front, 3/4, side, back, top, plus 4–6 details or lifestyle and scale shots; in lifestyle, use the rule of thirds or golden ratio to place the piece. To see a craftsman’s eye at work, study my approach and adapt it to your brand.
Post-Processing
Build a calm workflow and stick to it. Import or tether, cull the duds, correct color and exposure, fix lens and perspective, retouch small flaws, add gentle sharpening, then export. This rhythm protects quality and saves time.
Shoot RAW for latitude and accuracy. Set white balance with a gray card or color checker on set, and calibrate your monitor so wood tones stay honest. Export in sRGB for web, and keep Adobe RGB or ProPhoto masters for print or archive.
Edit with restraint. Nudge exposure and contrast until the material looks real, not plastic. Straighten lines with transform tools, correct lens distortion, and remove dust, threads, and small reflections, but practice honest retouching so finish and color are never misleading.
Export for speed and clarity. For web, aim for a long edge around 1600–2500 px and JPEG quality near 80–90, and keep master RAW or TIFF files backed up twice. Name files with useful terms like brand_model_finish_view.jpg, write descriptive alt text such as “oak dining table with tapered legs, 72-inch,” and upload 6–12 images per product to cover angles and details.
Do a final QA pass before publishing. Compare color to the real piece, zoom in for lint or artifacts, and check shadows or drop shadows for consistency across the catalog; embed basic metadata for search. Common mistakes include wide-angle distortion, color cast from nearby walls, blown background whites, and visible labels; fix them by stepping back and using a longer lens, setting custom white balance, keeping the background 1–2 stops brighter but not clipping, and removing labels on set. When you follow these habits, how to photograph furniture becomes a repeatable system that cuts returns and builds buyer trust.
What People Ask Most
What basic gear do I need to start learning how to photograph furniture?
You can use a smartphone or a simple camera, a tripod, and good natural light to start.
How do I use natural light when I photograph furniture?
Place the furniture near a large window and avoid direct midday sun for soft, even lighting.
What background should I use when I photograph furniture?
Use a clean, neutral backdrop that contrasts with the piece to keep attention on the furniture.
How can I make a piece look larger or smaller when I photograph furniture?
Change your shooting angle and distance. Low angles and close framing make it feel larger, while high angles and wider shots make it seem smaller.
How should I stage furniture when I photograph furniture for selling or catalogs?
Keep styling minimal with one or two simple props and remove clutter to show the piece clearly and its real use.
What common mistakes do beginners make when they photograph furniture?
Avoid harsh shadows, busy backgrounds, and odd angles, and remember to keep the camera level to show true proportions.
How can I edit photos after I photograph furniture to improve them?
Use basic edits like straightening, cropping, and small exposure or color adjustments to keep the image natural and accurate.
Final Thoughts on Photographing Furniture
If you want furniture photography that shows honest finish, texture, and saves hours in retouching, the prep matters more than any fancy lens. If you remember one number from this guide, let it be 270 — a mental shorthand for thorough prep that covers cleaning, background, lighting, angles, and post-work. This approach helps e-commerce sellers, catalog photographers, and makers present pieces clearly and confidently.
Be realistic: natural light is beautiful but fickle, and over‑polishing or harsh cleaners can add glare or color casts that cost time later. We answered the opening question—how do you make photos that sell—by walking through practical steps: clean and tighten, pick a neutral sweep, favor diffused window light, frame key angles, and finish with honest retouching and exports. That roadmap reduces surprises on shoot day and keeps images truthful for shoppers.
Keep this routine and you’ll cut editing cycles while showing the true quality of each piece. Look ahead with confidence — steady practice will sharpen your eye and lift your catalog.


0 Comments