
What is photo stacking? Can a handful of photos turn into one perfect image?
Photo stacking combines several images of the same scene to overcome a single-shot limit. It covers focus stacking to extend depth of field and image/exposure/astro stacking to cut noise and reveal faint detail.
In this guide you will learn how stacking works, when to use it, what gear to bring, and simple capture and editing recipes. You will also see clear before/after examples for macro, landscape, and astrophotography.
It won’t help much for moving subjects, but for controlled scenes it can be a game changer. Keep reading for step‑by‑step workflows, checklists, and troubleshooting tips.
What is photo stacking and why should you use it?
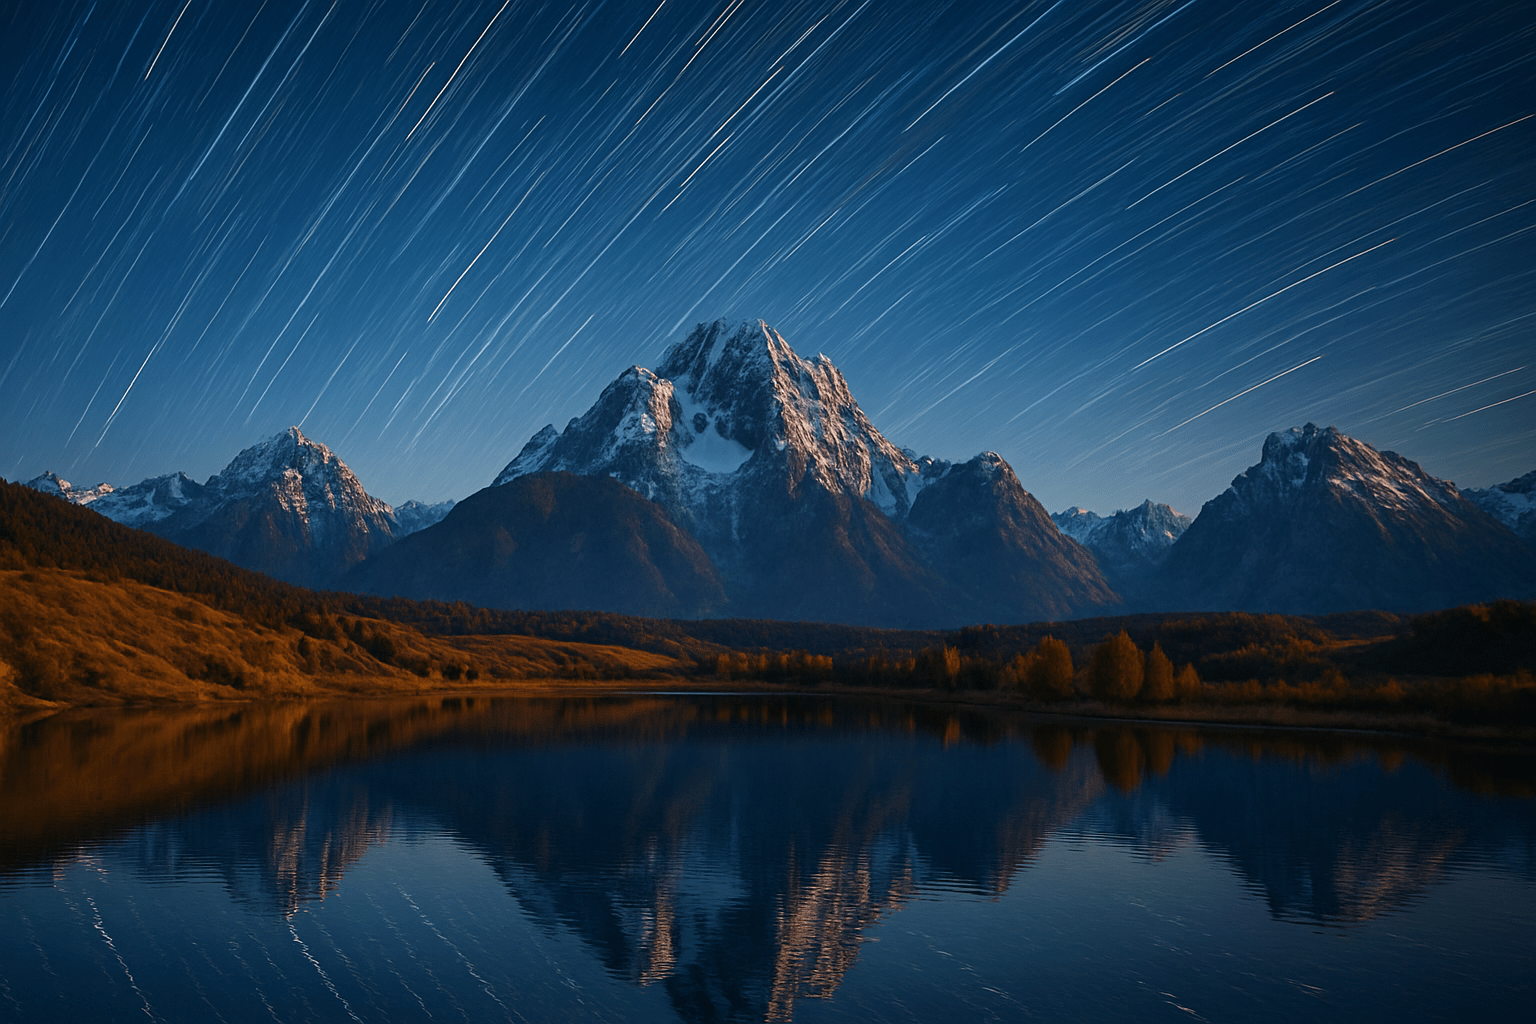
Photo stacking means combining multiple photos of the same scene to beat the limits of one shot. You can stack for focus to increase depth of field, or stack exposures and astro frames to reduce noise and reveal faint details. If you ever asked what is photo stacking, it is simply using many frames to build one stronger image.
Focus stacking chooses the sharpest parts from each frame to make front‑to‑back sharpness. Noise or astro stacking averages many identical shots to clean up high‑ISO grain and boost weak signal. Exposure stacking blends several brightness levels to control highlights and shadows without harsh HDR halos.
The payoffs are big. You get more overall sharpness, cleaner files, and the freedom to use wider apertures without losing depth. Stacks reveal texture you could not see and make high‑ISO night photos far smoother.
Picture a macro insect where only the eye is sharp in a single shot. With 30 or more focus‑bracketed frames, the antennae and wing edges snap into focus together. The difference feels like wiping condensation off a window.
For landscapes, one frame rarely holds both grass blades at your feet and the distant peak. Blend a handful of focus planes and the scene turns tack‑sharp without diffraction mush. The before and after looks like switching from soft to ultra‑fine sandpaper.
At night, stacking dozens of short exposures reduces noise and pulls faint stars and dust lanes out of the dark. You avoid star trails yet gather clean signal. The sky gains depth and smoothness no single long exposure can match.
Sometimes stacking is the wrong tool. Moving subjects, wind‑shaken leaves, or crashing waves can cause ghosting you cannot rescue. In those cases, simplify the composition or choose a different technique.
If you want a quick overview of the benefits, this clear explainer on why it matters lays out real‑world wins. It reinforces the simple answer to what is photo stacking with field examples you can try. You will know when the extra effort pays off.
How photo stacking works — focus stacking vs. image (noise/exposure) stacking
All stacking follows the same path: capture multiple frames, align them, blend them, then retouch. The camera gives you raw material, software does the alignment and math, and you finish the polish. Think of it as building a final image brick by brick.
In focus stacking, software scans each frame for the sharpest pixels and merges them. Many apps build a depth map to decide where each layer contributes, while others use pyramid blending to mix detail at different scales. The result is depth of field that no single aperture can deliver.
In image or astro stacking, the magic is averaging. Mean or median math reduces random noise while preserving true signal, so dim stars and fine textures rise out of the murk. Astrophotographers also register stars precisely and add calibration frames like darks, flats, and bias to remove sensor and optical flaws.
Depth‑map blending is fast but can leave halos or seams where planes meet. Pyramid blending hides transitions better but can soften micro‑contrast if pushed too far. Median stacking drops transient objects like planes or satellites, while mean stacking preserves faint diffuse detail.
Different tools shine for different jobs. Helicon Focus and Zerene Stacker excel at clean focus stacks with refined retouch tools. Photoshop and Affinity Photo are versatile for everyday blends, while DeepSkyStacker, Sequator, and Siril are favorites for night skies.
A simple diagram helps: imagine a strip of frames focused from foreground to background, and watch the software paint a depth mask that pulls sharp bits from each. For noise stacking, picture a noisy star patch smoothing as dozens of frames average together. These visuals explain what is photo stacking better than equations.
When and where to use photo stacking: common applications & benefits
Macro work almost always benefits at high magnification. Depth of field gets razor thin, so even f/16 sharpens only a sliver. Stacking 20 to 100 frames keeps texture intact without crushing detail with diffraction.
Aperture choice in macro is a balancing act. Use mid‑range values like f/5.6 to f/11 for crisp single frames, then let stacking extend depth rather than stopping to pinholes. That is how you keep tiny hairs and facets clean and sharp.
Landscapes ask for either hyperfocal tricks or focus stacking. If stopping down to f/16 turns the file soft, shoot 3 to 7 planes from near to infinity and blend them. The sharpness gain is instant and the foreground looks alive.
Nightscapes and deep‑sky scenes love stacking. Many short exposures at high ISO beat one long exposure because noise averages out and stars stay points. Add darks, flats, and bias frames to fix hot pixels, dust, and vignetting.
Low‑light interiors and city scenes benefit too. Instead of one risky long exposure, shoot a burst of shorter frames and stack for better signal‑to‑noise. You get cleaner shadows without smearing motion.
Product and flat‑lay shots need both clean noise and all‑in‑focus edges. Combine a small focus stack with exposure stacking to keep labels crisp and reflections under control. It makes catalog photos look premium without heavy retouch.
Quick rules help. If you cannot get all important planes sharp without wrecking detail to diffraction, focus stack. If noise hides subtle texture or faint stars, image or astro stack.
If you are new to the process, this walkthrough on how to focus stack images shows a clean capture‑to‑edit flow. Pair it with the rules above so you know when to deploy the method. Soon the choice becomes second nature.
By now you can answer what is photo stacking with confidence. It is the practical way to fix depth, noise, or both when one frame cannot. Use it when the scene deserves perfection from front to back.
Practical shooting workflow: gear, camera settings and capture recipes
Stable support is your foundation. Bring a sturdy tripod, a remote release or intervalometer, and a lens suited to the task. Macro rails, clamps, and a lens hood help tame tiny steps and stray light.
Use manual exposure and shoot RAW. Lock exposure, white balance, ISO, and focal length so the stack blends easily. If you plan to stack exposures, bracket consistently with the same interval.
Embrace in‑camera focus bracketing if your body offers it. If not, turn the focus ring in tiny, repeatable steps or slide on a rail while watching live view at high magnification. Always ensure each new focus plane overlaps the last.
Choose step size and frame count based on the scene. Macro often needs 30 to 100 or more frames because depth is microscopic, landscapes usually take 3 to 9, and astrophotography can run from a few dozen to a few hundred. Do a quick test and review at 100% before committing to a full run.
Mind diffraction as you pick aperture. Mid‑range values like f/8 to f/11 for landscapes and f/5.6 to f/11 for macro keep detail crisp, then let stacking finish the depth. Tiny apertures at macro magnification turn detail mushy even if everything looks in focus.
Control motion however you can. Use flash or a bright continuous light to freeze macro subjects, shield your scene from wind, and avoid live animals when possible. For handheld stacks, keep shutter speeds high and fire short bursts to minimize shifts.
Macro recipe: mount the camera on a tripod with a rail, set RAW, use f/8, a low ISO, and step focus from the nearest detail outward in 30 to 80 slices. Add a diffused speedlight to lock subjects and use a short recycle interval. Review a mid‑stack frame to confirm overlap and sharpness.
Landscape recipe: level the tripod, frame your scene, and set f/8 to f/11 with a constant exposure. Shoot 3 to 7 focus points starting on the closest foreground texture and ending near infinity. Keep the focal length fixed and disable image stabilization on the tripod.
Astro recipe: decide if you will track or not. Shoot 20 to 200 frames depending on exposure length, include dark, flat, and bias frames, and avoid bright Moon when possible. Keep the stars centered between sequences so registration is simple.
For a quick capture checklist, think stability, consistency, and overlap. Stability means solid tripod and motion control, consistency means RAW with locked exposure and white balance, and overlap means each new frame carries sharpness from the last. This workflow turns what is photo stacking from theory into practice.
Post‑processing workflow: select, align, blend and troubleshoot
Start by culling. Toss frames with blur, bumps, or lighting changes, then apply consistent global RAW tweaks like white balance, exposure, and lens corrections. You can also export neutral TIFFs if your stacking app prefers that.
There is a tradeoff between editing before and after stacking. Basic global edits before stacking help alignment and blending stay consistent. Save local dodging, heavy clarity, and sharpening until after the composite is built.
Photoshop makes a clean focus stack in a few steps. Load frames into layers, run Auto‑Align Layers to correct shifts, then Auto‑Blend Layers with Stack Images selected. Inspect seams at 100% and refine with layer masks, healing brush, and content‑aware fill.
Dedicated tools go deeper when needed. Helicon Focus and Zerene Stacker let you choose depth‑map or pyramid methods and even retouch the depth map directly. For the night sky, register stars and stack in DeepSkyStacker, Sequator, or Siril, then stretch the image and reduce noise in a photo editor.
Troubles appear in familiar ways and each has a fix. Halos along edges call for a different algorithm or manual masking; ghosting from movement can be tamed by removing bad frames or using median blends; misalignment or parallax means try a tighter tripod setup or a rail and, in post, different alignment options. Edge gaps where the foreground shifts relative to the background can be patched with content‑aware fill, clone, or by reshooting with smaller focus steps.
Finish with restraint. Apply noise reduction first, then add local contrast and a touch of sharpening so you do not reintroduce halos, and correct color before the final crop and export. Save a layered master file so you can revisit masks later.
A deep‑dive example can tie it all together. Shoot a macro beetle on a tripod at f/8 with a diffused flash, capture 60 slices from the nearest hair to the wing tips, align and blend in Helicon or Photoshop, fix a halo along the edge with a small mask, then finish with subtle sharpening and color cleanup. The before‑and‑after crop shows hairs that were mush now crisp end to end.
If exposure variations are part of your blend, remember you can also stack for aperture changes when needed. This overview of multiple f-stops explains how changing aperture affects depth and sharpness across a stack. It helps when you need both depth and a specific bokeh look.
When to reshoot is a practical call you will make often. If you see motion smears you cannot mask, if frames were too few to cover from front to back, or if exposure or white balance drifted, start over while the scene is still set. The few extra minutes save hours at the computer.
Keep a small troubleshooting checklist at hand and you will relax into the flow. Consistent capture, careful alignment, method choice, and gentle finishing solve most issues with what is photo stacking. The more you practice, the more natural the process becomes.
What People Ask Most
What is photo stacking?
Photo stacking is taking several photos of the same scene and combining them to improve image quality or sharpness. It reduces noise and helps extend depth of field without deep technical steps.
When should I use photo stacking?
Use it in low light, for night sky shots, or when you need more depth of field in macro and landscape photos. It’s also helpful for reducing noise in long exposures.
Do I need special equipment to try photo stacking?
No, a steady surface or tripod is recommended but not required, and many cameras or smartphones can be used. Basic stacking apps or simple computer software can combine the images.
How many photos do I need for photo stacking?
Usually a handful to a few dozen shots is enough depending on the goal, like noise reduction or focus stacking. More images can help but aren’t always necessary.
Can I do photo stacking on a smartphone?
Yes, many phones have apps or settings that let you capture multiple frames and stack them automatically. Third-party apps also make manual stacking easy.
What are common mistakes beginners make with photo stacking?
Common errors include moving the camera between shots, changing exposure, or overdoing the processing. These issues can create blur, ghosting, or unnatural results.
Will photo stacking always make my photos better?
No, it helps in specific situations but can worsen images if subjects move or stacking is done poorly. Use it when it matches your creative or technical needs.
Final Thoughts on Photo Stacking
Photo stacking is the simple trick that turns multiple imperfect frames into one image with expanded sharpness and cleaner signal — in practice you’ll shoot anywhere from a few frames for landscapes to 270 frames for deep astrophotography to pull out faint stars. Across the article we defined the techniques, compared focus, exposure and astro stacking, walked through camera recipes and gear, and laid out step‑by‑step capture and Photoshop/Helicon/Siril workflows so you know what to do. By showing concrete before/after examples and troubleshooting tips, this piece answered the opening question: you can beat single-image limits with a repeatable, visual process.
Do keep a realistic caution in mind: if your subject moves, if exposures or white balance shift, or if you try to cram too many tiny focus steps into one hurried session, you’ll spend time fixing ghosts or reshooting. Still, macro shooters chasing front‑to‑back insect detail, landscape photographers blending foreground-to-infinity focus, and night‑sky enthusiasts stacking to boost signal-to-noise will find the payoff worth the extra planning. Start small with a short stack and a patient workflow, and you’ll soon see how stacking opens fresh creative possibilities for sharper, cleaner images.


0 Comments