What should a photographer use with a tripod if the ground is slippery or uneven? This guide shows simple gear and tricks to stop slips and wobble on mud, sand, snow, rock, and ice.
You will learn which tripod features matter, when to use spiked or rubber feet, and how to add weight or stake the legs. The article maps clear solutions for each surface and includes a short field kit checklist.
Expect step-by-step setup checks, quick field hacks, and safety tips like avoiding spikes on boardwalks and protecting vegetation. Follow the short checklist and you will get steadier shots in tough terrain.
What Should a Photographer Use with a Tripod on Slippery or Uneven Ground?

Combine a wide-footprint tripod set low, the correct feet for the surface, and active anchoring with weight or tethers, and you will stay steady when the ground is slick or lumpy.
If you are asking what should a photographer use with a tripod if the ground is slippery or uneven?, think in three layers: the tripod build, the feet, and your anchors. Nail all three and you can shoot long exposures with confidence.
Carry a tripod with a wide base and independent leg-angle stops so you can splay the legs very low. A low stance lowers the center of gravity and bites into slopes better.
Pack interchangeable feet so you can swap between grippy rubber and penetrating spikes. If your tripod does not accept different feet, add screw-in spikes that clamp over the existing pads.
Bring a sandbag or a couple of water bottles and a tripod with a center hook. Weight calms vibration, but it works best when it hangs low and does not swing.
On soft ground, add two or three small tent stakes or screw-in ground anchors. A short cord lets you guy-line the tripod like a tiny tent.
Include a small ground pod or low-angle plate for rock or when wind is brutal. It is also handy for ground-level shots without raising the center column.
A small spirit level or a smartphone leveling app saves time on uneven surfaces. Level the platform first, then fine-tune your head.
Throw in thin gloves and a short strap or cord for quick tethering. Cold hands and slick legs lead to mistakes when conditions turn rough.
On dirt or grass, use spiked feet and push each foot down until it bites. Add a small weight and wedge a stone under any leg that sits in a hollow.
On sand, fit sand shoes or wide pads if you have them, or bury each leg a few inches for a firm base. Keep the tripod low and avoid raising the center column.
On snow, use snow plates or baskets so the legs do not plunge through. If there is ice under the snow, spikes that reach the hard layer give the best hold.
On dry rock, rubber feet grip better than spikes, especially on smooth granite. A small ground pod makes a low, stable platform when the rock is wildly uneven.
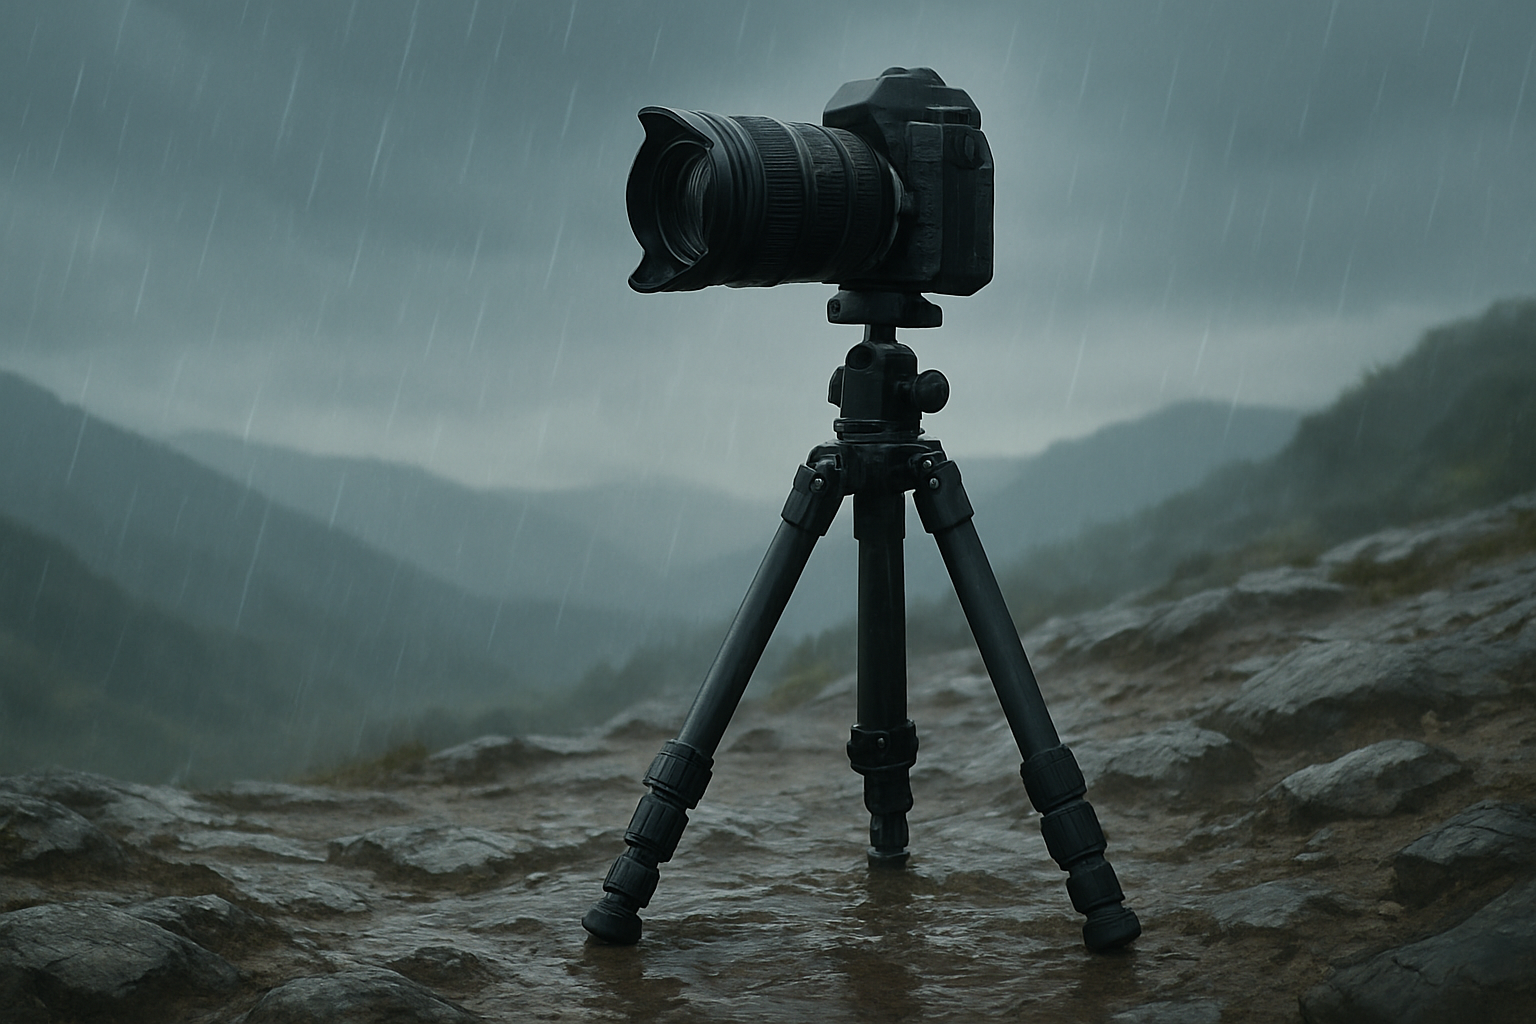
On wet stone or a boardwalk, choose rubber feet and add weight or a tether. Do not use spikes on boardwalks or any finished surface that could be damaged.
On ice, screw-in spikes or crampon-style pads are essential, and you should go very low. Tie the tripod to a fixed object or stakes if you can, and test with gentle pushes.
Always follow local rules and leave no trace, which means no spikes on fragile surfaces and no anchors where they could harm wildlife or infrastructure.
For visuals, commission a photo set showing tripod setups on snow, sand, and rock with the correct feet and leg spreads. Add close-up shots of spikes and rubber pads so readers can see the difference in contact.
Choosing the Right Tripod for Uneven Terrain
The tripod you choose is the foundation of stability on tricky ground. A few smart features make field setup faster and safer.
Look for a wide footprint and legs that can spread very low. A tripod that goes to near ground level is far more stable in wind and on slopes.
Independent leg-angle selectors let you set each leg at a different angle. That matters on boulders, steep trails, and riverbeds where no two feet land alike.
Leg locks need to be stout and easy to operate with cold hands. Twist locks are sleek and resist snagging, while flip locks offer quick visual confirmation; either works if it clamps firmly and is maintained.
A center hook is more than a convenience. It is a built-in anchor point for weight or guy lines, and it turns a light tripod into a steady platform.
Do not overlook the head or a leveling base. A solid ball head with a separate pan and friction control is versatile, and a leveling base speeds horizon work without raising the center column.
Carbon fiber saves weight and damps vibration well, but it costs more. Aluminum is affordable and tough, though it is heavier and feels colder to the touch in winter.
Choose feet that you can swap in seconds. Rubber grips on smooth, hard surfaces, spikes bite into dirt, and snow plates or “sand shoes” spread the load on soft ground.
For precision framing on steep slopes, a geared head shines, though it is heavier. Built-in bubble levels are helpful, but a small external level or your phone can be easier to read.
Landscape and mountain shooters should favor a short, stout tripod that goes very low and has reliable leg-angle stops. Beach and urban shooters benefit from corrosion-resistant hardware and easy-to-clean locks.
If you are on a budget, an entry-level aluminum kit in the $80–$200 range can work if it has a center hook and decent locks. Midrange carbon fiber in the $250–$600 range adds stiffness, while pro models from $600 up bring maximum height, low minimum height, and smooth heads.
To study specs and trade-offs in depth, skim this concise guide to tripods. It helps you compare footprints, locks, and head options before you buy.
All these choices shape the best answer to what should a photographer use with a tripod if the ground is slippery or uneven?. Pick the right base, and every other trick works better.
For clarity in your own kit planning, commission a diagram showing tripod footprint width at different leg angles. Add a side-by-side photo comparing a high, narrow stance versus a low, wide stance to show how much stability improves.
Adjusting Tripod Legs and Positioning for Stability
How you deploy the legs matters as much as what you carry. A steady routine keeps your camera safe and your horizon level.
1. Start by pointing one leg downhill on a slope if you will be standing behind the camera. If you will lean toward the subject, point a leg toward the subject to resist tipping.
2. Extend the thicker leg sections first and save the thinnest for last. Thick tubes flex less and keep the center of gravity low.
3. Set the widest leg spread you can before touching the center column. Lower is more stable, especially in wind or on ice.
4. Use the leg-angle selectors to drop one or more legs lower on steep or stepped terrain. This lets each foot sit flat and firm.
5. Lock every clamp and test by pressing straight down over the center. If anything wobbles, fix it now, not after you mount the camera.
Use two legs downhill and one uphill when the slope is mild and you want space for your body. Choose one leg downhill and two uphill when the slope is steep and you need maximum rollover resistance.
Avoid raising the center column unless you must. If you need the height, raise it a little, add weight, and shield the tripod from wind.
Stand between or beside the legs so you can brace the setup without kicking a foot. In gusts, use your body as a windbreak and keep the camera strap from flapping.
Check level with a quick glance at the bubble or your phone, then twist the tripod a few degrees and recheck. Press the top plate in each direction to feel for any flex, and adjust foot placement if needed.
For extra tips and field tests that go beyond the basics, see ideas on how to make your tripod more stable. Practice the moves at home, and setup becomes second nature in bad weather.
Field Setup Checklist:
1. Pick the right feet for the surface before you spread the legs.
2. Place a leg downhill or toward the subject for best balance.
3. Spread the legs very wide and keep the center column down.
4. Extend thick leg sections first and lock clamps firmly.
5. Add weight to the center hook or tie a guy line if wind is present.
6. Level the base, then level the head, and check the bubble again after framing.
7. Test stability with a gentle push from each side and fix any wobble.
8. Trigger with a self-timer or remote and review a magnified test shot for blur.
Common mistakes are easy to avoid once you spot them. Do not extend the thinnest leg sections first, and do not rely on the center column to solve uneven ground.
Remember to snug all head knobs before you let go of the camera. Finally, never use spikes on delicate surfaces; switch to rubber and tether instead.
If you keep stumbling on setup choices, repeat the question in your head: what should a photographer use with a tripod if the ground is slippery or uneven?. The answer is always a low stance, the right feet, and a secure anchor.
Using Spiked Feet, Stakes and Interchangeable Feet Systems
Feet decide how the tripod meets the ground, so choose for friction and bite. Spikes are for soft surfaces, while rubber grips hard, smooth ones.
Use spiked feet on dirt, grass, or forest floor and press each foot down until it seats. On gravel, test that the spike is between, not on, loose stones.
Switch to rubber feet on rock, pavement, or boardwalks, especially when wet. Rubber pads spread the load and reduce slipping on smooth stone.
In snow, snow plates or “baskets” keep legs from plunging through. If you can feel ice under the snow, longer spikes that reach the hard layer add a big stability gain.
Swapping feet in the field is simple if you practice. Keep a small cloth to wipe threads, screw the new foot on snugly by hand, and carry protective discs for rubber feet on polished surfaces.
Stakes or pegs let you anchor the tripod like a tiny shelter. Place each stake at roughly a 45-degree angle away from the tripod, then tether from the center or leg apex with cord or a camera strap.
Use two guy lines in a V toward the wind, or three lines for all-around stability. Keep lines taut and low so they do not trip you or others.
If the ground is very loose, consider sand-shoe attachments or a belly-mounted ground pod. A ground pod is also a great solution on jagged rock where only a few points can touch.
Forgot your spikes? Press rubber feet into a patch of textured surface, wedge small rocks around each foot, or add a strip of duct tape or a sticky pad under each leg on wet stone.
Treat the landscape with care and check local rules before staking or spiking. Avoid damaging boardwalks, fragile plants, or protected ground, and leave no trace when you pack out.
For clarity in teaching, commission close-ups of spiked feet on dirt next to rubber on rock. Add a simple diagram showing proper stake angles and tether paths from the tripod to the ground.
Adding Weight and Anchoring: Sandbags, Water Bottles and Field Hacks
Weight calms vibrations that feet and leg angles cannot kill. Anchors stop the whole rig from walking in gusts or sliding on slick stone.
The simplest anchor is a bag on the center hook. For more security, strap a sandbag to the legs or tie the tripod to a fixed object like a tree or fence post.
Commercial sandbags are compact and rugged, but a lightweight sack you fill with local sand or rocks works well. Water bottles are great because you can empty them for the hike back.
As a rule of thumb, add 1–2 kilograms of weight in a light breeze and 3–5 kilograms in strong wind. Keep the load low and tight; if it swings, it will blur your photos.
To stop swinging, let the bag rest lightly on the ground or clip it to a short bungee that is just taut. Check that the tripod does not lift or tilt when you bump it gently.
Use quick hacks when the weather shifts fast. Bury one leg in sand, wedge a rock under a foot, tape rubber pads to wet stone, or run guy lines to stakes on the windward side.
Do a safety check before long exposures. Press down on the top plate, wait for vibrations to die, and use a remote or timer with electronic shutter if your camera supports it.
Know when to walk away from a shot in extreme wind. If gusts toss you around or the tripod still shivers with weight and guy lines, go lower with a ground pod, brace the camera on a rock, or shoot handheld at higher ISO.
To show the benefits clearly, commission a before-and-after photo of a tripod with and without added weight. Include a close-up of a bag resting on the ground under the center hook.
When someone asks what should a photographer use with a tripod if the ground is slippery or uneven?, you now have a complete plan. Go low, pick the right feet, and anchor smart, and your images will stay sharp when the ground does not.
What People Ask Most
What should a photographer use with a tripod if the ground is slippery or uneven?
Use spiked or wide rubber feet, add a weight like a sandbag, and use a level or ball head to improve grip and keep the camera steady.
Are spiked tripod feet useful on slippery or uneven ground?
Yes, spikes can bite into soft or icy surfaces to improve grip, but cover them with rubber when on delicate or hard surfaces.
Can I use a sandbag or weight to stabilize my tripod on slippery ground?
Yes, hanging a sandbag or weight from the center lowers the center of gravity and makes the tripod much steadier.
Will a tripod level or bubble level help on uneven ground?
Yes, a built-in or small bubble level helps you quickly make small adjustments so your shots stay straight on uneven terrain.
Is it safe to use a tripod on wet rocks or ice?
Be careful and test stability before leaning on it; use spiked feet and secure the tripod to a solid anchor if possible to reduce slipping risk.
How can I stop my tripod legs from sinking into soft ground?
Use wider feet, small boards, or footplates under each leg to spread the load and prevent sinking.
What are common mistakes beginners make with a tripod on uneven surfaces?
Beginners often leave the center column extended, set legs unevenly, or forget to add weight, which all reduce stability.
Final Thoughts on Tripod Stability for Slippery and Uneven Ground
Think of stability like a 270-degree safety net around your camera: combine a tripod with a wide footprint, the right feet, and active anchoring and you’ll shoot steadier in dicey conditions. The real benefit here is confidence — fewer ruined long exposures and tighter framing because your gear behaves where the ground doesn’t. Just be realistic: swapping spikes on boardwalks or poking fragile vegetation can cause damage and legal trouble, so use protective pads or choose another anchor and use common-sense alternatives when possible.
This guide answered the opening question by giving clear gear choices, surface-specific mapping, and a short field checklist you can use the moment conditions change. Outdoor shooters — landscape, mountain, beach, and urban photographers — get the most payoff from these simple habits, while cautious attention to center-column use and swinging weights keeps images sharp. Keep practicing setups in different terrain and you’ll head into windy, slick, or uneven shoots with calm, prepared hands and better results ahead.


0 Comments