
What cameras did Ansel Adams use to make those iconic, crystal-clear landscape photos?
This article answers that question and gives a clear timeline of the cameras he used. You will read about his first Kodak Brownie, his Speed Graphic press camera, the 4×5 view cameras, his signature 8×10, plus panoramic, medium‑format, and Polaroid work.
We also explain why he favored large formats and how the 8×10 shaped his field workflow. The piece breaks down the Zone System, exposure choices, and the darkroom techniques that made his prints so powerful.
Practical tips, a short checklist, and image examples are included so you can try Adams‑style methods in film or digital. Sources and notes are flagged for readers who want to verify details or learn more.
Ansel Adams’ main cameras (answers the keyword)
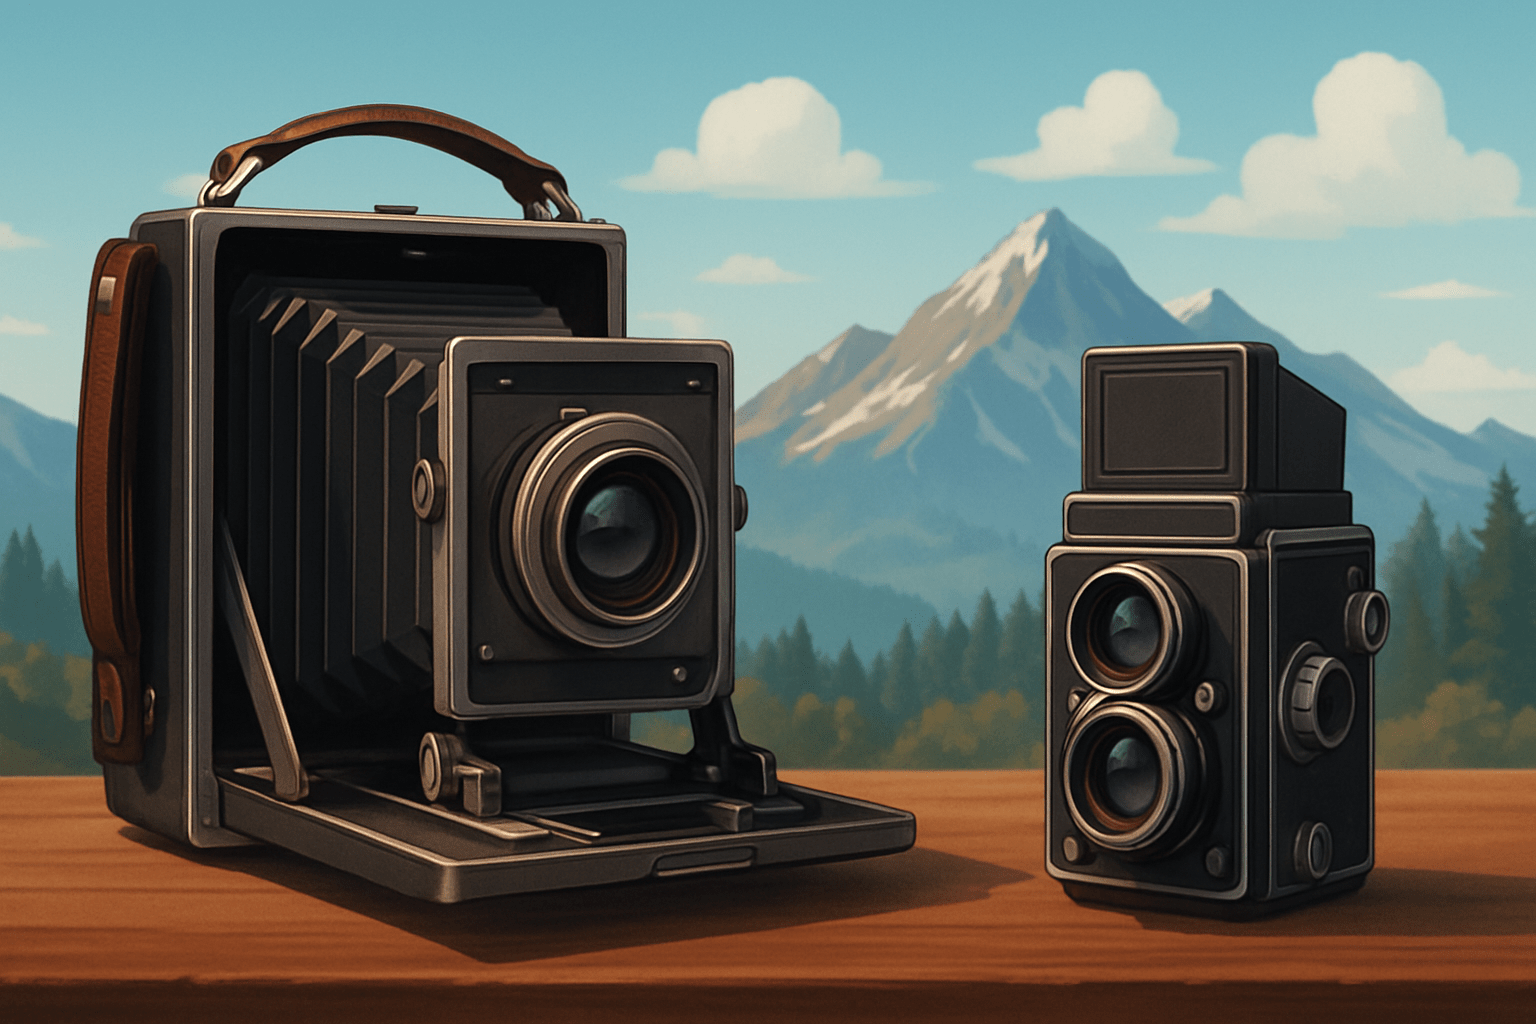
If you came here asking what cameras did Ansel Adams use, the honest answer is a family of tools, not just one. He is most closely linked with large-format view cameras, especially the 8×10, but he also used a Kodak Brownie in his youth, a Graflex Speed Graphic 4×5 press camera, several 4×5 and 5×7 view cameras, a special 7×17 panoramic camera, medium-format Hasselblad bodies, and later on, Polaroid cameras and films.
His camera story followed a clear timeline. As a boy, a Kodak No.1 Brownie got him started, and that simple box camera let him explore the world with curiosity. In the 1920s and early 1930s, he moved through press and view cameras in 4×5 and 5×7 formats as his work shifted from casual pictures to formal landscapes and assignments.
The Graflex Speed Graphic became an early professional tool for him because it was portable and quick to use. It was a 4×5 press camera with a focal plane shutter, and Adams used it when speed mattered more than movements. He could work faster with it than with a heavy view camera, especially for reportage and commissioned work.
By the early 1930s he had settled into large-format view cameras for most fine art. The 8×10 view camera became his signature instrument, giving him huge negatives, precise control with movements, and the ability to make very rich prints. Many of the images people associate with Adams come from this format, and the ritual of setting up an 8×10 suited his careful, contemplative approach.
He also explored ultra-large panoramic formats for special subjects. The 7×17 “banquet” camera let him create long, sweeping frames that no standard camera could match. He did not use it daily, but when the subject called for it, the effect was striking and immersive.
Adams did sometimes go smaller. In the late 1950s and 1960s he used Hasselblad medium-format cameras for select work when he wanted lighter gear and a different way of seeing. The square frame and the fine 120 film gave him flexibility and excellent detail without the full weight of 8×10. “Moon and Half Dome, Yosemite National Park” (1960) is widely reported as a Hasselblad image on 120 film, with a red filter for drama (to verify).
Polaroid also became part of his toolkit, especially after he began advising Edwin Land and the company. He used Polaroid materials for testing composition and exposure in the field, and later for creative work in their own right. Some of these were 4×5 Polaroid backs on view cameras, and others involved Polaroid Land cameras and later instant materials such as Type 55 positives/negatives and the SX‑70 (specific combinations to verify).
If you want quick use notes for each camera, this is the short version. The Brownie was for his earliest experiments and learning. The Speed Graphic handled early press and assignment work. The view cameras in 4×5, 5×7, and especially 8×10 produced his most famous landscapes. The 7×17 was for special panoramas. The Hasselblad and other medium-format bodies served when portability and a different look mattered. Polaroid provided rapid feedback and special projects late in his career.
Here is a practical map from famous prints to formats, with a reminder to fact-check specifics. “Moonrise, Hernandez, New Mexico” (1941) is widely attributed to an 8×10 view camera on sheet film, with exposure derived by judging the luminance of the moon-lit crosses (to verify lens and filter). “Clearing Winter Storm, Yosemite National Park” (1937) is often listed as 8×10 large-format (to verify). “The Tetons and the Snake River” (1942) was made during his government work and is typically cited as 8×10 as well (to verify). “Monolith, The Face of Half Dome” (1927) was made with a view camera in the 6½×8½ range and a strong red filter for a brooding sky (model and plate/film type to verify).
Across these tools, he used sheet film sizes like 4×5, 5×7, and 8×10, plus the panoramic 7×17, and at times 120 roll film in medium format. He also experimented with instant materials. While he occasionally tried 35mm for casual work, he did not build his major landscapes on that format. For a high-level biography and context, see Ansel Adams for dates and career milestones.
Adams famously said, “You don’t take a photograph, you make it.” The range of cameras he used shows how each choice fit a purpose. When you ask what cameras did Ansel Adams use, you are also asking how he shaped his vision through the strengths and limits of each format.
Large format versus medium and small formats — why Adams chose what he did
Adams leaned toward large-format view cameras because they delivered detail, tonality, and control. A big negative gives more resolving power and smoother tonal gradation, and with an 8×10 negative you can make brilliant contact prints or clean enlargements. The bellows and standards also allow movements that smaller fixed-body cameras cannot match.
Camera movements were a key advantage. With tilt and swing, he could align the plane of focus with a landscape plane, making near rocks and distant mountains sharp at the same time. With rise and fall he could frame tall trees and cliffs without tipping the camera and causing distortion.
There was also an aesthetic reason tied to Group f/64. That circle pushed for sharpness from corner to corner, small apertures, and clarity of form. The idea was not clinical sharpness for its own sake, but the feeling of presence a well-rendered negative can give in a print.
Large-format gear does have costs and drawbacks. It is heavy to carry and slow to set up, the film holders are bulky, and every sheet of film costs money. Weather and wind can fight a big camera on a tripod, and you have only a few holders before you need to reload or turn back.
That is why Adams sometimes used smaller formats. The Speed Graphic made sense when he needed to move fast or work in less controlled situations. Medium-format Hasselblad cameras offered a balance of quality and speed. They let him work handheld or on a lighter tripod, and the square format sparked different compositions.
If you photograph the same scene on 8×10 and on 35mm, the difference is easy to feel. On 8×10, you see micro-detail in rock textures and foliage veins, plus a gentle gradation through clouds and mist. On 35mm, even with careful exposure, small details compress and tones can feel more abrupt when enlarged to the same print size.
Adams wrote often about previsualization and how equipment helps or hinders it. Large-format made his process slower, but that slowness was part of the art. Smaller formats gained speed but lost some of the control he cared about most.
He also weighed the risks of motion blur and depth of field. With 8×10 at f/64, you can achieve huge depth of field, though shutter speeds can be slow. With medium format, you work at f/16 or f/22 more often, which is still deep focus but different in character.
If you want a quick summary from a gear angle, this is it. Large-format view cameras offered maximum control and quality for his art prints. Smaller formats were tools for speed and portability when needed. For a quick cross-check about his camera mix, you can see this concise camera overview and compare notes with his books.
8×10 view camera: his signature tool — technical details & how he used it in the field
The 8×10 view camera is simple in concept and deep in practice. It has a front standard for the lens, a rear standard for the film, and a bellows between them to keep light out. The lens mounts on a lensboard, and the back holds ground glass for composing and focusing.
Adams composed on that ground glass under a dark cloth. The image was upside down and reversed, which actually helped him see shape and tone more abstractly. He used a loupe to inspect critical focus, especially at edges and key points.
A typical field workflow began with a sturdy tripod on solid ground. He leveled the camera, set a base composition, and then adjusted movements to control perspective and depth. Only after the composition was settled would he meter the scene and set final exposure.
He used rise to keep vertical lines straight on cliffs and trees. He used tilt to bring both near foreground rocks and far ridges into sharp focus without resorting to extreme apertures. Swings helped match focus across uneven planes when the subject spread diagonally.
After focusing, he would close the lens to the shooting aperture, cock the shutter, and insert a film holder. He pulled the dark slide, waited for a lull in wind if needed, and then used a cable release for a steady exposure. He replaced the dark slide and notched it to mark exposed film.
Metering was deliberate and tied to the Zone System. He chose a shadow or highlight and assigned it to a zone, then set exposure to place it correctly. If the contrast of the scene was high or low, he noted a development adjustment for the darkroom later.
Hiking with an 8×10 was real work. He carried the camera in a case, plus film holders, lenses, filters, meter, tripod, and a dark cloth. Some days the load could reach dozens of pounds, and in rough terrain he moved slowly and with care (field weight figures to verify).
Lens choice was measured and intentional. On 8×10 a “normal” lens is around 300 mm, and Adams often worked with focal lengths in that neighborhood and wider for sweeping scenes. The Group f/64 idea of small apertures meant long exposures, but the gain in depth and the crispness of detail were worth it to him.
Consider a famous example interpreted from sources. In “Clearing Winter Storm,” he likely used rise to hold verticals while keeping the valley floor strong, and a small aperture to hold detail from mist to granite (specific lens to verify). The negative’s capacity for tone made the drama in the clouds print beautifully.
Another case is “The Tetons and the Snake River.” The sweeping S-curve feels made for a large view camera, where a small tilt and careful depth control can keep both the near river bank and the far peaks sharp. The broad tonality across sky and water hints at sheet film flexibility (as reported; lens to verify).
Adams also taught the craft behind the machine. If you want a deeper dive into how he thought about gear and technique, his book The Camera lays out the foundations with clarity. It remains a helpful guide for anyone learning to work slowly and with purpose.
He often reminded students that a camera is a means, not an end. “A good photograph is knowing where to stand,” he said. With the 8×10, that meant mapping the scene, choosing the exact vantage, and waiting for the light that matched his previsualized print.
Development of the Zone System and exposure control — how camera choice tied into his exposure method
The Zone System is the backbone of Adams’s exposure control. Co-developed with Fred Archer, it maps tones from deep black to pure white across eleven zones, from 0 to X. The approach joins previsualization with precise placement of tones by metering and development.
Previsualization is the act of seeing the final print in your head before you expose the negative. Adams would look at a scene and decide where the important shadows and highlights should fall. He then exposed and developed the negative so that the print matched that vision.
Here is a simple worked example to make it concrete. Imagine a granite face in soft shade that you want to hold with texture as a deep tonality. You meter that shaded granite and place it on Zone III by setting your exposure two stops less than the meter’s middle-gray suggestion.
Next you check the brightest cloud you want to keep detail in. If that cloud meters five stops brighter than your chosen Zone III, it would fall on Zone VIII in the negative. If that is too bright or too dull in your vision, you adjust development later to shift contrast up or down.
Those development shifts are the N, N+, and N− controls. N is normal, where you do not change contrast. N+ increases contrast to push highlight zones higher, and N− reduces contrast to keep highlight detail from blocking up. Sheet film makes this practical because you can develop each negative differently.
Adams used meters carefully to enable this process. Early on he worked with Weston exposure meters, and later, one-degree spot meters helped him read small areas of a scene precisely (specific meter models to verify). He knew when to take incident readings and when to trust reflected spot readings.
Large-format made the Zone System easier to apply. With big negatives, the tonal steps are smoother, and the deliberate pace encourages careful metering. With roll film, development is usually for a whole roll, so you lose the ability to tailor contrast to each frame.
But the principles still work with smaller formats and even digital. You can still decide which shadows should hold texture and which highlights should glow with detail. You just need tools that help you set exposure and adjust contrast in processing.
For modern photographers, the histogram is your zone guide on a screen. Expose so highlights stay within the right edge, just as you might protect Zone VIII in film. Bracket when the scene is extreme, then merge or choose the best file while keeping your previsualized tones in mind.
Adams connected the whole chain when he wrote, “You don’t take a photograph, you make it.” That making begins at exposure with zone placement, and it continues in development and printing. Every decision aims at the print you imagined on the ground glass.
If you want to study the original method directly, you will find his explanations in The Negative and other writings, which expand these steps with examples. The key idea is simple though. Decide how the print should look, place zones to match, and shape the negative so the print can sing.
Darkroom printing techniques, burning & dodging, tonal control — plus practical takeaways for readers who want to work “Adams-style”
Adams treated the darkroom as a performance hall. “The negative is comparable to the composer’s score and the print to its performance,” he wrote. He made contact prints and enlargements, chose papers with care, and used burning and dodging to sculpt tone until the image felt alive.
Dodging is holding back light on parts of the paper to keep them lighter. Burning is giving extra light to areas that need more density and depth. He worked with small tools and masks under the enlarger, shaping edges and transitions by hand until the picture balanced.
He paid close attention to paper surface, developer choice, and final toning for depth, often using selenium to deepen blacks and shift tone subtly (frequency and combinations to verify). He made work prints, studied them in good light, then printed again with refined notes. This cycle could go on until the print matched the mental picture he formed at the camera.
If you want to emulate the look with film, start with a slow, fine-grain stock and expose with Zone thinking. Bracket if needed, then adjust development for contrast with N, N+, or N−. In the darkroom, print with a clear plan for where to dodge and where to burn to guide the eye.
If you want to translate the approach to digital, shoot RAW and expose to protect highlights. Use curves to place tonal relationships, and dodge and burn with layers or masks in small, careful passes. Soft-proof for your printer and paper, then make final prints on high-quality black-and-white media.
Gear choices can follow the spirit rather than the letter. A sturdy tripod, a stable head, a cable release or remote, a good spot meter or reliable app, and a small set of filters will push you toward the same discipline. Medium-format digital or high-resolution full-frame cameras can yield detail and tone that echo the large-format feel when paired with careful technique.
If you crave the full experience, try 4×5 sheet film before jumping to 8×10. The process teaches patience and control at a more manageable size and cost. You can also build panoramic stitches to echo the 7×17 look when scenes suit that approach.
Practice is the final ingredient. Choose one scene and previsualize the print in your head before you set up. Meter, expose, and then either develop or process with a plan to bring that imagined print to life.
Here is a simple field-and-processing checklist you can use right away. First, slow down and walk the scene until you find the exact vantage and foreground anchor. Second, previsualize the final print’s tones, from the deepest textured shadows to the brightest detailed highlights.
Third, set up a stable tripod and level the camera, then compose on screen or ground glass without rushing. Fourth, meter a key shadow you want textured and place it low, then check highlight placement and adjust exposure with your intention in mind.
Fifth, if you shoot film, note a development plan such as N, N+, or N− to match the scene’s contrast. Sixth, if you shoot digital, expose to protect highlights and plan specific dodge and burn moves before you touch a slider.
Seventh, print early drafts and mark them with pencil notes, just as Adams marked work prints for burning and dodging. Eighth, refine and print again until the print matches what you saw when you first framed the scene.
In the end, the cameras are part of a larger craft. So when you ask again what cameras did Ansel Adams use, remember that he chose each tool to serve the picture he imagined. You can do the same today, with film or with pixels, if you follow that patient path from vision to final print.
What People Ask Most
What cameras did Ansel Adams use?
He mainly used large-format view cameras that gave him extreme detail and control for big landscape prints, and he also used smaller cameras when he needed more portability.
Why did Ansel Adams prefer large-format cameras?
Large-format cameras produced very sharp images and let him control perspective and focus precisely, which helped create his dramatic landscape prints.
Can beginners use the same cameras Ansel Adams used?
Beginners can try them, but large-format gear is heavy and slow to use, so it’s often better to learn basics on a simpler camera first.
Do you need a large camera to make photos like Ansel Adams?
No, you don’t need a large camera to get beautiful landscapes; good composition, light management, and printing skills matter more than gear size.
How did Ansel Adams’ camera choices help his final prints?
His camera choices gave him high image quality and control over tones, which made it easier to produce clear, detailed prints with strong contrast.
Are Ansel Adams’ camera techniques useful for digital photographers today?
Yes, his focus on careful exposure, composition, and tonal control applies to digital photography and still helps improve images.
What common mistakes do beginners make when trying to copy Ansel Adams?
Beginners often focus too much on copying gear instead of studying light, composition, and darkroom or editing techniques that really shape the final image.
Final Thoughts on What Cameras Did Ansel Adams Use
This piece began by answering what cameras did Ansel Adams use—Brownie to Speed Graphic to various 4×5 view cameras, his signature 8×10, and occasional panoramic or medium‑format rigs—and then showed how each choice shaped his tonal control and composition, with a brief 270 reminder that technical detail mattered. The main payoff is practical clarity: you get not just the names of his tools but a clear sense of how format, movements, and printmaking produced those famous images.
Be realistic: that gear and those methods are deliberate, often slow, and sometimes costly, so you’ll need patience and planning to follow them closely. Landscape and fine‑art photographers, printmakers, and students of exposure will benefit most; casual shooters can still borrow ideas without hauling an 8×10.
We opened with a quick list and then kept our promise by unpacking format choices, the Zone System, and darkroom craft so you can see how camera choice feeds the final print. Keep experimenting with previsualization and exposure, and you’ll find your own work grows more intentional over time.


0 Comments