Ever wondered how photographers turn ordinary scenes into cinematic aerial images without spending years learning to fly?
For many beginners, the drone world looks expensive and technical.
But a well-chosen starter drone makes stunning skyward shots accessible and actually enjoyable.
This guide reviews five beginner-friendly photography drones and explains how to pick the best one for your needs.
We distill hands-on testing into clear, honest impressions so you can avoid gimmicks and costly mistakes.
Expect direct comparisons that highlight real-world strengths and trade-offs, not just spec sheets.
You’ll read about ease of flight, how forgiving each model is, and the kinds of images you can reasonably expect early on.
We also cover portability and safety so you can match a drone to the places you’ll shoot.
Build good habits and spend more time creating.
Whether your goal is dramatic landscapes, smooth cinematic clips, or just better travel photos, this guide helps you start smart.
No prior experience required.
Ready to lift your photography into the sky? Let’s get started.
Along the way we share practical tips for first flights and basic setup.
You’ll also learn what matters most so you can focus on making great images, not chasing features.
Flip open your bag, charge a battery, and prepare to shoot from fresh perspectives.
1. DJI Neo for New Pilots

DJI Neo 4K Drone (135 g, Propeller Guard)
Ultra-light 4K aerial camera with propeller protection for safe indoor and outdoor flights; stable imaging and beginner-friendly controls.
Check PriceThe DJI Neo is a fantastic first drone for photographers who want to experiment with aerial shots without a big investment. It’s very intuitive to fly, so even pilots with zero experience can get useful footage quickly.
You can launch and control the Neo directly from your smartphone, which keeps things simple and pocketable. The compact design fits in a backpack or even a large pocket, making it ideal for travel and walk-around shoots.
FPV mode is a lot of fun and gives an immersive perspective that helps you learn framing and motion. Be aware it can feel disorienting at first, but it’s a great learning tool once you get used to it.
Subject tracking works well in open areas and is dependable for basic follow-me shots and social content. However, tracking struggles in cluttered scenes or with fast subjects, so plan simpler shots for the best results.
Image-wise the Neo is fine for daytime social-media work, but expect softer, noisier results in low light or high-contrast scenes. Video stabilization is basic and will show shake in wind since it’s not a 3-axis gimbal system.
Convenience features include built-in storage and phone audio recording, though some users miss a microSD slot and find the audio quality limited. Battery life is on the short side (~18–20 minutes in real-world use), so bring spares if you want longer sessions.
- Extremely easy to learn and fly
- Lightweight and travel-friendly
- Fun, immersive FPV mode
- Reliable basic subject tracking
- No obstacle avoidance; higher crash risk in tight spaces
- Short battery life (~18–20 minutes real-world)
2. DJI Flip for Beginner Flyers
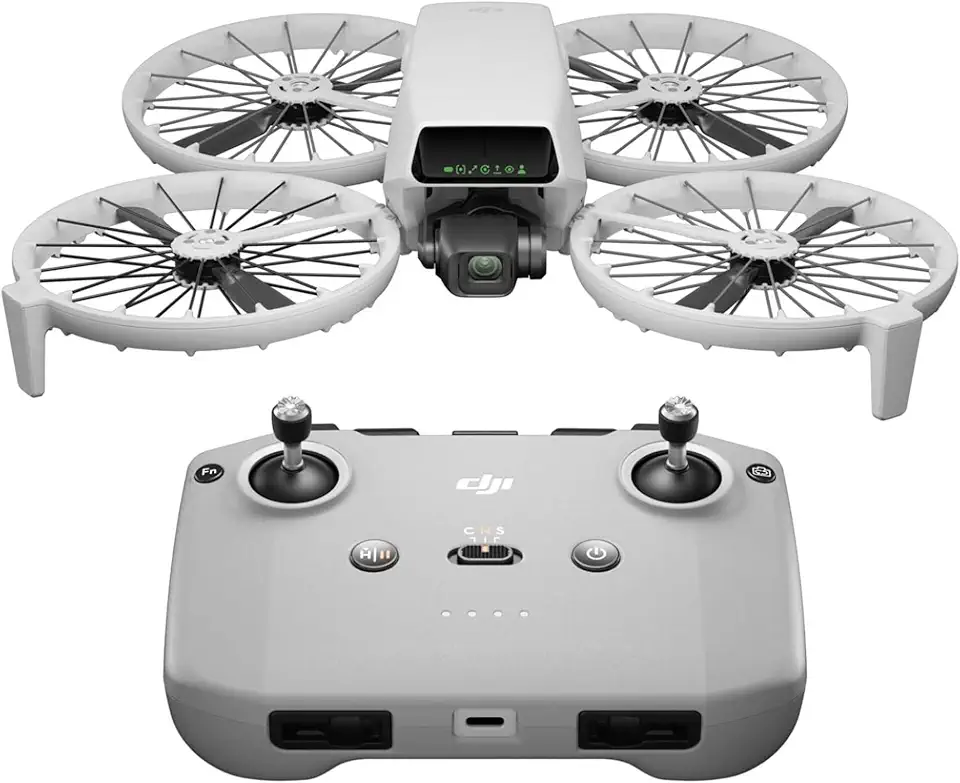
DJI Flip (RC-N3) 4K Drone (under 249 g, 3-axis gimbal, 31 min)
Compact 4K drone with 3-axis stabilization, 31-minute flight time, and responsive remote control for smooth, cinematic aerial footage.
Check PriceAs a photographer who shoots both landscapes and action, I find the DJI Flip to be a very compelling all‑rounder for beginners. It balances image quality, safety features, and straightforward controls in a compact package that lets you focus on composition rather than complicated piloting.
The camera is a highlight: sharp 48MP stills and smooth 4K/60fps HDR video, with RAW support included for serious editing. AI subject tracking and QuickShot modes (Dronie, Circle, etc.) make capturing creative, cinematic moves effortless even if you’re new to aerial work.
Practical design details matter: foldable propeller guards improve indoor safety and reduce crash damage, while hand launch and simple controls lower the learning curve. The compact, easy‑to‑use controller offers good range and a reliable signal so you can concentrate on framing your shots.
There are a few tradeoffs to keep in mind. The Flip is stable in light winds but can drift in stronger gusts because of its lightweight design, so I avoid shooting in choppy conditions. It also lacks obstacle avoidance, so fly with caution around trees, buildings, and tight areas. The shape can be a bit awkward to pack despite the guards, but its durability helps offset that.
Overall, this drone is mostly great for beginners who want pro‑level images without a steep learning curve. If you prioritize camera quality, safety features for indoor use, and easy creative modes, the DJI Flip is worth serious consideration—just plan around wind and complex obstacle environments.
- Propeller guards for indoor safety
- Excellent camera (48MP, 4K/60fps HDR, RAW)
- AI tracking & QuickShot modes
- Hand launch and intuitive controls
- No obstacle avoidance
- Less stable in strong wind
3. DJI Mini 4 Pro for Beginners
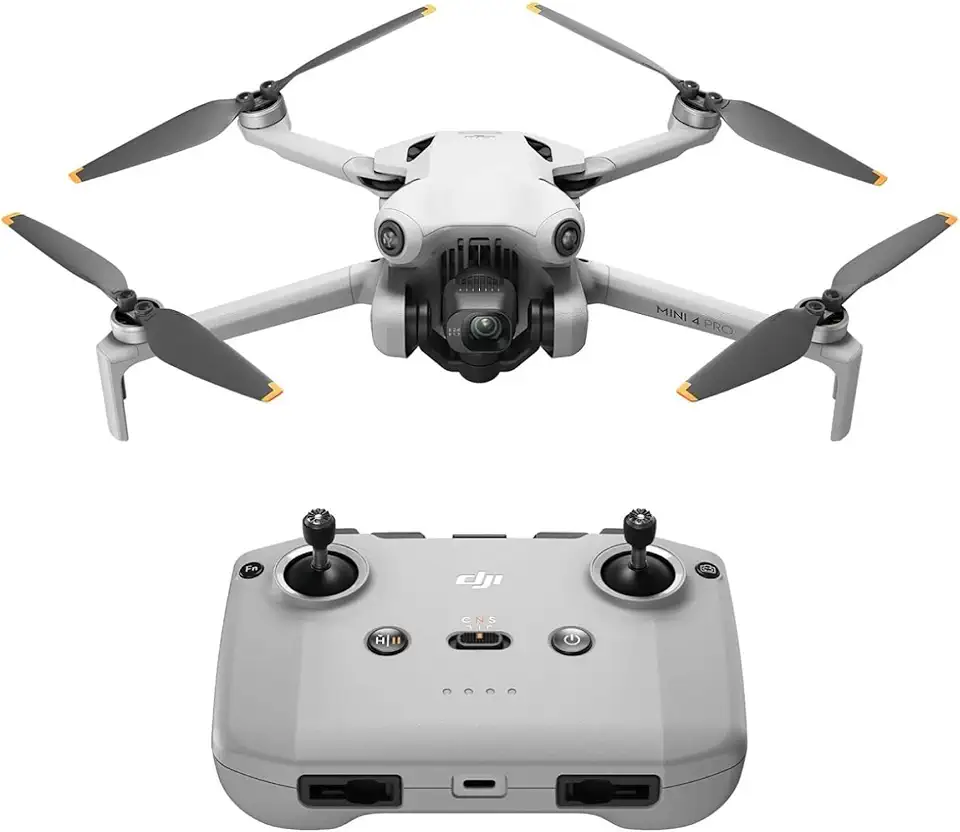
DJI Mini 4 Pro (RC-N2) 4K Drone (249 g, 34 min)
Pro-grade 4K imaging in a 249 g ultralight frame, 34-minute endurance and intelligent flight modes for stunning, effortless captures.
Check PriceAs a working photographer I recommend the DJI Mini 4 Pro when you want a drone that grows with you—its feature set reads like a pro rig but it’s remarkably approachable for beginners. It’s often described as the gold standard for beginner-friendly drones because it blends safety, image quality, and intuitive controls in a compact package.
The camera is a strong reason to choose it: sharp 48MP stills, smooth 4K/60fps video and a D‑Log M color profile for serious color grading. RAW support and a rotating gimbal that enables true vertical video make it a fantastic choice for social-media creators and anyone who wants usable files straight out of the air.
Flight-wise the Mini 4 Pro shines for novices—360° obstacle avoidance gives real peace of mind near trees, buildings or crowds, and the handling feels natural compared to lighter entry models. It resists wind better and delivers smoother flight thanks to its open prop design, so footage stays steady even when conditions aren’t perfect.
The app is intuitive and the automated flight modes (QuickShots, ActiveTrack) let you focus on composition rather than wrestling the controls, which accelerates learning and yields better images sooner. It’s compact and backpack-friendly, so you can actually take it to locations where you’ll want to shoot without extra hassle.
Real-world battery life sits at about ~30 minutes per flight, which is very usable for most shoots though some users swap in spares for longer sessions. If you want pro-level imagery, vertical video capability, and robust safety features in a travel-ready body, the Mini 4 Pro is hard to beat—just be prepared for a slightly higher price and routine spare batteries for extended shooting.
- 360° obstacle avoidance for safer flights
- 48MP stills, 4K/60fps and D-Log M with RAW support
- Rotating gimbal enables true vertical video
- Smooth, stable flight in moderate winds (open prop design)
- Slightly more expensive than basic models
- Battery life good but not exceptional (~30 minutes)
4. Potensic Atom 2 for Starters

Potensic Atom 2 4K Drone Standard Kit (under 249 g, 3-axis gimbal, 32 min)
Lightweight 4K quadcopter with 3-axis gimbal, 32-minute battery life and versatile kit accessories for reliable, smooth aerial photography.
Check PriceAs a photographer who shoots both landscapes and short video pieces, I appreciate the Potensic Atom 2 for what it aims to be: a budget-friendly, travel-ready camera drone that actually delivers usable footage. Its 3-axis gimbal gives noticeably smoother, more stable video than electronic stabilization alone, and the 12MP stills plus 4K/30fps video produce very good color and detail in daylight.
The folding design makes it easy to slip into a daypack for hikes or city shoots, and the app is mature and intuitive with a good range of settings, so you can start with presets and slowly learn manual controls. Battery life is practical for beginners — roughly 25–30 minutes per flight in real-world conditions — and extra batteries are available if you need longer sessions.
QuickShot modes and subject tracking help you capture creative moves without advanced piloting skills, though tracking can be less reliable than on higher-end models, so expect to check footage and re-shoot when the subject moves into cluttered scenes. Build quality is solid for the price, but it doesn’t feel as premium as more expensive drones — still, it holds up well for casual and travel use.
Overall, the Atom 2 is a strong starter drone if you want smooth daytime video, simple creative modes, and portability on a budget. It’s less ideal for low-light work or windy days, so if you plan a lot of night or stormy-weather shooting, consider those limitations before buying.
- 3-axis gimbal for smooth video
- 12MP stills and 4K/30fps daytime quality
- Compact folding design for travel
- Intuitive, feature-rich app
- Can be shaky in wind
- Poor low-light performance (noticeable noise)
5. Holy Stone HS900 for Beginners

Holy Stone HS900 4K Drone (8K Photo, 249 g) Dual Batteries & Charging Hub, 60 min
High-end 4K drone capturing 8K photos, includes dual batteries and charging hub for up to 60-minute total flight time, perfect for extended shoots.
Check PriceAs a working photographer, I appreciate the Holy Stone HS900 as a practical, budget-friendly entry into aerial photography. Its 12MP stills and 4K/30fps video deliver clean, well-saturated results in daylight, which is where this drone really shines for social posts and travel shots.
GPS-assisted flight makes takeoffs, landings and hovering nearly foolproof. That ease of use lets you concentrate on composition instead of frantic stick corrections—ideal when you’re learning to frame horizons and subjects from above.
The HS900 folds down compactly, so it’s easy to toss in a camera bag for hikes or quick trips. The controls and app are intuitive with a good range of useful modes, which speeds up the learning curve and helps you capture cinematic moves without deep piloting skills.
Battery life is average at roughly 25 minutes per flight, so plan for spare batteries if you want extended sessions. Build quality isn’t as premium as DJI’s models, but it’s durable enough for regular use at this price point.
Two trade-offs are worth noting: there’s no RAW support, which limits heavy post-processing ambitions, and stabilization is decent but not as smooth as top-tier gimbal systems—expect some shakiness in wind. Overall, if you want a straightforward, travel-friendly drone that produces pleasing daylight images while you learn, the HS900 is a smart, affordable choice.
- GPS-assisted flight for easy takeoff/hovering
- Portable folding design
- Easy-to-use app with useful modes
- 12MP stills and 4K/30fps decent daylight images
- No RAW support
- Stabilization can be shaky in wind
Key Features for Beginner Photographers

When you’re starting out, the two non-negotiables are a good camera and solid stabilization. Aim for a sensor that delivers at least 12–20MP stills and 4K video so your shots remain usable as you learn composition and editing. Equally important is a motorized gimbal — a true 3-axis gimbal will save you from hours of shaky footage and give you clean frames to practice grading and cropping.
Safety features matter more than you might think. Multi-directional obstacle sensing drastically reduces crash risk when you’re learning to fly around trees, buildings, or people. For absolute peace of mind, prioritize drones with front, back and downward sensors so you can focus on framing instead of constant evasive maneuvers.
Smart flight modes are a beginner’s best friend. Tracking, Point of Interest, and automated QuickShot paths let you capture cinematic moves without advanced piloting skills. Use these modes to build a shot list and learn how movement, speed and framing interact before you attempt complex manual flights.
Think about portability and wind handling together. Folding, lightweight designs are easier to carry on shoots, but heavier frames handle gusts better and produce steadier images. Choose what matches where you’ll fly most: urban rooftops and travel call for compact, resilient options; open fields can tolerate lighter builds.
Video flexibility is worth paying for. Features like rotating gimbals for vertical video and RAW capture give you creative freedom for social media and serious edits. RAW and flat color profiles allow recovery of highlights and shadows — invaluable as your post-processing skills grow.
Finally, don’t skip learning the basics of manual controls. Start in auto, then experiment with shutter speed, ISO and white balance in controlled shoots. That gradual switch is what turns a beginner into a photographer who can deliberately freeze motion, expose tricky skies, and craft images that match a creative vision.
Battery Life and Flight Time
Battery life is one of those practical details that quietly shapes every shoot. In the real world you rarely get the manufacturer’s maximum, so plan around realistic numbers: lighter entry models like the DJI Neo tend to give about 18–20 minutes per charge, mid-range options such as the Potensic Atom 2 and the Holy Stone HS900 average around 25–30 minutes, and class-leading compact prosumers like the Mini 4 Pro sit near 30 minutes in calm conditions. Top-end gear can push much further, but those are exceptions rather than the rule.
Knowing these numbers changes how you approach composition. I treat each battery as a short film reel: pre-visualize the shot, set camera parameters on the ground, and launch only when ready. That way most of a flight is spent framing and fine-tuning instead of fiddling with settings in the air.
Bring spares. Two extra batteries and a charging hub will transform a half-day into a full shoot. Swapping batteries also gives you natural breaks to review footage, change cards, and scout new angles without feeling rushed.
Environmental factors matter more than people expect. Wind, rapid manoeuvres, and cold temperatures all shorten flight time, so reduce aggressive flying in gusts and keep batteries warm before takeoff. Always leave a safety margin for your return-to-home and landing—don’t fly until the controller warns you you’re low.
Be mindful of trade-offs. Larger batteries extend airtime but add weight and reduce portability, which affects packing and some drones’ handling. If travel and minimal gear are a priority, accept shorter flights and compensate with planning and extra cells.
Finally, develop a simple battery routine: check voltage before launch, note estimated remaining minutes, and rotate batteries evenly to prolong lifespan. With a few spares, a charging hub, and a disciplined workflow, you’ll get far more useful shots per outing—and less anxiety about missed opportunities.
What People Ask Most
What are the best drones for beginner photographers?
Look for models that balance easy handling, reliable safety features, and a capable camera for clear photos and video. Prioritize drones known for intuitive controls and good customer support so you can learn without frustration.
What features should I look for in a beginner photography drone?
Focus on camera stabilization, reliable imaging, obstacle sensing, and simple automated flight modes that help capture shots. Portability, battery convenience, and a user-friendly app also make learning and shooting much easier.
How do I choose a drone for aerial photography as a beginner?
Decide what matters most to you between image quality, ease of use, and budget, then compare models that fit those priorities. Read real-world reviews and, if possible, try a hands-on demo to see how a drone feels in flight before buying.
Are camera drones hard to fly for beginners?
Modern consumer drones are generally designed to be approachable, with assisted flight modes that simplify control and landing. However, practicing in open areas and gradually trying more advanced maneuvers will help you build confidence safely.
What camera specs matter most for drone photography beginners?
Stabilization from a gimbal, good sensor performance in daylight, and support for flexible image formats are the most useful camera attributes. Video capability and the option for basic manual controls help expand creative possibilities as you improve.
What settings and tips should beginners use for drone photography?
Start with automated or semi-automatic settings while you learn framing and movement, then experiment with simple manual adjustments as you gain experience. Use gentle camera movements, plan your shots, and review footage to refine composition and exposure choices.
Do beginners need to register or get a license to fly a photography drone?
Regulatory requirements vary by location, so check your local aviation authority for registration and training rules that may apply to hobbyist pilots. Always follow legal guidelines and local safety rules before flying.
Conclusion for Beginner Photography Drones
This guide walked you through five beginner-friendly drones and the core factors to weigh when choosing one: camera and stabilization, safety sensors, ease of control, portability, and battery planning.
Keeping those priorities in mind will help you match a drone to how and where you want to shoot, whether you favor steady video, safer flights in tighter spaces, or longer sessions in the field.
Start with the simpler flight modes to build confidence, then gradually explore manual controls and creative automated shots as your skills improve.
If you want practical tips and deeper guidance, take a look at more articles on the site to continue improving your aerial photography skills.
Have questions or experiences to share? Leave a comment below — we usually reply within a few hours and are happy to help guide your next steps.

0 Comments