Which adhesive will keep your favorite photograph flat, safe, and looking gallery-ready for years to come? Choosing the wrong glue can cause bubbling, yellowing, or irreversible damage.
In this guide I compare five adhesive approaches for mounting photos, from quick-and-easy fixes to archival methods suited for heirlooms. You’ll get a clear sense of which choice fits a casual album, a gallery print, or a mixed-media project.
Expect honest pros and cons for each option, plus real-world advice on application, repositioning, and long-term stability. Practical preservation tips and a concise FAQ round out the piece so you can protect your images without guesswork.
I’ll also explain how substrate, permanence needs, and display plans should shape your decision. That way you’ll avoid common pitfalls like over-adhesion or migration on sensitive papers.
Whether you’re framing a family portrait, prepping prints for a show, or tidying up a scrapbook, this primer helps you pick the right bond. Read on to make smarter, safer mounting choices and keep your photos looking their best.
You don’t need a conservation lab to get professional-looking results. With a few simple rules and the appropriate adhesive for your surface, you can preserve color and prevent warping for decades. This guide will save you time and worry.
1. Scotch Photo Mount Spray Adhesive

Scotch Photo Mount Adhesive 10.3 oz 6094
Professional-strength instant-dry mounting adhesive for photos and prints, creating durable bonds for framing, scrapbooks, and display.
Check PriceScotch Photo Mount Spray Adhesive is a professional-grade spray made specifically for photo mounting. It produces a fine, even spray and a single coat gives a strong, permanent bond that stays clear and non-staining for both black-and-white and color photographs.
In practice it’s convenient and effective for scrapbooking and mounting. The aerosol sprays evenly, so you don’t get lumps or bubbles, and users report an immediate bond that holds photos flat without warping or bubbling.
If you’re a scrapbooker, photographer, or artist mounting prints to boards, paper, or other flat surfaces, this product will likely suit your needs. It’s fast to use and dries quickly, which speeds up projects and reduces handling time.
That said, there are a couple of practical cautions. The spray requires ventilation because of fumes, and once you lay a print down it’s difficult to reposition. Also be mindful of overspray; a little mess can happen if you don’t mask the surrounding area or use a spray booth.
Overall, I recommend Scotch Photo Mount Spray if you want a reliable, permanent mount with clean, bubble-free results and quick drying time. It’s especially good for display pieces and scrapbooks where a strong, invisible bond is desired. Avoid it if you need to reposition prints frequently or are working in a small, unventilated space.
- Strong, permanent bond
- Non-staining and clear
- Quick drying
- Fine, even spray — no bubbles
- Requires ventilation (fumes)
- Difficult to reposition; risk of overspray
2. 3M SprayMount Repositionable Adhesive

Scotch Spray Mount 10.25 oz 6065
Even, repositionable spray adhesive delivering uniform coverage for photos and crafts, with clean, long-lasting hold and minimal residue.
Check PriceAs a photographer I reach for 3M SprayMount Repositionable Adhesive when I need a flexible mounting solution for photos, paper, and other lightweight materials. It’s designed to be repositionable up to 12 hours (or about 2 hours if both surfaces are sprayed), which makes aligning prints far less stressful.
The adhesive dries to a durable, non-brittle bond—so after the reposition window it converts to a strong permanent hold suitable for scrapbooking and art pieces. In practice that means you can tweak placement and then trust the mount to stay flat and secure once set.
I also appreciate the wide spray angle; it covers larger pieces evenly and reduces the chance of missed spots when working on boards or layered layouts. It has a milder, less noxious odor than many spray adhesives, which makes longer mounting sessions more pleasant.
Real-world users find it especially good for layered scrapbooking because it allows flexible placement and then reliable adhesion after drying. That said, careful spraying is important to avoid overapplication and wrinkles, and you should still use ventilation when spraying.
It’s a solid choice if you value being able to align multiple elements before committing, especially on larger pieces where the wide spray helps. Always test on a scrap first so you know distance and coverage for your particular paper and board.
- Repositionable up to 12 hours (2 hours if both surfaces sprayed)
- Wide spray angle for larger pieces
- Strong permanent bond after drying (durable, non-brittle)
- Milder, less noxious odor
- Careful spraying required to avoid overapplication and wrinkles
- Needs ventilation
3. Pioneer Photo Glue Stick and Pen
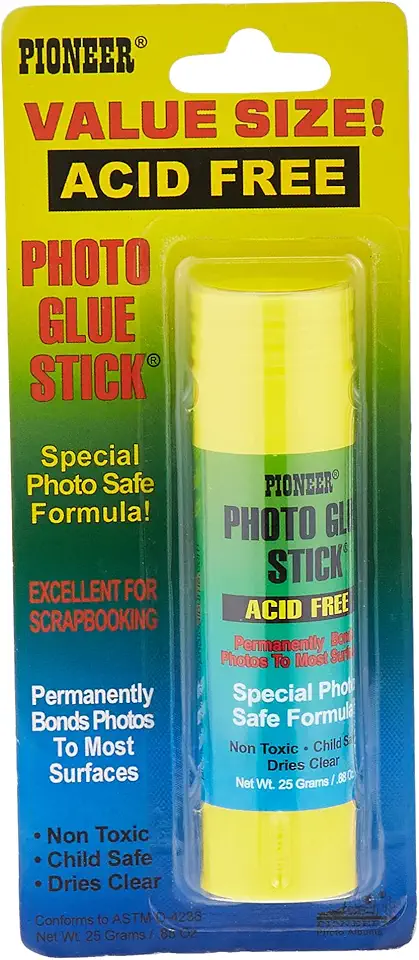
Pioneer Value-Sized Photo Glue Stick 25 g
Compact glue stick for quick, mess-free photo mounting; dries clear and provides a secure, archival-safe bond.
Check PriceAs a photographer who spends a lot of time assembling albums, I reach for the Pioneer Photo Glue Stick and Pen when I need a clean, no-fuss mounting solution. It’s a water-based glue stick from a photo album maker, so it’s designed specifically with photos in mind.
The formula is acid-free and archival-safe, which gives you confidence for family albums and casual scrapbooks. It spreads evenly, dries clear, and remains flexible, so prints sit flat without the telltale shine or stiffness of some adhesives.
Practical application is simple: the stick provides broad, even coverage to avoid bubbles or wrinkling, while the pen lets you tackle corners, small photos, or labels with precision. Because it’s non-toxic and low-mess, it’s ideal for working around kids or doing extended assembly sessions on the kitchen table.
Where it shines is exactly where its design intends — lightweight prints, inserts, captions, and scrapbooking pages that need a neat, archival-friendly finish. The flexible dry state also helps mounted photos accommodate normal page movement without cracking the adhesive bond.
That said, this isn’t the adhesive I’d choose for large-format prints, heavy boards, or gallery display mounts. The bond is noticeably weaker and less permanent than spray adhesives or wet PVA glues, so for display or structural mounting you’ll want a stronger option.
- Acid-free and archival-safe
- No bubbling or wrinkling
- Precise application (pen)
- Dries clear and flexible
- Weaker, less permanent bond than sprays or wet adhesives
- May not suit heavy/large photos
4. Herma Double-Sided Photo Stickers

Herma 1071 Photo Stickers 1000
Self-adhesive photo stickers for fast, damage-free mounting; perfect for albums, scrapbooks, and displays.
Check PriceHerma Double-Sided Photo Stickers are small, peel-and-apply permanent mounts made for quick, no-mess adhesion. Each sticker is double-sided and solvent-free, about 12mm x 17mm, so they’re discreet once applied and won’t leave a wet residue or require drying time.
As a photographer who mounts dozens of contact prints and proof sheets, I appreciate how instantly they grab paper, receipts, and small cutouts. The bond is permanent, so once you press a photo down it stays put — ideal for albums and scrapbooks where you want a clean, finished look without glue smears.
Because they’re small and precise, these stickers are great for small prints, labels, and edge mounting where a tiny adhesive dot is preferable. They’re a real timesaver for batch work: peel, stick, done — no tacky fingers or drying racks to worry about.
There are limitations to be aware of. The permanent nature means repositioning is difficult, so you must align carefully before pressing. Also, the 12mm x 17mm size can feel fiddly on larger photos or when you need broader coverage — they’re not a substitute for sprays or wet adhesives for big mounts.
If you want a clean, glue-free solution for albums, scrapbooks, receipts, and small cutouts, Herma’s stickers are very practical. Choose them when permanence and cleanliness matter, and avoid them if you expect to reposition often or need to mount large prints.
- Instant adhesion
- Solvent-free and safe
- Clean application
- Discreet small size (≈12mm x 17mm)
- Difficult to reposition
- Fiddly small size for larger photos
5. Lineco Neutral pH PVA for Wet Mounting

Lineco Neutral pH Adhesive 8 oz
Archival, neutral-pH adhesive formulated for conservation-grade repairs; clear-drying, non-yellowing bond safe for photographs and paper.
Check PriceAs a professional photographer, I reach for Lineco Neutral pH PVA when I need archival, permanent mounts. It’s a wet-mounting PVA adhesive formulated acid-free and neutral pH, applied with a foam roller for even coverage. It’s built for large or specialty mounts like foam board and other archival substrates.
When applied correctly it gives a very smooth, bubble-free finish and a true archival-quality bond. The adhesive remains flexible and durable once cured, so prints sit flat and stable for display or sale. That said, it’s technique-sensitive; uneven application can cause warping or buckling.
Practical workflow matters with this glue. Users advise sealing both sides of foam board before full application to prevent warping, and to practice the foam-roller spread on scraps first. Expect a longer process and drying time compared with quick sprays or stickers — plan for patience when doing large mounts.
If you’re a fine art printer or professional photographer who mounts gallery prints or specialty pieces, this is worth the learning curve. It rewards careful application with archival permanence and a professional, smooth finish. If you need fast, foolproof mounts for casual projects, this may feel overkill.
- Archival quality (acid-free, neutral pH)
- Strong, smooth permanent bond
- Flexible and durable finish
- Ideal for large/specialty jobs (foam board, archival substrates)
- Technique-sensitive; needs careful application
- Longer process and drying time
When to Use Different Photo Adhesives
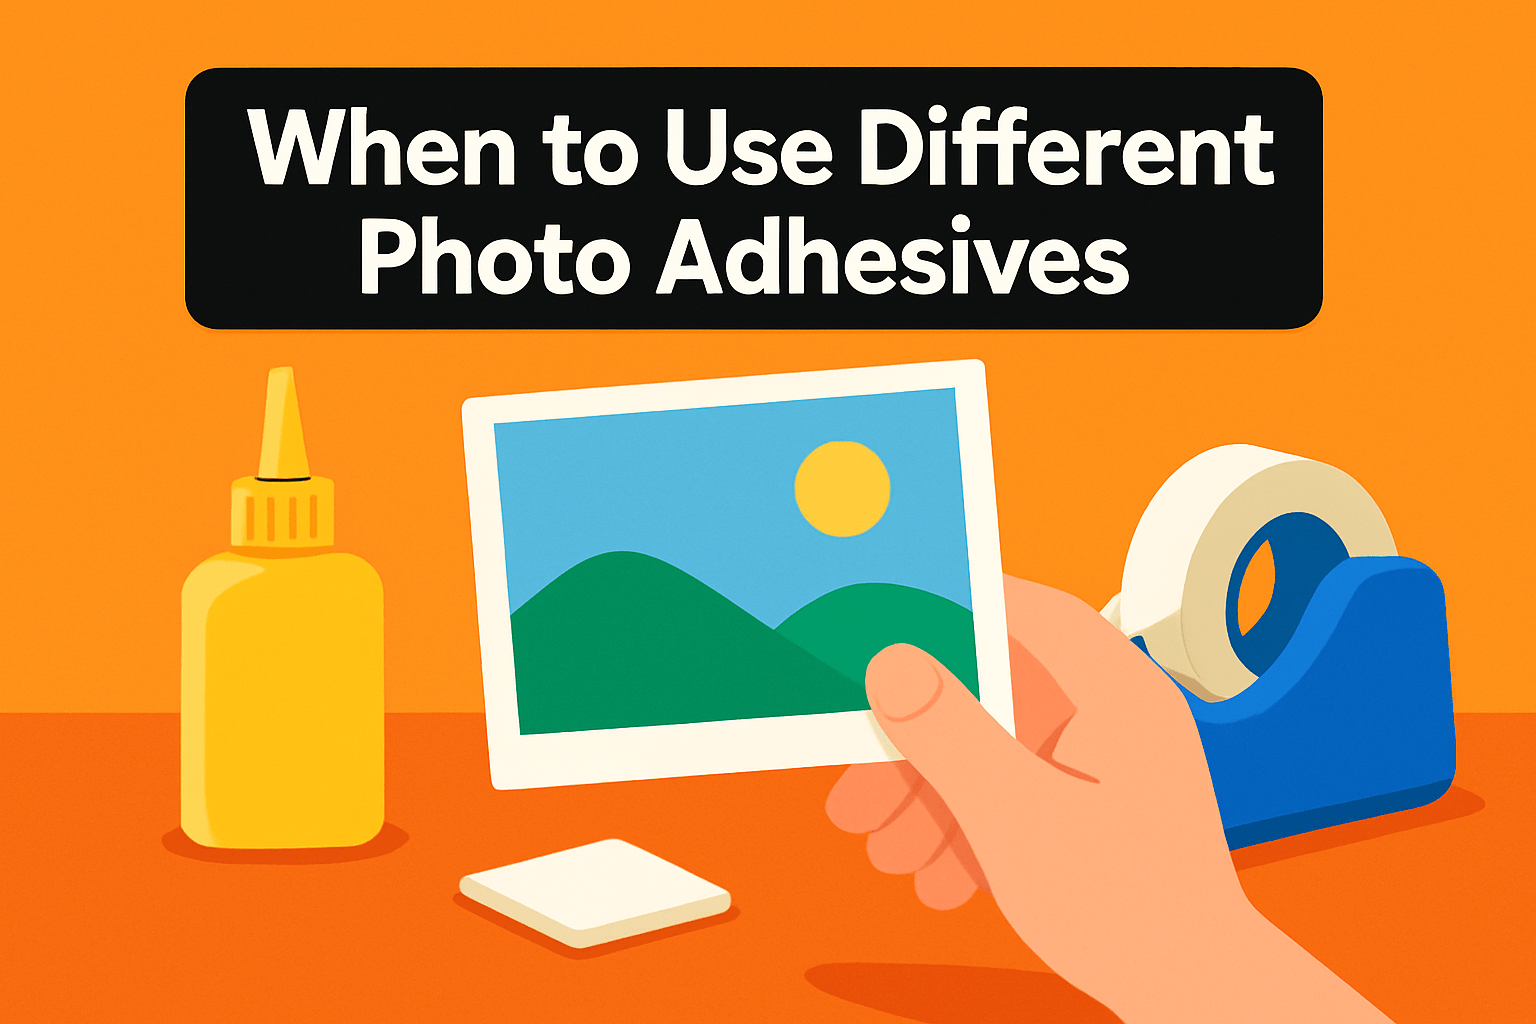
Deciding which adhesive to use starts with what you’re mounting and how long you want it to last. For valuable or framed prints choose reversible, archival-friendly methods; for quick displays pick something fast and forgiving.
Hinging tapes—linen, Abaca and gummed—are the go-to for museum-quality and archival framing. Linen supports heavier papers, Abaca is gentler on thin stock, and gummed tapes can be reversed with water when conservation matters.
Pressure-sensitive adhesives are fantastic for fast, clean mounting and temporary displays. Some PSAs are repositionable while others are permanent, so check preservation specs before you commit to a valuable piece.
Spray adhesives work brilliantly when you need a smooth, bubble-free bond to foam board and other rigid substrates. They’re efficient for large pieces and exhibits, but they demand even application and ventilation and are generally less reversible than hinging methods.
Starch-based pastes (wheat or rice) remain the traditional choice for conservation mounting. They’re reversible, allow adjustments as they dry, and are very gentle on delicate papers, though they’re labor-intensive and not meant for heavy-duty permanent bonds.
Match adhesive to substrate: hinging tapes and starch pastes are best for paper, mats and backing boards when long-term preservation matters. PSAs and sprays give strong, flat bonds for foam board and rigid panels—just choose acid-free or archival formulations.
Textured surfaces like canvas or fabric often need heat-activated or specialty adhesives; tapes and some sprays won’t grip well. For clear substrates such as acrylic or glass use products designed to avoid trapped air and visible reflections.
In short: reserve hinging tape or starch paste for high-value prints and conservation, use PSAs when you need speed and easy placement, and reach for sprays when mounting large pieces to rigid supports. When in doubt, prioritize pH-neutral, acid-free, and reversible approaches—and practice on scraps, because technique matters as much as product choice.
Tips to Preserve Mounted Photos
Mounted photos look fantastic, but once they are glued or taped they become an object that needs care. The choices you make at mounting time decide how they age. A few practical habits will keep your prints looking fresh for decades.
Use archival-quality materials: acid-free, pH-neutral mats, boards and adhesives. Avoid office tape, masking tape and duct tape — they yellow and can stain prints. Spending a little more on safe supplies is the most effective preservation step.
Think about movement and tension when you mount. I often hinge-mount with small linen or gummed tape strips so the photograph can expand and contract naturally. Never glue a print tightly down across its entire back; that causes warping and stress over time.
If you choose wet PVA for a permanent, flat mount, technique matters. Seal both faces of foam board before adhesive and roll on a thin, even coat to avoid bubbles or warping.
Spray adhesives can produce a flawless bond but practice first. Work in a ventilated space, test on scrap, and use light, even passes to prevent overspray and blotches. Also check product labels for acid-free or pH-neutral claims when preservation is a priority.
Protect mounted pieces from the environment: use UV-filtering glass or acrylic and consider anti-reflective glazing for brighter rooms. Keep framed work out of direct sun and in stable temperature and humidity. Avoid basements, attics and other spaces with wide humidity swings.
Handle prints with clean, lint-free gloves and dust frames gently and regularly. For pieces you might want to change later, use archival corners or photo tabs instead of permanent adhesives.
Inspect mounts routinely for adhesive bleed, yellowing or tape failure and act early if you see problems. For valuable or sentimental prints, plan to re-mount with fresh archival materials roughly every decade. When possible choose reversible methods so future conservators or future you can make changes without damage.
What People Ask Most
What is the best adhesive for mounting photos?
It depends on how permanent the mount should be and what surface you are attaching the photo to. For valuable prints choose materials that prioritize preservation, while simpler adhesives are fine for temporary displays.
What adhesive is safe and archival for mounting photographs?
Choose acid-free, neutral pH adhesives formulated for archival use to minimize staining and long-term damage. Reversible or conservation-grade options are preferable for irreplaceable images.
Can you use spray adhesive to mount photos?
Spray adhesives can create a smooth, even bond for flat mounting but require careful, even application and good ventilation. Some formulations are more appropriate for display use than for long-term archival storage, so testing first is wise.
How do I mount photos to foam board or poster board?
Use adhesives designed for rigid substrates and apply them evenly to avoid buckling or bubbles. Follow manufacturer guidance for surface preparation and consider sealing edges if recommended for the material.
Can double-sided tape be used to mount photos without damage?
Archival-quality, photo-safe double-sided tapes offer a clean, low-mess option but can be permanent and difficult to reposition. For valuable photos, prefer tapes labeled as acid-free or use nondestructive mounting methods.
What glue should you use to mount photos to canvas?
Use adhesives formulated for fabric or flexible substrates so the bond remains flexible and conforms to texture. Avoid rigid glues that can crack or distort the print, and test on a scrap before applying to the final piece.
How do you mount photos on walls without frames or nails?
Use removable, photo-safe mounting strips or putty designed for wall displays and suitable for your wall surface and the size of the photo. Avoid adhesives that can damage paint or leave residue, and try them on an inconspicuous area first.
Conclusion on Best Photo Mount Adhesives
Choosing the right adhesive comes down to matching permanence, substrate, and preservation needs so your photos look their best now and for years to come.
For valuable or irreplaceable images, prioritize archival-quality, pH-neutral, acid-free materials and reversible techniques whenever possible to minimize long-term damage.
For casual projects or temporary displays, user-friendly options that are clean and easy to apply will save time while still giving pleasing results, provided you follow basic care guidelines.
Regular inspection and simple maintenance—like using UV-filtering glazing, stable storage conditions, and periodic remounting when needed—will significantly extend the life of mounted photos.
If you want to build your mounting and preservation skills, explore more articles on our site to learn techniques and product considerations at your own pace.
Please leave a comment with questions or experiences below; we usually reply within a few hours and are happy to help refine your approach.


0 Comments