What if the tiny dab of glue in your album could decide whether your best memories stay crisp for decades or yellow away in a few rainy seasons?
Scrapbooking is as much about preservation as it is about creativity, so the adhesive you choose matters more than you might think.
When you’re mounting photos, acid-free and lignin-free adhesives aren’t just nice-to-have — they’re essential for long-term preservation.
Photo-safe formulas prevent chemical reactions that cause fading, staining, and brittleness, so your prints retain color and clarity for generations.
Different projects demand different bonds: archival mounting for heirloom pages, mess-free tape for precise layouts, foam or dots for dimension, and non-permanent mounts when you want to swap images later.
Understanding those options helps you balance longevity, aesthetics, and flexibility without sacrificing one for the other.
Beyond safety labels, look for adhesives that dry clear, resist warping, and match the weight of your photos and embellishments.
That way you avoid wrinkled pages, visible glue lines, and brittle edges while keeping your creative vision intact.
In the pages ahead we’ll explore the best glue choices for scrapbooking photos and explain which option suits each creative goal and preservation need.
Whether you’re building an archival album or a playful, changeable layout, you’ll learn how to pick adhesive wisely so your memories last.
1. Elmer’s Rubber Cement
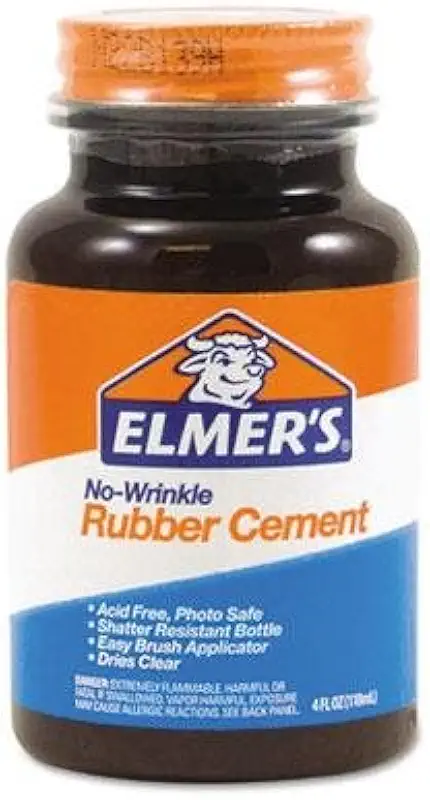
Elmer's E904 Rubber Cement 4 oz
Fast-drying adhesive for paper and photo projects; flexible, smear-resistant bond that peels cleanly without wrinkling.
Check PriceElmer’s Rubber Cement is a strong, liquid adhesive that comes recommended for scrapbooking and photo albums. It’s explicitly acid-free, which is essential for preserving prints over the long term.
In practice it secures photos without damaging the paper. It dries quickly and, importantly for printed images, does not warp or cause wrinkles to the paper.
That combination — photo-safe formulation plus a robust bond that sets fast — makes it a solid choice when you want a permanent attachment that won’t mar the look or flatness of your photos. As a photographer, I appreciate adhesives that hold confidently and stay out of sight; this one does both.
Note the trade-offs before you choose it. Cleanup can be messier than tape-based options, and because it’s a liquid you need to take care to avoid excess on edges. If you’re comfortable working with a wet adhesive and want archival performance with a quick set time, Elmer’s Rubber Cement is a very practical tool for scrapbooked photos.
- Acid-free and photo-safe
- Strong bond
- Quick drying
- Does not cause wrinkles or warping
- Cleanup can be messier than tape adhesives
- Liquid application requires care to avoid excess on edges
2. 3L Scrapbook Adhesives Foam Squares
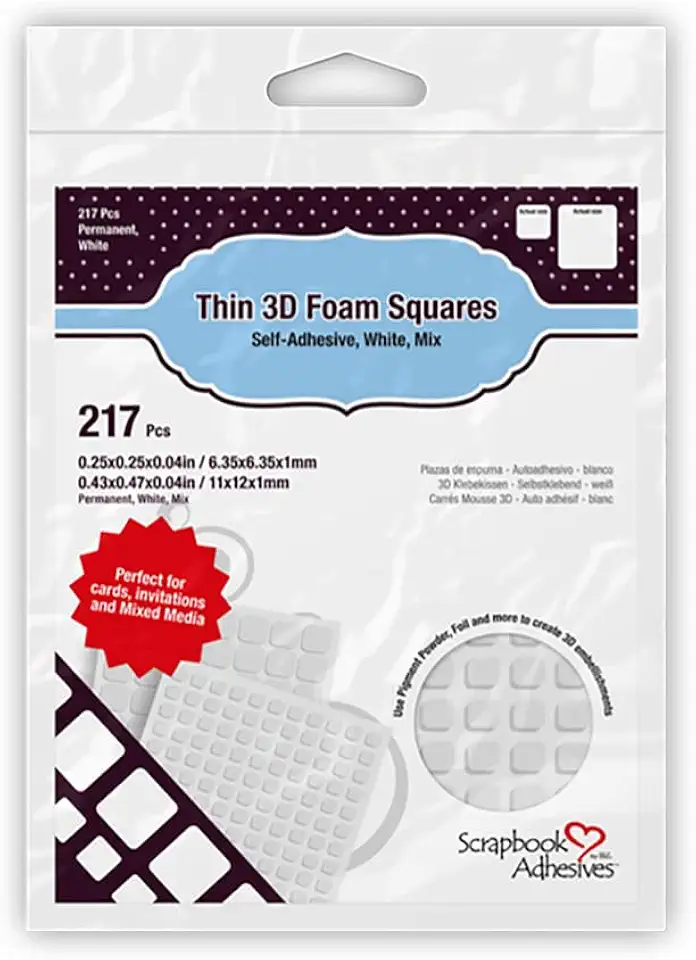
3L Permanent Pre-Cut 3D Foam Mounting Squares
Pre-cut foam squares for secure, gap-free mounting of photos, crafts, and displays; permanent adhesive provides raised, professional-looking dimension.
Check PriceAs a photographer who likes to add tactile depth to layouts, I reach for 3L Scrapbook Adhesives Foam Squares when I want immediate dimension without bulk. These are high-density, double-sided foam squares that lift photos and elements off the page to create a professional layered look.
They come pre-cut and ready to peel-and-stick, which saves time when I’m assembling multiple spreads. Availability in white or black and in multiple sizes makes it easy to match the edge appearance or control the amount of lift for different photos and embellishments.
In practice they give a very strong hold, so once elements are placed they stay put — ideal for securing heavier embellishments or creating raised frames around prints. The consistent thickness of these foam squares delivers clean, even elevation that photographs nicely in close-up shots of the scrapbook itself.
The big caution is that these foam squares are not acid-free. I avoid placing them directly under valuable or archival prints. For anything I want to preserve long-term, I either use them only under cardstock mats that keep adhesive away from the photo surface, or choose an archival mounting method instead.
Another practical note: they’re not repositionable once pressed firmly, so plan your composition carefully and do a dry layout before committing. If you’re after quick, neat dimension for gift albums, craft projects, or non-archival keepsakes, these are a great, time-saving option.
- Strong peel-and-stick hold
- Gives clear 3D/dimensional effects
- Pre-cut for convenience
- Comes in white/black and multiple sizes
- Not acid-free — caution with archival photos
- Not repositionable once pressed
3. Double-Sided Tape Runner

Double-Sided Tape Roller 4-Pack 0.3 in x 26 ft
Easy-to-use dispenser delivers invisible, double-sided adhesive for quick paper bonding, scrapbooking, and crafting with clean, steady application.
Check PriceAs a photographer who builds albums and layouts, I reach for a double-sided tape runner when I need a clean, professional bond without the fuss. These are pressure-sensitive adhesive cartridges in a tape-runner dispenser — mess-free, acid-free, and non-toxic — which makes them ideal for paper-to-paper adhesion and safe for photos over time.
In practical terms they’re valued for neat, fast, reliable bonding. Whether you’re mounting a full print or securing tiny die cuts, the thin, precise application avoids wrinkles and bubbles and there’s no drying time to worry about, so pages stay flat and predictable.
Use them for photo corners, matting, or attaching lightweight embellishments; they work well across larger areas as well as for detail work. Be aware, though, that they aren’t the answer for heavier embellishments or projects that need real dimensional lift — for that you’ll want foam squares or glue dots instead.
Also consider the dispenser model: many are refillable, which keeps costs and waste down, but some units are disposable and less eco-friendly. Overall, if your goal is archival-safe, low-mess mounting that looks clean and holds steady, a double-sided tape runner is one of the most versatile and user-friendly tools you can add to your scrapbooking kit.
- Mess-free, instant adhesive (no drying time).
- Acid-free and photo-safe.
- Thin, precise application avoids wrinkles/bubbles.
- Easy to use; some models refillable.
- Some models disposable/non-refillable (less eco-friendly).
- Not ideal for heavier embellishments or 3D effects.
4. Self-Adhesive Photo Corners

Pioneer PCR-1 Self-Adhesive Photo Corners 250-Pack
Clear, peel-and-stick corners secure photos and memorabilia without glue; archival-safe, residue-free protection for albums and displays.
Check PriceAs a photographer who often assembles albums for clients, I reach for self-adhesive photo corners when I need a non-invasive, archival way to mount prints. These corners are acid-free, lignin-free, and PVC emission-free, so they keep the adhesive off the photo itself and help preserve your images over time.
They’re pressure-sensitive and repositionable until you press them firmly, which makes layout work fast and forgiving. For changeable or shared scrapbooks they’re ideal — you can swap photos without ever committing them to permanent glue, and the finished pages look clean and professional.
In real-world use they give a classic, museum-like finish that complements vintage and modern prints alike. Because the adhesive never touches the photo surface, there’s minimal risk of staining or chemical interaction, which is something I always prioritize for irreplaceable prints.
Be mindful of the limitations: these corners only adhere at the edges, so a photo can shift if a corner loosens. They also offer less holding strength than direct glue, so they’re not the best choice when you’re attaching heavy embellishments or bulky mounts.
If your goal is preservation, flexibility, and a neat presentation — especially for swapping prints or creating client proof books — self-adhesive photo corners are a very good option. If you need maximum hold for layered embellishments or heavy cardstock, consider a stronger adhesive method instead.
- Photo-safe and archival
- Repositionable at first; no drying time or mess
- Adds classic/professional finish
- Mounts photos without adhesive touching the photo
- Only adheres photo at edges — can move if corners loosen
- Less holding strength than direct glue; not ideal for heavy embellishments
5. Glue Dots Adhesive

Glue Dots Poster Dots 0.375 in Disposable Dispenser 200-Pack
Instant, no-mess adhesive dots cling posters and lightweight decor; portable disposable dispenser for fast, damage-free mounting.
Check PriceAs a photographer who assembles albums, I reach for Glue Dots when I need a fast, clean solution. These small pressure-sensitive adhesive dots provide a strong, instant bond for photos and embellishments, and there’s no mess to worry about.
In practice they’re popular for ease of use and for creating a subtle 3D effect; they’re excellent for heavier decorations that standard tape can’t hold. Because they’re pressure-sensitive you don’t wait for drying — the bond is immediate, which keeps layouts stable while you work.
Glue Dots add dimension without bulk in some cases, so you can lift elements slightly for visual interest without using thick foam. They’re also easy to handle and versatile for heavier embellishments, which is why I use them when attaching metal charms, layered die-cuts, or heavier paper bits.
Be mindful of the trade-offs: the adhesive is very strong, so repositioning or removal is difficult and may cause damage to photos or paper. Also, the dots can be visible if misaligned or overused, so place them carefully and use sparingly on thin or translucent materials.
Bottom line: Glue Dots are a go-to when you need instant hold and a bit of lift for heavier pieces, but they’re not ideal if you want to move photos around after placement or need an invisible bond on delicate surfaces.
- Strong instant bond; no drying time.
- Adds dimension without bulk in some cases.
- Easy to handle; versatile for heavier embellishments.
- No mess.
- Very strong adhesive — repositioning/removal is difficult and may cause damage.
- Dots can be visible if misaligned or overused.
Tips for Choosing the Right Adhesive
Archival safety is non-negotiable: always select acid-free, lignin-free adhesives that are explicitly labeled photo-safe or archival. Those labels mean the formulas won’t release acids or other chemicals that yellow, embrittle, or break down prints over time.
Also choose non-toxic adhesives—good for your health and often a sign of a milder chemical formula for images. I favor products that dry clear and quickly because they prevent visible glue lines and reduce the chance prints shift while pages cure.
Match bond strength to the materials you’re using rather than choosing by brand alone. Lightweight photos and thin papers do best with a tape runner or thin double-sided tape for a clean, low-profile hold. Bulky items like chipboard, heavy embellishments, or layered elements need stronger options such as heavy-duty glue dots, foam tabs, or a more robust archival adhesive to avoid sagging.
Think about whether you want permanence or flexibility before you glue anything down. If you rearrange layouts or share pages, go with repositionable adhesives or self-adhesive photo corners so images aren’t permanently altered. For heirloom albums where photos will stay put, opt for a permanent archival bond.
Choose the application method to fit the job: spray adhesives give even coverage for large photos or background sheets—use them in a ventilated area—while tape runners and double-sided tape offer speed and precision for trims and die cuts. Glue dots and foam squares deliver instant hold and dimension when you need lift or depth.
Avoid wet or solvent-based glues for photo mounting; they commonly warp paper, curl glossy prints, or leave residues that worsen with age. Sticking to archival, fast-drying, clear products matched to the weight of your materials will keep pages flat, neat, and protected.
In short, prioritize archival labeling, clear fast drying, appropriate bond strength, and the right application tool for the task. A little planning up front saves you headaches later and helps ensure your images look as good in decades as they do today.
How to Attach Photos Without Damaging Them
Treat each print as a small work of art: handle photos by the edges and, when possible, wear cotton or nitrile gloves to avoid fingerprints and oils. Work over a clean, flat surface with good light so a slip or crease doesn’t ruin the image.
Less is more with glue — apply only a tiny amount to the back or the very outer edge and never to the image surface. Excess adhesive can seep out, stain borders or cause paper to buckle, so test the product on scrap or a back-of-print sample first.
Use archival, acid-free, lignin-free adhesives for longevity, and consider archival photo corners when you want the image untouched; corners secure prints by the edges and make removal easy. If you use spray adhesive, mist lightly from a distance and let it tack briefly before contact to avoid saturation.
Always allow adhesives to cure fully before closing the album or stacking pages — trapped tack will bond sheets together and ruin margins. Resist the temptation to speed drying with heat tools, which can distort emulsions and accelerate chemical breakdown, and store albums in a cool, dry, low‑light place.
When you must remove a stuck photo, work slowly with a thin, flexible tool such as a micro spatula or gently saw non‑waxed dental floss under the edge; never yank a print free. If the bond is stubborn or the print shows damage, stop and consult a conservator rather than forcing it.
For the most gentle display, slip prints into clear archival sleeves or photo pockets so pages remain glue‑free but viewable. With careful handling, minimal adhesive and stable storage, your photographs will stay stable and beautiful for generations.
What People Ask Most
What is the best glue for scrapbooking photos?
There is no single best glue for every situation; choose an adhesive that is labeled acid-free and photo-safe and that matches the materials and effect you want. Flat paper-to-paper work often benefits from thin, instant adhesives, while heavier embellishments may need stronger mounting options.
Are glue sticks safe for scrapbooking photos?
Glue sticks can be safe if they are labeled acid-free and photo-safe, but formulas vary between brands. Test a small area first and avoid overapplication to prevent seepage or buckling.
What adhesive is photo-safe and archival?
Photo-safe and archival adhesives are typically acid-free and lignin-free and are marketed for preservation. Look for products labeled archival or photo-safe and follow manufacturer guidance for use and storage.
Can I use Mod Podge to adhere photos to scrapbook pages?
Mod Podge and other wet sealants are not ideal for archival photo mounting because wet adhesives can cause warping or leave residue. If you choose to use a wet adhesive, test it on a nonessential sample first and avoid applying it to the photo front.
How do you attach photos to a scrapbook without damaging them?
Handle photos by the edges and use minimal, photo-safe adhesive applied to the back or edges; archival photo corners are a non-contact option. Allow adhesives to set fully and store albums in cool, dry conditions to protect images.
Is double-sided tape good for scrapbooking photos?
Double-sided tape is a popular choice because it is mess-free and provides instant bonding, and many varieties are labeled acid-free and photo-safe. It works well for flat mounting and precise placement but may not hold very heavy embellishments.
How do you glue photos without wrinkling or bubbling?
Avoid excessive wet glue and apply adhesive evenly and sparingly to the back or edges of the photo, then smooth carefully from the center outward. Let the adhesive set undisturbed and avoid heat or rapid drying methods that can cause distortion.
Conclusion for Scrapbooking Photo Adhesives
Choosing acid-free, lignin-free, photo-safe adhesives is the single best step you can take to preserve prints, and matching the adhesive type to your project keeps pages neat, secure, and long-lasting.
Whether your priority is archival safety, mess-free precision, added dimension, or the ability to remove and rearrange, the right adhesive approach will protect both photos and layouts while helping you achieve the look you want.
Follow the handling and testing tips outlined earlier—work from the edges, use minimal adhesive, test on scraps, and allow adhesives to set—to avoid common problems like shifting, warping, or staining.
If you want to build your skills and try new techniques, browse more articles on the site for practical advice and project ideas to improve your scrapbooking and photo-mounting confidence.
Have questions or want specific troubleshooting help? Leave a comment below and we usually reply within a few hours.


0 Comments