
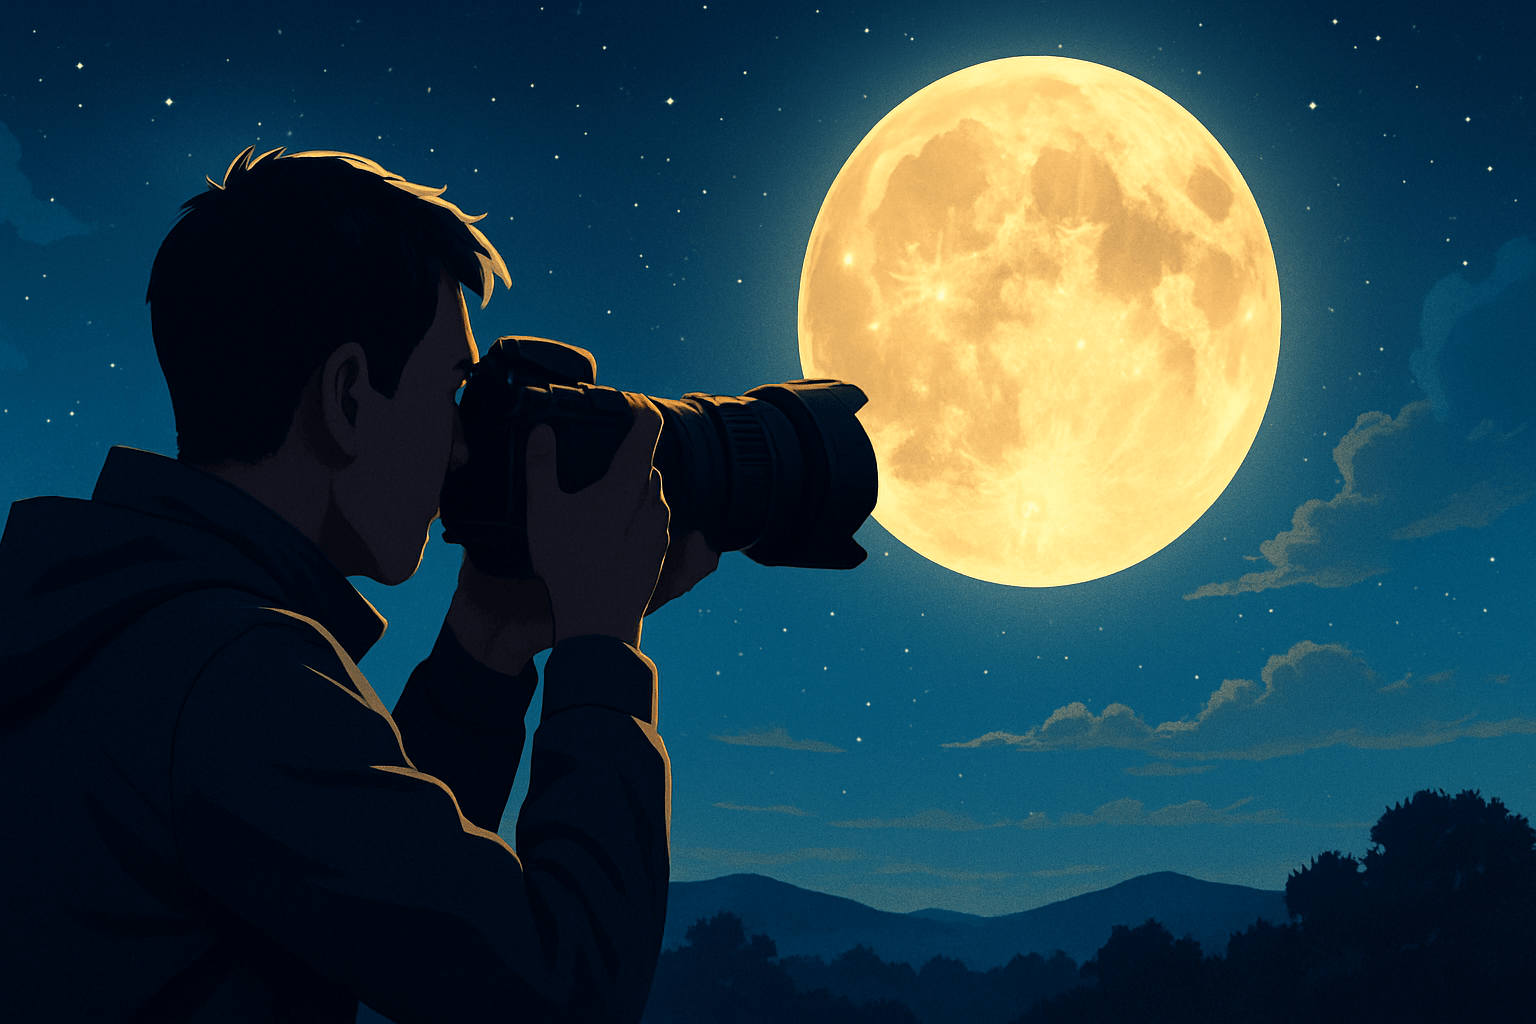
How to photograph moon so it fills your frame and shows crater detail like a pro?
This guide makes it simple and practical. You will learn step‑by‑step how to photograph moon with gear and settings you can copy.
We cover the right lenses, sturdy support, and the Looney 11 exposure cheat‑sheet. You will also get exact focusing steps, planning tools (Photopills/TPE), and composition tips with sample camera settings.
Finally, learn stacking, post‑processing, and a printable field checklist with five pro tips. By the end you will know how to photograph moon with repeatable, real results.
Essential Camera Gear for Moon Photography
The two things that matter most are focal length and stability. Think in three tiers: a beginner kit with a modest telephoto and tripod, an enthusiast setup with a 300–600mm lens and solid support, and an advanced rig with a super‑telephoto or telescope. Any camera can work, but more reach and steadier support make the moon bigger and sharper.
Mirrorless bodies help at night with bright electronic viewfinders and focus magnification, while DSLRs are rugged and often cheaper used. Full‑frame sensors handle noise and dynamic range well, but crop bodies give extra apparent reach, turning a 400mm into a 600mm equivalent on a 1.5x crop, which is handy for tight lunar frames.
Resolution also matters because you will crop. A 24–45 MP camera gives you room to trim the frame while keeping crisp detail on craters and rilles. In-body stabilization is useful for handheld shots, though on a tripod you will usually turn stabilization off to avoid micro‑vibrations.
Choose lenses by your goal. At 200–400mm you can tell a story with the moon small above a landscape or city skyline. At 400–800mm you can fill much of the frame with the lunar disk and show prominent maria and large craters. Beyond 1000mm, or with a telescope, you can resolve fine features like the Alpine Valley and delicate terminator shadows.
Teleconverters extend reach, but they cost light and sharpness. A 1.4x converter usually keeps good quality with a one‑stop loss, while a 2x converter hits autofocus and contrast harder and is best on top‑tier lenses. Cropping is a safe alternative if your lens is already near its sweet spot and your camera has enough pixels.
Most lenses sharpen up around f/8 to f/11 for the moon. Stopping down to f/16 can soften detail due to diffraction, especially on high‑resolution sensors. Test your lens at f/8 and f/11, then pick the sharper result and stick with it for consistent output.
A sturdy tripod is non‑negotiable for long lenses. Use a solid ball head or a gimbal if your lens has a tripod foot so the rig balances and resists wind. Hang a bag under the tripod or spread the legs lower if gusts push the setup around.
A remote shutter release or intervalometer reduces shake and lets you fire bursts easily. If your camera offers electronic front‑curtain shutter or full electronic shutter, enable it to cut vibration at long focal lengths. As a fallback, the two‑second self‑timer works well for single shots.
Turn off image stabilization when the camera is firmly on a tripod, because the system can hunt and blur the frame. Leave stabilization on for handheld shots or when your tripod is on a moving surface like a deck. If both body and lens have stabilization, pick one system to avoid fighting corrections.
Tracking mounts are optional but powerful for advanced work. A mount with a lunar tracking rate keeps the moon pinned while you record longer sequences for stacking, or a timelapse of an eclipse. Equatorial mounts shine for long runs, though for single‑frame moon photos you do not need tracking at all.
A telescope pair with a DSLR or mirrorless body is a classic path to extreme detail. Use a T‑ring plus the right adapter to shoot at prime focus, and add a Barlow for more magnification or a focal reducer for wider coverage. Keep the rig balanced because small shakes are magnified at long effective focal lengths.
Do not forget practical accessories. Bring spare batteries and faster memory cards for bursts, a red headlamp to protect night vision, a microfiber cloth for dew, and a simple dew heater if your nights get humid. A phone clamp and mini‑tripod are handy if you plan a smartphone backup shot.
Smartphones can surprise you with the right support. Use a tripod adapter, set exposure low to avoid blown highlights, and fire a burst to pick the sharpest frame. Clip‑on telephoto lenses can help a little, but a stable mount and careful focus lock matter more.
For a deeper dive on kit combinations and sample setups, skim a concise moon guide before heading out. It will clarify how focal length changes the moon’s size in your frame and what support systems keep details tack sharp.
Camera Settings for Moon Photography
Start in Manual mode—auto exposure and AF will often fail for lunar shots. This is where how to photograph moon becomes a simple recipe you can repeat and refine. Lock your settings, read the histogram, and make small adjustments.
The Looney 11 rule is your first exposure. At f/11, set shutter speed to about 1 over ISO, then check the histogram for clipping. It puts you very close in most clear conditions.
Here are concrete numbers you can dial without thinking. ISO 100 at f/11 gives 1/100s, so pick 1/125s on most cameras. ISO 100 at f/8 brightens the lens one stop, so go to 1/200s to keep exposure the same.
If light dims or haze thickens, raise ISO to 200 at f/11 and use 1/200s. Treat these as starting points and trim by a third of a stop based on the highlight warning. Aim to keep detail in the bright maria without turning the moon into a flat white circle.
Shutter speed must also match your focal length to avoid blur. Use the reciprocal rule: shutter speed should be at least 1 over focal length times crop factor. At 300mm on a crop body, try 1/300s or faster, and at 600mm aim for 1/600s or faster to freeze micro‑vibrations and the moon’s drift.
Remember the moon moves quickly across the sky. Even on a tripod, very long focal lengths will show motion if your shutter gets too slow. When seeing is turbulent, push shutter speed a bit faster than the rule and raise ISO slightly if needed.
Aperture between f/5.6 and f/11 works for most lenses. Use f/8 to f/11 to land in the sweet spot, and avoid stopping down to f/16 unless your lens is unusually soft wide open. Keep ISO low, typically 100–400, for single‑frame shots, and prefer stacking later instead of cranking ISO high.
Use spot or center‑weighted metering and put the spot on the moon. Expose a touch to the left of the histogram to protect highlights, because a clipped lunar disk cannot be recovered. If you plan a landscape composite, bracket by one or two stops so you have a clean moon and a pleasing foreground.
Set RAW capture and shoot continuous low to fire short bursts. From a burst of five to ten frames, at least one will be a hair sharper when seeing steadies. If your camera offers high‑resolution video, record a few seconds and stack the best frames later for “lucky imaging.”
Use Daylight white balance around 5200K for a natural gray moon, or pick a cooler tone for a bluish night feel. Do not worry too much, as you can fine‑tune color in post when shooting RAW. Keep long‑exposure noise reduction off for the moon to avoid delays between frames.
Make a small field card with the essentials so you can work fast. Write down Looney 11, a reminder to check the histogram, and the reciprocal rule for shutter speed. Tape it to your tripod leg and you will never forget how to photograph moon in the dark.
If you want extra context from scientists on exposure and stability, bookmark these concise lunar tips before your shoot. They reinforce the idea that the moon is sunlit rock, not a dim night subject, and that crisp technique beats exotic settings.
Sample settings reference: 600mm on APS‑C, RAW, ISO 200, f/8, 1/800s, spot meter on the limb. The histogram sits just left of center, highlights are safe, and the crater rims show clean edges.
How to Focus Accurately and Avoid Common Mistakes
Sharp focus makes or breaks the shot, even more than exposure. Most soft moon photos are slightly front‑ or back‑focused, and small errors show at long focal lengths. Slow down and follow a simple focusing routine every time.
1. Mount the camera firmly and stabilize the setup, then turn off stabilization on the tripod. Make sure the lens collar is tight and the head is locked. Wait out gusts if wind is shaking the rig.
2. Use Live View and magnify to maximum on the lunar limb, where bright craters meet black space. Switch to manual focus and rock the ring past sharpness, then come back slowly until pixels look crisp. The high‑contrast edge reveals focus better than the bright center.
3. If autofocus locks well because the moon fills the frame, use a single point on the limb. After AF confirms, flip to manual focus to prevent hunting. Recheck at full magnification to be sure you did not lose the lock.
4. Trigger the shot with a remote or the two‑second timer and use mirror lock‑up or electronic shutter. This removes mechanical vibration that blurs micro‑detail. Fire short bursts to beat moments of shaky air.
Verify focus immediately in the field. Zoom to 100% on the LCD and look for crisp crater walls and fine ridges near the terminator. If the edges look mushy, refocus and try again.
If the moon is a white blob with no detail, your exposure is too hot. Drop shutter speed a stop or two or close the aperture to match Looney 11, and use spot metering. Check the blinkies and bring the highlights back inside the histogram.
When images look soft, it is usually a focus or motion problem. Try a faster shutter and confirm focus at full magnification, then shoot extra frames and stack the best later. Keep the tripod lower and add weight if wind is an issue.
Autofocus hunting is common when the moon is small in frame or thin in phase. Switch to manual focus and magnified Live View to nail it. If your lens has a focus limiter, set it to the “far” range.
Camera shake can sneak in through light tripods or a wobbly deck. Use a heavier tripod, tighten everything, and shelter from wind behind a wall or car. A sandbag on the center column helps dampen vibrations.
Atmospheric distortion, called “seeing,” softens detail when the moon is low. Shoot when the moon is higher in the sky and record bursts at several times, then pick the sharpest moments. Stacking is your friend when the air won’t sit still.
If you are using a telescope, confirm you have enough backfocus to reach focus with the camera. Use your focuser’s fine knob and consider a focus mask on a bright star, then swing back to the moon and touch up. It is not required for lunar work, but it makes first focus much faster.
Planning, Timing & Composition
The most striking lunar photos are planned with care. Timing controls color and scale, and location sets the stage. A few minutes of prep turn a good shot into a portfolio image.
Moonrise and moonset are the easiest times to add drama. The moon passes through thicker atmosphere, which adds warm color and creates the famous “big moon” illusion. You can place it beside a tower or above a ridge and tell a story.
Shoot near golden hour or blue hour when you want a balanced landscape and a detailed moon. The sky is brighter, so the dynamic range between foreground and moon is kinder. You can bracket and blend if the foreground still needs extra light.
Phases matter for texture and mood. Gibbous and quarter phases show the best relief because the terminator’s shadows carve depth across the surface. The full moon is bright and easy but flatter, so center composition on symmetry or save it for eclipse night.
Special events add emotion and scale. A supermoon rises slightly bigger and brighter, and a lunar eclipse lets you keep shooting safely with no filters while the light falls into red. Plan for longer shutter speeds during totality and watch vibration, because exposures can stretch to seconds.
Use planning apps to line up the moon with your chosen foreground. Photopills, TPE, Stellarium, and MoonCalc will show where and when the moon rises, sets, and tracks across the sky. Check angles, elevation, and the exact minute the alignment happens.
Photopills has a great trick with its FOV and AR tools. You can preview how big the moon will look at different focal lengths and where it will land behind your subject. This helps you pick a lens and decide how far back you need to stand.
Composition with the moon rewards strong foregrounds and silhouettes. Telephoto compression can make a distant building or peak seem to swell under the lunar disk. To exaggerate the size relationship, put yourself far from the subject and use a long lens to pull them together.
Think about distance more than size alone. If your subject is very close, the moon will always look small above it, even at 600mm. Move back hundreds of meters or even a few kilometers and let compression do the heavy lifting.
Frame with clean shapes and simple lines. A ridge line, lighthouse, or city spire gives the moon a stage and creates a clear focal point. Layered exposures are fine if you shoot a sharp moon separately and match the perspective when you blend.
If you want the moon to look bigger, combine distance and focal length instead of only chasing extreme zoom. A well‑placed 400mm shot from far away often looks larger than a 1200mm shot from too close. The limitation is your line of sight and how far you can safely step back.
Check weather and seeing forecasts before you go. Clear air with low haze brings crisp detail, while low altitude shots often shimmer. Meteoblue or ClearOutside can hint at upper‑level winds that smear fine texture.
Arrive early and scout in daylight to find exact tripod spots and safe paths. Practice your framing and mark a few positions so you can shift quickly if the alignment drifts. Keep a minute‑by‑minute plan and a backup angle if the horizon clouds up.
Sample composition reference: rising moon behind a lighthouse at 400mm, ISO 200, f/8, 1/250s from 1.2 km away. The compression sets the lantern room under the lunar rim, and a quick bracket adds detail to the bricks without blowing the highlights.
For a step‑by‑step planning walkthrough with maps and AR previews, read a concise planning guide before your next outing. It will show you exactly where to stand and which focal length will nail your alignment.
Post-Processing & Advanced Techniques
Post‑processing is where you turn a good capture into a great moon photograph. There are two main workflows: a single RAW edit for a clean lunar disk, and a composite for landscape scenes where the foreground needs a different exposure. Pick the method that matches your shoot.
For a single RAW edit, protect highlights first, then add a bit of contrast and clarity or texture to pull out fine craters. Keep colors neutral so maria stay gray with a slight brown or blue cast if you like. If haze flattened the frame, a touch of Dehaze or local contrast brings back snap.
For composites, shoot a sharp, properly exposed moon and a separate frame for the foreground. In Photoshop or Affinity, layer the moon above and mask carefully around the disk, matching color temperature and brightness so it looks natural. Keep the moon’s size consistent with what your focal length would show from the camera position.
Stacking and “lucky imaging” can lift detail and reduce noise dramatically. Record bursts of stills or short 4K/8K video clips, then run the footage through stacking software such as AutoStakkert!, RegiStax, or Photoshop’s align and stack tools. The stack averages out bad frames and boosts micro‑contrast on craters and rilles.
The basic stacking steps are simple. Capture lots of frames, pick the sharpest percentage, align on surface features, stack them, and then apply gentle sharpening. Save an unsharpened master layer so you can retreat if halos appear.
Sharpen lightly with wavelets or deconvolution and watch for bright edges around the limb. A small radius and moderate amount preserves texture without fringing. Add noise reduction only where needed, usually in shadows or the dark sky around the disk.
Chromatic aberration sometimes shows as green or purple along the limb. Use your RAW editor’s CA removal, and if color remains, try a targeted desaturation with a soft brush. Good focus and a stopped‑down aperture reduce CA at the source.
If you used a telescope, you may need to derotate for long sequences so features align over time. Crop generously to center the moon and correct vignetting with lens profiles or flat frames if you shot them. Keep the workflow simple so you can repeat it quickly on your next session.
Export for the web in sRGB at around 2000–3000 pixels on the long edge with modest output sharpening. For print, resize to your final dimensions at 300 ppi and proof on a neutral background. Save layered files so you can revisit adjustments later.
Before and after comparison: single frame at 600mm versus a 300‑frame stack from the same clip shows sharper crater rims and smoother maria. Subtle wavelet sharpening adds bite, and a slight contrast curve keeps the highlights intact.
Build yourself a one‑page cheat sheet with Looney 11 examples, the reciprocal rule, and a tiny gear checklist. Tape it to your bag so you never forget how to photograph moon when the sky clears. With a repeatable process and a patient eye, your lunar shots will improve every month.
What People Ask Most
How to photograph moon?
Start with a steady setup, zoom in or use a longer lens, and adjust exposure and focus so the moon is sharp and not overbright.
Can I photograph the moon with a smartphone?
Yes, you can get good results by stabilizing your phone, using optical zoom or a clip-on lens, and locking focus and exposure before shooting.
What time is best to photograph the moon?
Moonrise and moonset or phases like crescent and half often show more surface detail and interesting light, but any clear night can work.
Why does the moon look blurry in my photos?
Blurriness is usually caused by camera shake, wrong focus, or atmospheric haze, so steady your camera and refocus to fix it.
Should I use auto mode when learning how to photograph moon?
Auto can help for quick shots, but switching to manual or adjusting exposure lets you control brightness and sharpness for better results.
Can I capture moon details like craters?
Yes—using higher magnification, a steady setup, and taking multiple shots to combine can reveal more crater detail.
What common mistakes should beginners avoid when learning how to photograph moon?
Avoid using only digital zoom, shooting handheld, trusting default exposure, and ignoring weather and focus, as these all reduce image quality.
Final Thoughts on Moon Photography
Photographing the moon stops feeling like a mystery once you can turn nights into sharp, textured images that hang on your wall, and the rewards are immediate in both print and pixels. Even a 270 setup will deliver satisfying lunar shots when you pair the right reach with solid stabilization and exposure technique.
Remember one realistic caution: atmospheric seeing, wind, and optics will limit detail more than technique alone, so expect variable results and plan for stacking or multiple attempts. This guide showed how to pick gear tiers, nail exposures with the Looney 11 rule, and focus with magnified Live View so you can work around those limits. It’s most useful for backyard shooters, landscape photographers, and hobbyists with telephoto lenses or small scopes.
We opened by asking what matters most — focal length and stability — and closed with step‑by‑step settings, focusing workflows, planning tricks, and post‑processing so you can make that question practical. Get out on a clear night, try the steps, and enjoy watching your moon photos improve.


0 Comments