
Want your vertical videos to stop scrollers mid-swipe and feel cinematic rather than shaky, even when you’re shooting on the move in crowded, fast-paced environments?
This guide rounds up the five best gimbals for vertical and portrait shooting, covering tools that span smartphones to pro mirrorless and cinema rigs. We highlight options that make upright framing effortless and deliver smooth, usable footage whether you’re walking, panning for a product shot, or capturing fast-paced social content.
Our selection process zeroed in on the features that actually matter for portrait workflows, not just impressive spec sheets. We prioritized vertical support, rock-solid stabilization, intuitive controls, payload capacity, dependable tracking, compact portability, and battery life under real shoot conditions, and we weighed build quality, app integration, and ergonomic handling so each pick performs smoothly from setup through the final edit. This roundup is aimed at social creators, vloggers, and semi‑pro to professional videographers who need quick vertical setups or higher payload precision; read on to find the gimbal that speeds your workflow and lifts your vertical storytelling to a consistently polished level.
1. DJI Osmo Mobile 7 for Vertical Video

DJI Osmo Mobile 7 3-Axis Smartphone Gimbal for iPhone/Android
Capture smooth, cinematic phone footage with effortless one-handed control, smart tracking, and lightning-fast setup for on-the-go creators.
Check PriceThe DJI Osmo Mobile 7 is built specifically for smartphone creators who want fast, reliable vertical video without fuss. As a working photographer and videographer, I appreciate that it targets vloggers and social creators—casual to intermediate users who need professional-looking footage with minimal setup.
Its auto-balancing system removes the usual headache of manual balancing, so you’re ready to shoot almost immediately. ActiveTrack 5.0 delivers intuitive, reliable subject tracking during movement, and the quiet motors plus smart stabilization algorithms keep footage crisp and smooth even when you’re walking or shooting run-and-gun sequences.
Switching between portrait and landscape is simple thanks to the one-button portrait/landscape mode switch, which means you won’t lose momentum mid-shoot to rebalance. The DJI app ties in well, giving you direct control over ISO, shutter speed, and focus—handy for dialing looks on the fly without fumbling your phone settings.
There are limitations to be aware of: the Osmo Mobile 7 is designed primarily for smartphone use, so it’s not ideal for complex filmmaking setups with larger cameras. Also, if you rely on external mics or other accessories, you may need adapters or cables to integrate them cleanly into your workflow. For anyone making vertical content for social platforms, though, this gimbal is close to perfect—fast to set up, stable in motion, and very user-friendly.
- Quick setup with auto-balancing
- Reliable ActiveTrack 5.0 tracking
- One-button portrait/landscape switching
- Quiet motors and smooth stabilization
- Primarily for smartphone use
- External mics may require adapters/cables
2. Zhiyun Smooth 5S for Vertical Video
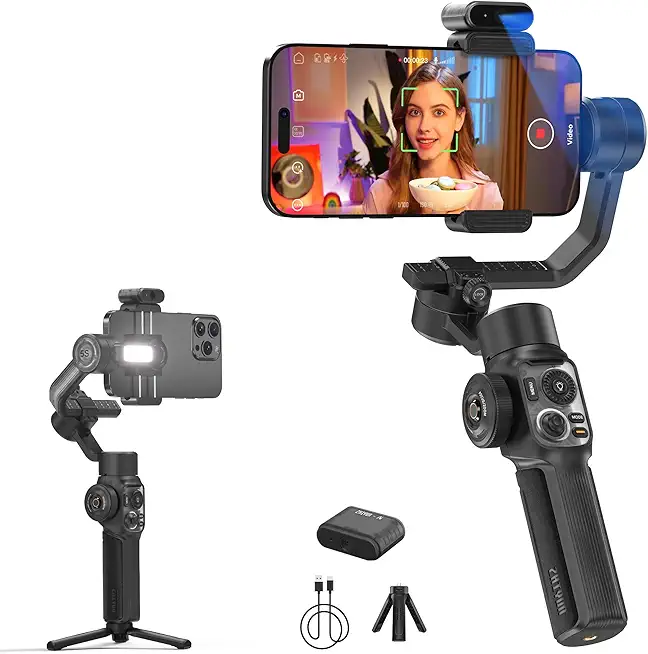
ZHIYUN Smooth 5S AI Combo 3-Axis Smartphone Gimbal for iPhone 15 Pro Max & Android
Professional-level stabilization with AI-assisted tracking, precision controls, and creative modes for flawless motion and vlogging excellence.
Check PriceZhiyun Smooth 5S is a compact, well-rounded gimbal that stands out for handling larger smartphones and cases without fuss. As a photographer who shoots a lot of handheld content, I appreciate that it balances portability with actual power.
The motor system is lightweight but powerful, giving superior stabilization when I’m moving through crowded streets or shooting quick run-and-gun clips. It produces very steady footage and the controls remain responsive even with heavier phone setups.
Cinematic modes are a real highlight — they bring advanced creative techniques I used to reserve for pricier rigs straight to a smartphone workflow. Those modes let you craft smoother reveals, dynamic push-ins, and more polished storytelling without adding bulk.
The interface strikes a nice middle ground between plug-and-play ease and customizable pro controls, so you can start shooting quickly and still fine-tune behavior as you learn. That makes it a good choice for vloggers and semi‑pro creators who want more creative options without carrying a full rig.
Because it’s lightweight, the Smooth 5S reduces fatigue on long shoots or when you’re holding it overhead for vertical framing sessions. It truly feels designed for creators who need portability plus professional functionality.
Two practical cautions: the advanced cinematic modes have a learning curve for beginners, so expect to spend some time experimenting. Also, Zhiyun users report frequent firmware updates to maintain peak performance, so plan for occasional maintenance.
- Handles heavier smartphones easily
- Brings creative cinematic modes previously found on premium gimbals
- Excellent stabilization with easy-to-use controls
- Lightweight design reduces fatigue during extended use
- Advanced modes present a learning curve for beginners
- Frequent firmware updates reported for best performance
3. Insta360 Flow Pro for Vertical Video

Insta360 Flow Pro 3-Axis AI-Powered Smartphone Gimbal
AI-powered stabilization delivering buttery smooth footage, intelligent framing, and compact portability for adventurous creators and travel storytellers.
Check PriceAs a working photographer I appreciate tools that make vertical shooting simple and reliable. The Insta360 Flow Pro’s industry-leading AI tracking keeps subjects centered even in busy, dynamic environments. That alone makes it a standout for run-and-gun and event work.
It’s compact and foldable, so I toss it in my kit bag without guilt. The long-lasting battery comfortably handles a full day of shooting. The 360° rotation capability also opens up creative rotational shots that stand out on social feeds.
In practice the tracking consistency means fewer retakes and less babysitting when I’m covering a one-person interview or a moving subject. Portability lets me move between locations quickly. Battery life keeps me shooting through long sets and events without swapping packs.
There are trade-offs to consider. The app ecosystem feels less mature and intuitive compared to DJI, so expect a bit of a learning curve and fewer polished app features. The “Pro” version is also priced higher than some competitors, which matters if budget is tight.
If your priority is reliable AI tracking, travel-friendly design, and long battery life for vertical social clips or event coverage, the Flow Pro is a very capable option. If you rely heavily on advanced app features or need the most budget-friendly choice, factor those points into your decision.
- Best-in-class AI tracking consistency
- Highly portable and travel-friendly
- Long battery life supports lengthy shoots
- 360° rotation expands creative options
- App ecosystem less mature or intuitive compared to DJI
- “Pro” version carries a higher cost vs competitors
4. DJI RS4 Pro for Vertical Video
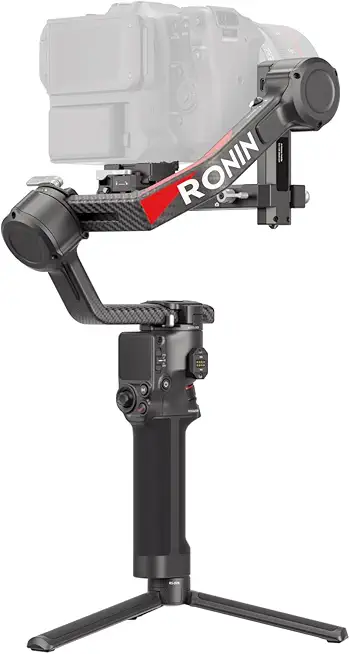
DJI RS 4 Pro 3-Axis Camera Gimbal 4.5 kg payload
Supports heavy camera rigs up to 4.5 kg, offering rock-solid stabilization, precise control, and cinematic motion for professional productions.
Check PriceAs a working photographer I appreciate gimbals that remove compromises, and the DJI RS4 Pro is built for vertical shooters who don’t want to downsize their camera kit. It ships with a horizontal-to-vertical plate for native vertical shooting, so you can flip into portrait mode without jury-rigging a bracket or swapping plates mid-shoot.
Its 10 lbs payload capacity means you can comfortably run full-frame mirrorless bodies with cinema lenses, rigs, or batteries and still expect reliable stabilization. The motors get a 20% torque increase over previous generations, which translates to smoother operation when you’re pushing the gimbal with heavier glass or accessories.
Workflow-wise the RS4 Pro is versatile: remote control via app, Bluetooth, or even gaming controllers lets you trigger movements and tweaks from a distance. That’s useful on solo shoots or when the camera is mounted on a rig and you need to fine-tune follow settings without crawling under a tripod.
Build quality and thoughtful design cuts setup time; attention to detail in the build makes frequent vertical switching less fiddly in the field. Still, it’s not a plug-and-play toy for beginners — balancing heavier rigs takes patience and practice, and there’s a learning curve if you haven’t used professional gimbals before.
If you’re a professional videographer or a solo content creator who relies on heavier mirrorless or cinema cameras for vertical content, the RS4 Pro is a strong choice. It gives you the payload, torque and control options to produce stable, cinematic vertical footage without constantly changing hardware.
- Effortless vertical shooting switch mechanism
- High payload capacity and improved motor torque for professional setups
- Remote app and additional controller options increase versatility
- Solid build quality and design refinements reduce setup time
- Balancing heavier rigs can be time-consuming initially
- Higher learning curve for beginners unfamiliar with professional gimbals
5. Zhiyun Weebill 3S for Vertical Video

ZHIYUN Weebill 3S Gimbal Stabilizer for DSLR and Mirrorless Cameras
Lightweight support for DSLR and mirrorless systems, balancing agility with payload strength for smooth handheld filmmaking and run-and-gun shoots.
Check PriceThe Zhiyun Weebill 3S feels built for long days on set — its rotating sling grip allows secure two-handed operation and an ergonomic design that genuinely reduces fatigue during extended shoots. As a photographer who switches between handheld and sling work, I appreciate how that grip lets you move fluidly without fighting the gimbal’s weight.
Stabilization is where the Weebill 3S shines: it delivers excellent stabilization for walking and rapid movements, producing smooth, cinematic footage even when you’re on the move. The strong motors handle heavier DSLRs and mirrorless cameras, so it’s a solid option if you step up your rig beyond lightweight setups.
Battery life sits around 11.5 hours, which will usually get you through a full shooting day, though it’s worth noting that this is shorter than some rival gimbals. Portrait/landscape switching works but can require rebalancing in some cases, so plan a quick rebalance when you flip orientations to avoid drift during a take.
All told, the Weebill 3S is best for serious content creators who need reliable stabilization and ergonomic handling for run-and-gun or extended handheld work. If you prioritize motor strength and comfortable two-handed control, this gimbal will serve you well; just be mindful to rebalance when changing orientations and carry a spare battery if you push long multi-day shoots.
- Ergonomic design reduces fatigue during long shoots
- Strong motors handle heavier DSLRs and mirrorless cameras
- Smooth, cinematic stabilization with advanced controls
- Portable enough for on-the-go shooting
- Battery life shorter than some rival gimbals
- Portrait/landscape switching not always seamless; may need rebalancing
Balance Your Camera Vertically
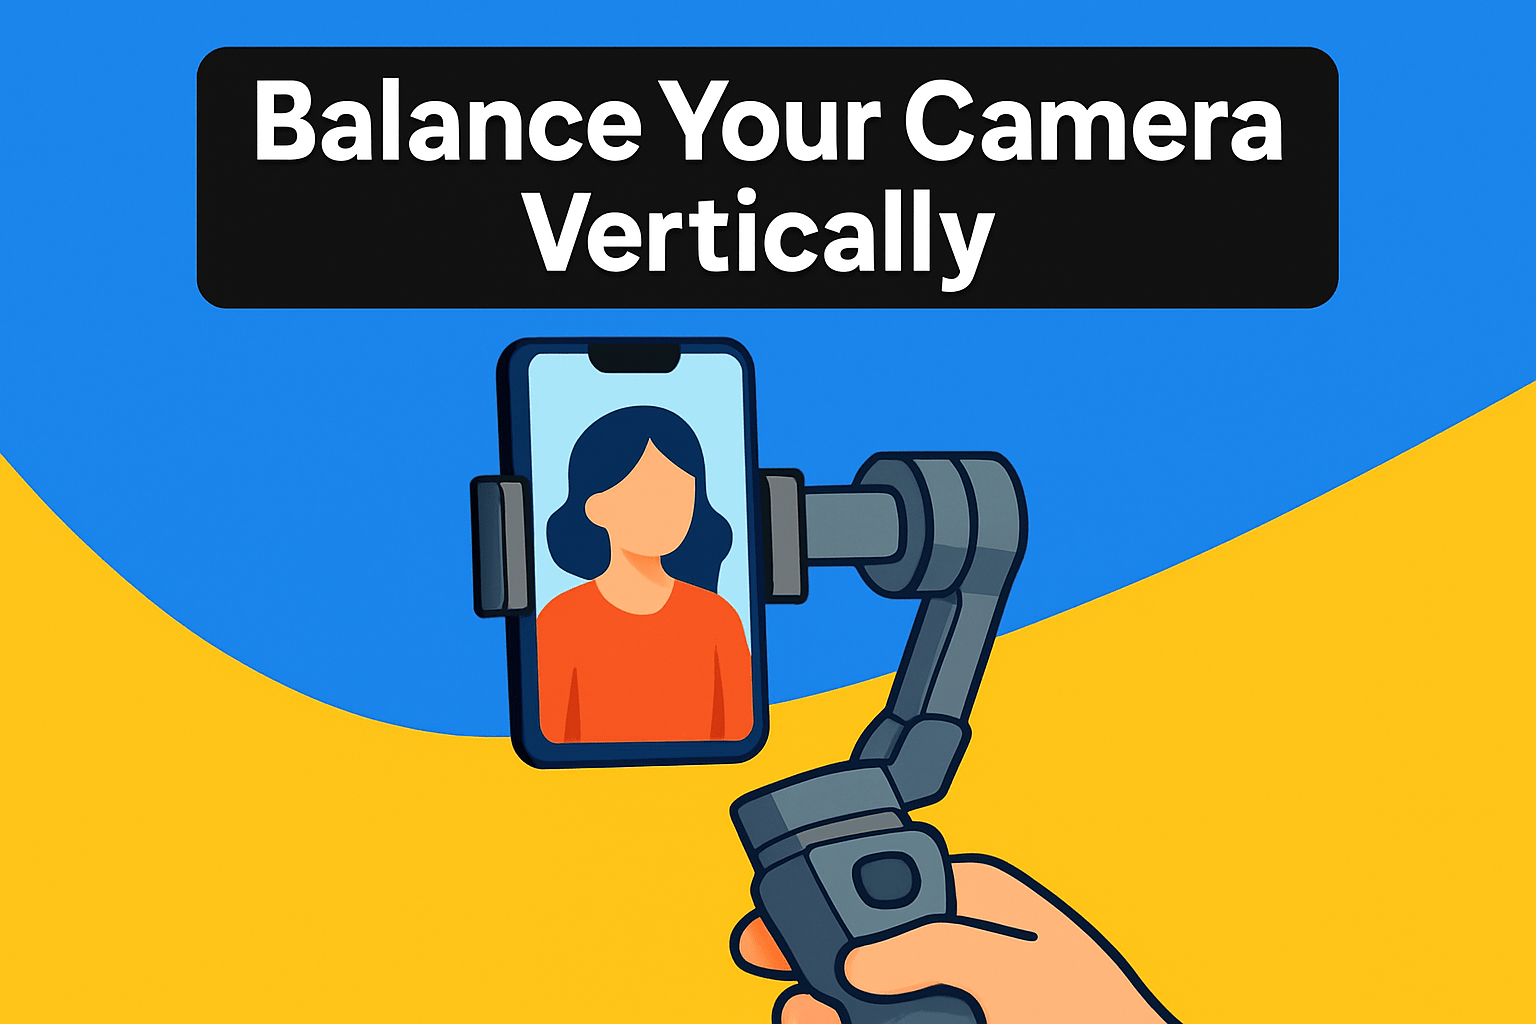
Balancing a camera in portrait is about more than convenience — it keeps motors happy and gives you the clean, drift-free footage buyers notice. Start with the camera mounted in portrait on a vertical plate or L‑bracket, and always do this on a flat, stable surface so small adjustments behave predictably.
With the gimbal powered off, unlock the tilt axis and slide the camera forward or back until it holds level when released. Next, rotate the roll so the lens points up and slide the camera up or down until it stays put; finally check the pan by tilting the gimbal ~45° and sliding left/right until the camera doesn’t swing.
A good rule I use: balance with the heaviest lens and any accessories you plan to shoot with. Adding mics, batteries, or a follow focus after balancing is a fast track to trouble — cables and dangling adapters will change the center of gravity and introduce drift, so secure or reroute them before the final check.
Lock down the plate once everything holds, then power up and run any auto‑tune or calibration your gimbal offers. If the motors hum or you see odd jitter during moves, power off, make tiny plate adjustments, and recheck — small shifts often fix big behavior problems.
If you’re working with heavy mirrorless or cinema rigs, use a cage or an L‑bracket to bring the camera’s center of mass closer to the gimbal’s mounting axis. I often mark the sweet‑spot on the quick‑release plate with a bit of tape after I’ve found it — saves time when swapping bodies or lenses in the field.
Final sanity test: with the gimbal on, tilt each axis gently; the camera should return smoothly to center and hold position when you stop. If it drifts, rebalance — a few extra minutes here pay off with steadier footage and less motor strain during a long shoot.
Portrait Mode Gimbal Setup
Getting your gimbal truly ready for portrait shooting is less about gadgetry and more about small rituals that keep your footage clean and predictable. Start with the hardware: power everything off, swap in the vertical adapter or rotate your camera 90° in a cage or L‑bracket, then lock the plate down. I always mount the heaviest lens and any microphone or battery I plan to use before I ever try to balance.
Balance on a flat, steady surface makes life easier. Slide the camera until the tilt, roll and pan axes all hold position when unlocked. Do the “power‑off test” — nudge each axis gently; if the camera drifts, rebalance. This saves motor strain and keeps the gimbal humming quietly during long takes.
Once the hardware feels right, boot the gimbal and enable portrait or vertical mode in the settings. Some units prefer an FPV setting to allow full rotational freedom; check your touchscreen or app for the correct mode so follow behavior and motor tuning match the vertical orientation.
Run auto‑tune or calibration if your gimbal offers it. It’s a small step with a big payoff: motors will adapt to the new center of gravity and tracking becomes more reliable. If you change lenses, batteries, or add accessories, rebalance and rerun the tune — don’t assume it will be fine.
Use a cage or L‑bracket for heavier mirrorless and DSLR combos to keep the camera stable and to protect your alignment. If your gimbal lacks a vertical plate, a good third‑party bracket will save time and frustration and let you keep consistent framing between shoots.
When shooting, secure all locks and keep your movements deliberate. Vertical compositions magnify headroom and lead room mistakes, so rehearse your pans and walks slowly. If you rely on tracking, test it in the portrait orientation to ensure faces and key subjects stay framed where you want them.
For long handheld sessions, ergonomic grips or a sling handle cut fatigue and help steady subtle moves. Keep an eye on battery life too — portrait rigs can draw more current when motors hold larger moments of torque.
Little discipline in the setup pays off as smoother footage and fewer reshoots. Balance thoroughly, enable the right portrait mode, and treat every lens or accessory change as a new setup. Your vertical footage will look like you intended, not like you improvised.
What People Ask Most
Can I use a gimbal for vertical video?
Yes, many gimbals support vertical shooting either natively or with a simple adapter. You may need to rebalance and enable a portrait mode in the gimbal settings for best results.
How do I set up a gimbal for vertical (portrait) mode?
Mount the camera or phone in the portrait orientation and secure it to the vertical adapter or bracket. Rebalance the axes, power on the gimbal, and select the portrait or vertical setting in the app or on the device if available.
Which gimbals support portrait/vertical shooting for smartphones?
Many smartphone-focused gimbals include portrait support or a dedicated portrait bracket, and app features that optimize follow behavior. Check the product description and app capabilities to confirm vertical mode and easy switching.
Do I need a special gimbal for vertical video?
Not always; some standard gimbals offer portrait adapters or built in vertical support so a separate unit is not required. For heavier cameras or complex setups, a gimbal designed for professional rigs may be more suitable.
How do you balance a gimbal in vertical orientation?
Place the camera in portrait orientation on the vertical plate and adjust tilt, roll, and pan so the camera stays in position when the gimbal is powered off. Perform a final check by gently moving each axis and rebalancing until the camera holds steady.
What features should I look for in a gimbal for vertical video?
Look for reliable portrait or vertical mounting options, strong motor support for your camera, smooth tracking modes, and intuitive app controls. Portability and good battery life also help for on‑the‑go vertical shooting.
Can I use a mirrorless or DSLR on a gimbal for vertical video?
Yes, many gimbals are compatible with mirrorless and DSLR cameras when the gimbal supports the camera weight and has the appropriate mounting plate or cage. Always rebalance after attaching a heavier camera and adjust settings for stable vertical operation.
Conclusion for Vertical Video Gimbals
Whether you shoot on a smartphone or a mirrorless/cinema rig, these five gimbals cover the spectrum of vertical support, stabilization and portability to match different creator workflows.
Choose by matching payload needs, tracking requirements, portability and how the gimbal fits your editing and shooting routine rather than chasing features alone.
Before you commit, test balancing and portrait setup with your actual camera and accessories to confirm fit and avoid surprises on a shoot.
To continue improving your vertical‑video skills and gear choices, read more articles on the site for hands‑on tips, setup walkthroughs, and workflow ideas.
Have a specific setup or question? Leave a comment below — we usually reply within a few hours to help you choose or troubleshoot.



0 Comments