How to photograph rain so every drop glows and the scene feels alive?
This guide gives a simple, repeatable workflow you can use in the field. It includes a quick settings cheat sheet for freezing drops, making streaks, night shots, portraits and macro.
You will learn how to set shutter, aperture, ISO and focus for freeze versus motion. I also cover backlighting, flash tricks, and composition ideas like reflections, umbrellas and low-angle puddle shots.
Finally, get practical gear and protection tips, a five-item on-the-go checklist, and post-processing steps with exact example settings. Read on and you will be ready to shoot rainy scenes with confidence and creative flair.
How to Photograph Rain (Step‑by‑step & quick-start cheat sheet)
Here is a simple, repeatable workflow you can follow in the field. It keeps you fast when the sky opens up and helps you make confident choices under pressure.
Check weather and location so you know where the light falls and where puddles, shelter, and reflections will form.
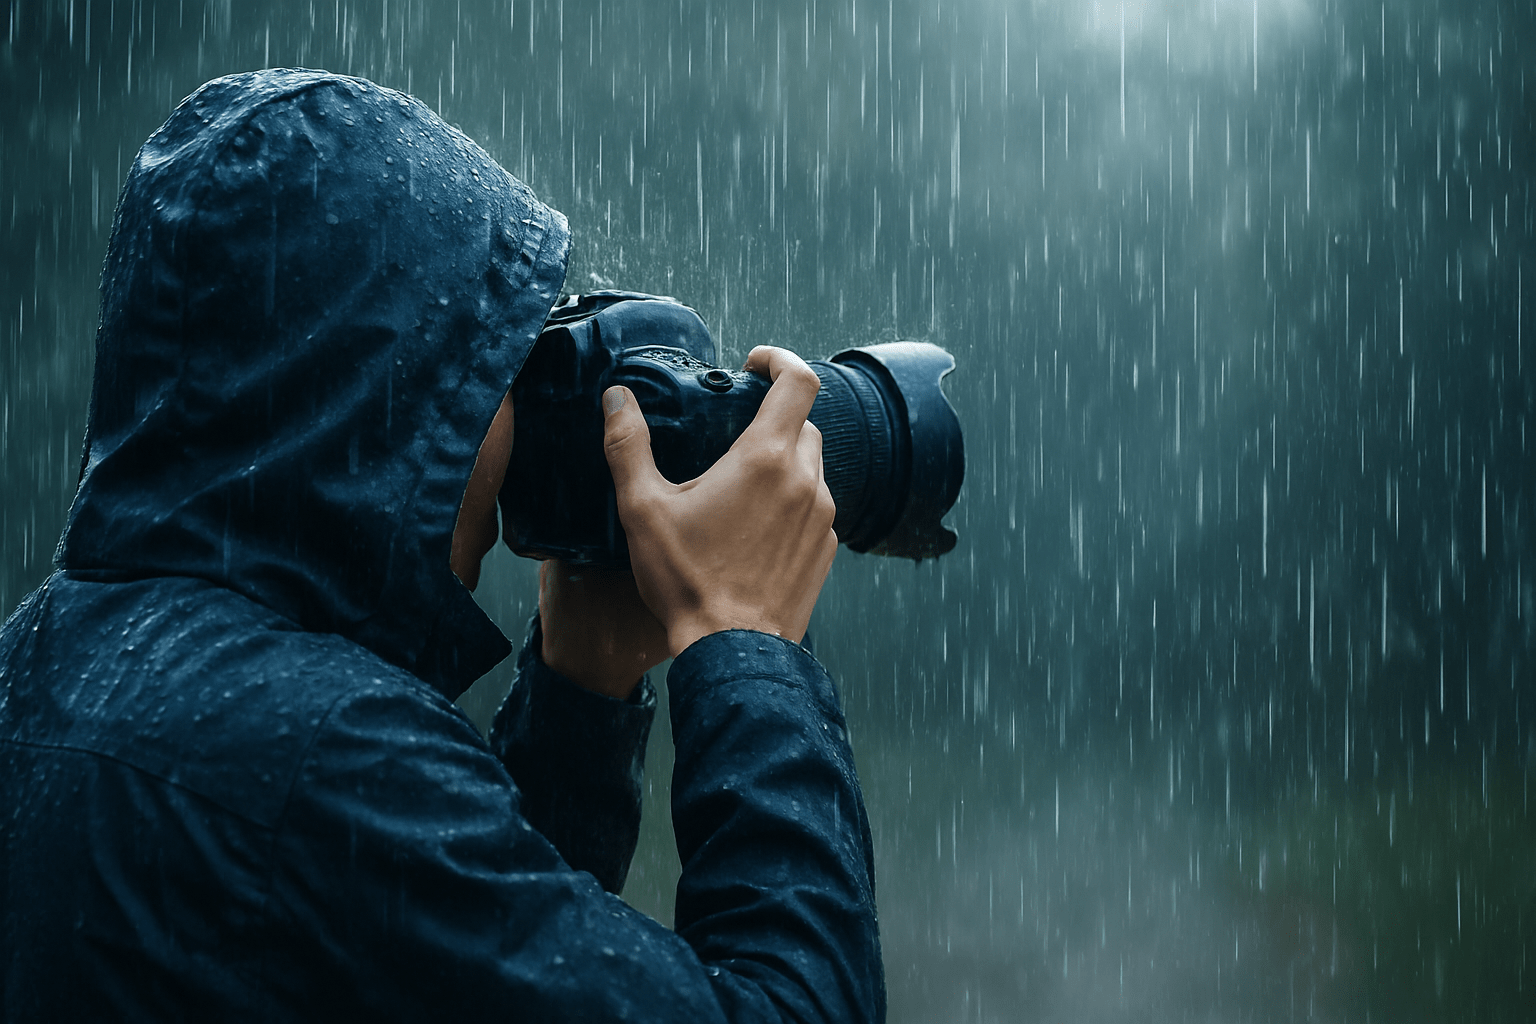
Protect your gear before you step out by fitting a rain sleeve, hood, and UV filter, and stash microfiber cloths in a pocket.
Pick a lens and compose with intention, choosing either a fast prime for shallow depth or a zoom for flexibility and background control.
Set exposure for the look you want in the rain, deciding whether to freeze drops or show motion with streaks.
Focus carefully and shoot short bursts or bracket exposures to maximize keeper rate as conditions change.
Clean your gear, wipe the front element often, and wrap up with desiccant in your bag so your kit stays dry and ready.
If you have wondered how to photograph rain without guessing, this is the core loop you can repeat all day. For extra perspective on field craft, see how other shooters photograph in the rain and adapt the ideas to your locations.
Use this quick settings cheat sheet as a fast starting point in the field. Adjust one variable at a time and watch how the rain changes in your frame.
Freeze raindrops: 1/1000–1/2000s, f/2.8–f/5.6, ISO 800–3200.
Rain streaks/long exposure: 1/8–1/2s on a tripod, f/8–f/16, ISO 100–400, add an ND filter in daylight if needed.
Backlit night rain: 1/60–1/250s, f/2.8–f/4, ISO 800–6400, with off‑camera flash or HSS to freeze drops.
Macro droplets: 1/200–1/500s, f/5.6–f/16, ISO 200–800, focus stack as needed for full depth.
Shoot RAW to preserve highlight detail and give yourself room to reduce noise later. Check your histogram often, and do not trust the LCD brightness alone.
Bracket exposures when the light is tricky or changing fast so you can blend later or choose the cleanest file. Wipe the lens between frames and minimize lens changes to keep water and mist off your glass.
As you practice how to photograph rain, keep this loop in your head, and your images will consistently improve. The goal is to make the technical choices automatic so you can focus on story and light.
Adjust Your Camera Settings — Freeze vs Motion, Focus & Exposure
The first creative choice is simple: do you want individual drops frozen or motion shown as streaks. Both are beautiful, and both start with shutter speed, so use the cheat sheet above as your anchor and adjust from there.
At 1/1000–1/2000s you will crisply freeze mid-air drops and splashes, especially in daylight or with flash. Expect tiny spheres and sparkling highlights, and remember you will often raise ISO to get there.
At 1/250–1/500s you will partially freeze drops and keep a hint of motion, which feels lively without losing form. This range works well for portraits in light rain where you want visible rain but still-sharp subjects.
At 1/30–1/125s drizzle becomes visible streaks that suggest movement and mood. Watch wind direction and background contrast so the streaks read clearly instead of blending into clutter.
At 1/8–1/2s on a tripod the rain turns into smooth, graceful lines, and night lights stretch into trails. If you need longer exposures in daylight, add an ND filter to control brightness without closing the aperture too far.
Aperture is your second lever, shaping depth of field and the character of bokeh. Wide apertures like f/1.8–f/4 isolate subjects and turn drops and background lights into creamy orbs, while mid to small apertures like f/5.6–f/16 keep more of the scene sharp and support long exposures.
Be mindful of diffraction if you close down very far, as f/16–f/22 can soften fine detail on smaller sensors. Balance sharpness with your artistic intent and the shutter speed you need.
ISO strategy should be pragmatic, not dogmatic. Keep ISO low for long exposures and scenes with plenty of light, but do not fear ISO 1600–6400 when you need to freeze action, because modern sensors and good noise reduction handle it well.
Shoot RAW to maximize latitude for noise reduction and highlight recovery. A slightly noisy, sharp file is better than a clean but blurry one when you are learning how to photograph rain in challenging light.
Autofocus can struggle on falling drops, so give it something solid. Prefocus on a static object at the distance where the drops will pass, use single‑point AF on the subject’s face or an edge at the same plane, or switch to manual focus for macro and silhouettes.
Back‑button focus is a great habit for moving subjects in the rain, as it lets you separate focusing from the shutter press. For macro droplets, use magnified live view to nail focus and consider a focusing rail if you plan to stack.
Metering can be tricky when highlights sparkle. Use spot or center‑weighted metering for backlit drops and consider slight underexposure of about −0.3 to −1 EV to preserve bright highlights, then lift shadows later in post.
When the light is changing or mixed, bracket in one-stop increments to be safe. Review the histogram, not just the preview, to avoid clipping bright droplets or luminous reflections.
Flash is a powerful tool for rain, and you can use it subtle or bold. On‑camera flash can freeze drops but often looks flat, while an off‑camera unit behind or to the side of the subject outlines drops with a rim and keeps texture.
High‑speed sync lets you use fast shutter speeds in daylight without stopping down too far, which is perfect for freezing rain with a bright ambient background. Try rear‑curtain sync at slower speeds to mix ambient streaks with a flash-frozen subject at the end of the exposure.
Enhance Shots with Backlighting & Light Tricks
Backlight makes individual drops glow because the light enters them and scatters toward the camera. Place the light behind the rain and shoot toward it, and you will see each drop outline itself like tiny beads of glass.
At sunrise or sunset, position yourself so the low sun is just out of frame and the rain is between you and the light. In the city at night, use streetlights, shop windows, and car headlights as a ready-made backlight source that you can line up behind your subject.
One flash behind your subject at a low angle creates a clean rim on the rain and a cinematic edge on hair, hats, and umbrellas. An off‑camera flash with a small diffuser keeps drops crisp while softening the light on faces, and HSS maintains control of ambient brightness.
Gels on your flash add mood and help match color temperature with sodium streetlights or neon. Warm gels give a cozy cinematic rain, while blue-green gels lean into a moody, noir feel.
At night, use passing cars to light the rain, then time a 1/4–1s exposure for light trails and long rain streaks. If you need more texture in the drops, bump ISO a stop and shorten your shutter slightly so the streaks don’t smear too far.
Practical lights like neon, shop windows, and street lamps add color contrast that makes rain sparkle. Meter for the highlights to avoid blown droplets, and let shadows fall away for drama, or lift them gently in post for a softer mood.
If you want more creative lighting ideas and a second perspective on shaping light in wet scenes, this rain photography guide is a solid complement to the steps here. Combine its color tips with your own tests for a style that feels personal.
Protect your lighting gear with clear rain covers, and keep your flash ports and batteries dry. Keep a small towel for the flash head and a zip bag for quick storage between sets so you are not working with wet, slippery gear.
Capture Reflections & Compose Strong Rainy Scenes
Rain changes the world into a mirror, so lean into reflections, silhouettes, and simple shapes. Umbrellas, coats, and boots become story clues, while wet streets and leading lines pull the eye through glowing puddles.
Get low for puddles and let the reflection do half the storytelling. You can shoot wide open to blur ripples for a dreamy look or stop down to keep the reflection crisp, and flipping the image in post can create a surreal, upside‑down opener.
For street photography, wait where light hits wet asphalt and watch for umbrellas to pass through the brightest patches. The mirrored lights create a river of color, and a clean stride or mid‑conversation gesture adds a human anchor.
Portraits in the rain love props and backlight. An umbrella gives your subject something to do with their hands and shields stray drops, while a back or side light rims the rain and makes the scene feel cinematic.
For macro and textures, explore leaves, flowers, windows, and car roofs for droplets clinging to edges. Extension tubes or a true macro lens unlock larger-than-life detail, and a small focus stack ensures the key droplets stay sharp front to back.
Landscapes after rain feel saturated and deep, especially when fog lingers in valleys or rain curtains layer the scene. Use the softness to simplify the frame and let muted tones carry the mood.
Telephoto lenses compress distance and magnify the visibility of rain, especially against a dark background. Wide angles set the story in place with reflections and foreground puddles, and a low viewpoint turns small pools into dramatic mirrors.
Shooting through windows and windshields creates painterly refractions that say “rain” even before a single drop is sharp. Touch the lens hood to the glass to reduce glare, or use a polarizer to tame reflections while keeping the room’s mood intact.
Tell a clear story by including clues that scream rain: umbrellas, puddles, steam, and neon reflections. When you think about how to photograph rain, imagine a single frame that lets viewers hear the patter and feel the chill, then build the scene around those cues.
Gear, Protection, Field Workflow & Post‑Processing Checklist
A weather‑sealed camera helps, but a simple rain sleeve, lens hood, and clear filter do most of the heavy lifting. Pack microfiber cloths, lens wipes, a blower, a compact umbrella, a dry bag, silica packets, a tripod with spikes, a remote release, spare batteries and cards, a polarizer, ND filters, and your favorite macro, fast prime, and tele zoom.
Minimize lens changes in the rain, and if you must switch, duck under cover or use a rain sleeve to shield the mount. Keep spare batteries warm in an inside pocket because cold and moisture drain them faster, and wipe your lens between shots to prevent water spots from ruining otherwise great frames.
A golf umbrella or a doorway can turn into a mobile studio when the rain intensifies. Work the edges of cover to keep your camera dry while still shooting into the rain, and stash the kit quickly in a dry bag when you move.
Use a tripod for long exposures and turn off image stabilization when the camera is locked down. Handhold steady shots by using stabilization, bracing your elbows, and timing your shutter at the bottom of your breath.
Safety first in storms: avoid open locations during lightning, and do not stand under isolated trees. Watch for slippery surfaces and fast traffic near reflective puddles, and keep an eye on rising water where curbs disappear.
Start your post‑processing by removing sensor or lens spots so raindrop circles and flare remain intentional. A quick pass with spot-heal in your editor clears distractions fast.
Adjust exposure and contrast to balance the scene, and reach for dehaze to shape atmosphere without crushing midtones. Gentle tweaks go a long way in rainy scenes because the light is already soft.
Use local dodge and burn to draw the eye to droplets, faces, and reflections. Brighten the streaks or rims you want noticed and darken busy patches that pull attention away.
Sharpen selectively on droplets, eyelashes, and textural edges so the rain looks crisp where it counts. Pair that with tasteful noise reduction for high‑ISO files, and keep an eye on halos or smeared detail.
Color grade with intent: cool the scene for moody, blue-gray rain, or warm it for cinematic backlight and golden reflections. Split toning and subtle LUTs can help unify mixed light at night.
If you choose to simulate or enhance rain, try overlays, motion blur, or selectively duplicating streaks with ethical transparency. Label significant edits when sharing so viewers know what is real and what is crafted.
For a compact refresher before you step out, here is a quick on‑the‑go checklist. Read it once on your phone and you will remember the flow as the weather shifts.
Confirm forecast and pick locations with backlight, cover, and puddle potential.
Seal your camera, set hood and filter, and stash two clean cloths in a pocket.
Decide the look: freeze or streak, then set shutter first to match the goal.
Prefocus and shoot bursts or bracket, wiping the lens between sequences.
Store gear dry with silica and swap wet cloths for fresh ones when you finish.
For phone-friendly settings, think in simple pairs you can recall instantly. These one‑liners keep you agile when the scene unfolds fast.
Freeze look: 1/1000s, f/2.8, Auto ISO capped at 3200.
Streak look: 1/4s on tripod, f/8, ISO 100, use a 3‑stop ND by day.
Backlit portrait: 1/200s, f/2, ISO 1600, one off‑camera flash behind subject.
Macro droplet: 1/250s, f/8, ISO 400, manual focus and stack 4–8 frames.
Example photos and exact settings help you see how changes map to results. Use these as references when you experiment in similar light.
Street reflection at dusk: 1/60s, f/2, ISO 1600, 35mm, backlit by shop windows with a low crouch to the puddle for a mirror effect.
Portrait in light rain with rim: 1/250s, f/2.8, ISO 2000, 85mm, off‑camera flash behind subject with a 1/4 CTO gel to warm the rim.
Frozen splash on curb: 1/2000s, f/3.5, ISO 3200, 50mm, continuous burst timed to a car tire hitting a puddle.
Long‑exposure streaks at night: 1/2s, f/11, ISO 200, 24mm on tripod, metered for street highlights with rear‑curtain sync to freeze a passerby at the end.
Macro leaf droplet: 1/320s, f/11, ISO 400, 100mm macro, manual focus with a small 5‑shot stack for edge-to-edge sharpness.
Landscape after the storm: 1/8s, f/16, ISO 100, 24mm on tripod, polarizer to cut glare on wet rocks and enhance color saturation.
Rain through glass for abstract bokeh: 1/125s, f/1.8, ISO 3200, 50mm, lens hood touching window to reduce reflections and focus locked on distant neon.
Backlit night rain on alley: 1/160s, f/2, ISO 5000, 35mm, single speedlight placed high behind subject to outline drops and lift steam.
If you want an extra nudge of inspiration and field-tested tricks, skim these concise rain photography tips and then head outside to practice. Nothing replaces time in the rain, and the more you shoot, the faster your choices become.
Mastering how to photograph rain is about rhythm and attention: set your shutter for the look, protect your kit, and build the frame around light and story. Stick to the simple loop, experiment with backlight and reflections, and you will bring home images that sound like the weather feels.
What People Ask Most
Do I need special gear to learn how to photograph rain?
No, you can start with a basic camera or smartphone and simple weather protection like a rain cover or plastic bag. Learning composition and timing matters more than expensive gear.
How can I capture raindrops clearly without blur?
Use a faster shutter or burst mode and keep the camera steady with your hands or a tripod. Freezing motion and taking multiple shots improves your chances of a sharp image.
Is it better to photograph rain at night or during the day?
Both can look great: night rain picks up streetlights and creates streaks, while daytime rain gives softer light and reflections. Try both to see which style you like.
How do I protect my camera while shooting in the rain?
Use a rain cover, plastic bag, or umbrella and keep a microfiber cloth handy to wipe the lens. Avoid changing lenses outdoors to keep water out of the camera body.
What composition tips help make rain look more dramatic?
Shoot into backlight to highlight drops, include reflections on puddles, and use people or umbrellas for scale and story. Low angles and contrast help emphasize the rain.
Can I use my phone to photograph rain effectively?
Yes, smartphones work well if you keep the lens dry, use burst or portrait modes, and do small edits for contrast and clarity. Practice framing and timing just like with a camera.
What common mistakes should beginners avoid when learning how to photograph rain?
Don’t forget to protect your gear, ignore lens spots that ruin photos, or rely only on automatic settings without trying different exposures. Planning your shots and checking images as you go helps you improve quickly.
Final Thoughts on How to Photograph Rain (Step‑by‑step & quick-start cheat sheet)
You came for a simple, repeatable workflow and that’s exactly what this guide delivered — from scouting and protecting gear to settings that freeze drops or stretch them into streaks. Think of the 270 as a shorthand reminder to check weather, shield your kit, and choose a shutter strategy; street shooters, portraitists, and macro fans will all gain practical steps and quick settings to make rain a creative advantage.
The core benefit is a straightforward path from idea to image — a quick workflow, a settings cheat sheet, and practical lighting and composition tricks that remove guesswork. Be realistic: rain adds risk to gear and footing, so respect safety warnings, keep kit covered, and avoid risky spots even when the scene looks perfect.
Whether you’re a beginner chasing dramatic puddle reflections or an experienced shooter refining backlight and flash techniques, you’ve got a compact, do‑it‑in‑the‑field plan to try. Pack your covers, bracket your frames, and enjoy turning dreary weather into memorable images — there’s a great shot waiting in the next downpour.


0 Comments