Ever wondered which lens will make tattoo ink pop, skin texture read true, and tiny linework hold up in a photograph?
The right glass changes everything from color fidelity to client satisfaction, whether you shoot in studio or on the road, and it reduces retouch time.
This guide breaks down five top lens and lens‑setup options, offers practical glare control methods, and gives concise lens-selection advice that works for real shoots.
Throughout we weigh practical tradeoffs—sharpness versus portability, focal-length choices for framing, aperture for depth versus edge-to-edge detail, and the role of stabilization, and how those tradeoffs affect speed and ease of shooting.
You’ll get hands-on tips for minimizing glare, managing working distance, and choosing lenses that suit both studio and mobile sessions so you spend more time shooting and less time guessing.
1. Canon RF 35mm f/1.8 IS Macro STM
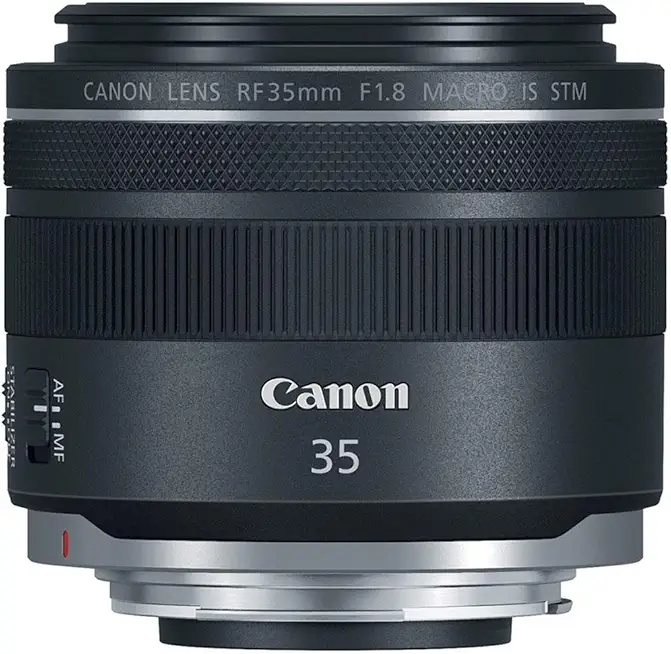
Canon RF 35mm f/1.8 Macro STM
Bright 35mm prime with true macro close-focus, whisper-quiet autofocus and sharp optics—perfect for environmental portraits and tabletop detail.
Check PriceThe Canon RF 35mm f/1.8 IS Macro STM is a very practical lens for tattoo work, especially if you shoot on Canon EOS R series bodies or an EOS M50 Mark II with an adapter. Its 35mm perspective gives a natural wide-angle look without the exaggerated distortion of a 24mm, so full-back and sleeve shots retain their proportions.
It also doubles as a macro with a ~7cm minimum focus distance, which lets you get in close and capture crisp detail on small pieces — linework and color transitions look excellent. The wide f/1.8 aperture gives you control over depth of field for subject isolation while still letting in enough light for studio and ambient-lit scenarios.
Image Stabilization makes handheld shooting in dim studios much more manageable and often reduces the need for harsh flash. Color reproduction and ease of use are frequently praised by users, so what you see in-camera generally matches what you want to show in a portfolio.
Autofocus is acceptable for most tattoo sessions but is slightly slower than pro L-series glass and can lag in low-contrast areas, so be mindful when shooting very fine, low-contrast linework or when you need split-second focus. The lens is lightweight and compact, which makes it great for mobile tattoo photographers who move between shops or shoot on location.
- Sharp macro focusing
- Effective stabilization for handheld use
- Minimal distortion at 35mm
- Lightweight and compact
- AF can lag in low-contrast areas
- Not wide enough in tight spaces for very large pieces
2. Sony FE 90mm f/2.8 Macro G OSS

Sony FE 90mm f/2.8 Macro G OSS
Telephoto macro delivering edge-to-edge sharpness, optical stabilization, and creamy bokeh for stunning close-ups and flattering portrait compression.
Check PriceThe Sony FE 90mm f/2.8 Macro G OSS is a dedicated macro that gives you true 1:1 life‑size reproduction, so you can capture the tiniest linework, skin texture, and ink saturation with absolute fidelity. Its 90mm focal length provides a comfortable working distance that keeps you out of the client’s face while maintaining excellent subject isolation—perfect for close detail shots without distortion.
Optical SteadyShot (OSS) stabilization makes handheld macro work far more practical in dim studio light, reducing the need for harsh flash and allowing for tack‑sharp results at slower shutter speeds. The lens is highly regarded for its sharpness and contrast; it renders vibrant color and extremely fine detail, which is why many pros use it for portfolio shots of intricate pieces.
Autofocus is precise and quiet, a real benefit during client sessions when discretion matters and you want reliable locking on tiny features. That said, the lens is heavier and bulkier, so it’s better suited to studio setups than mobile walk‑around work. For large tattoos the framing is naturally narrower, so you’ll often need to reposition or take multiple frames to cover full sleeves or backs.
If you shoot primarily on Sony Alpha a7/a9 bodies and you need a dedicated macro that excels at rendering linework, color, and texture, this lens is an excellent, professional choice. If you frequently move between locations or require wide framing without stepping back, consider that it’s optimized for detail rather than broad coverage.
- Exceptional sharpness and detail resolution
- Effective OSS stabilization
- Quiet, fast autofocus
- Ideal working distance without distortion
- Bulky and heavier; less portable
- Narrow framing for large tattoos; requires repositioning
3. Sigma 24-70mm f/2.8 DG DN Art

Sigma 24-70mm f/2.8 DG DN Art (Sony E)
Fast 24–70mm zoom with constant f/2.8 aperture, Art-series optics, and rugged build for pro-level event, wedding, and everyday shooting.
Check PriceThe Sigma 24-70mm f/2.8 DG DN Art is a workhorse zoom that gives tattoo photographers wide-to-telephoto coverage in one glass. It covers 24–70mm with a constant f/2.8 aperture, so you get consistent exposure and depth-of-field control whether shooting full-piece wide shots or tighter detail frames.
Optically it delivers strong sharpness and color fidelity across the range, which matters when you need accurate ink tones and crisp linework in a portfolio. As a photographer, I value that it eliminates frequent lens changes during a session — you can step back for a full-back image at 24mm, then zoom in for closer regions without swapping lenses.
Be aware of the trade-offs: the lens is larger and heavier than typical primes, so long handheld shoots can lead to fatigue. Also, while edge sharpness is generally excellent, the 24mm end is slightly less razor-sharp compared with dedicated primes, so I often stop down a touch for edge-to-edge clarity on very large pieces.
Autofocus is accurate and quiet, which helps with client sessions and video documentation. The lens is made for Sony E-mount and L-mount systems, making it a flexible option for mirrorless shooters who want one high-quality, all-purpose lens for studio and on-location tattoo work.
- Flexible focal range for all tattoo sizes
- Consistent f/2.8 for low light and DOF control
- Excellent image quality
- Reliable autofocus
- Heavier than primes; potential hand fatigue
- Slightly less edge sharpness at 24mm vs primes
4. Canon EF 100mm f/2.8L Macro IS USM

Canon EF 100mm f/2.8L IS USM Macro (Lens Only)
Short-tele macro offering stable image stabilization, fast autofocusing, rock-solid build, and silky bokeh ideal for flowers, insects, and portraits.
Check PriceI reach for the Canon EF 100mm f/2.8L Macro IS USM when I need absolute clarity on ink, linework, and skin texture. This professional L-series macro lens delivers exceptional sharpness and contrast that make tattoo details pop in portfolio shots.
The 100mm focal length gives a comfortable working distance that minimizes skin distortion and keeps clients relaxed during close-ups. Hybrid IS is optimized for handheld macro work, so you can get tack-sharp images in dim tattoo-studio lighting without constantly resorting to flash or a tripod.
Color accuracy from this lens is very reliable, which is critical when you’re trying to show true ink saturation and subtle shading. Autofocus is dependable and quick enough to keep sessions moving, especially for head-to-shoulder and arm tattoos where you’re generally not fighting for distance.
Be aware that this lens is heavier than compact options, though it’s well balanced for macro tasks and built like an L-series pro tool. If you routinely shoot full-back pieces, you’ll need more working distance or to plan multiple frames, since the framing is narrower at 100mm.
- Superb sharpness and detail
- Effective Hybrid IS for macro shooting
- Excellent color rendering
- Reliable autofocus
- Heavier and larger
- Narrow framing; needs space or multiple shots for large pieces
5. Fujifilm XF 56mm f/1.2 R

Fujifilm XF 56mm f/1.2 R
Ultra-fast 56mm prime producing dreamy background blur, exceptional low-light performance, and creamy rendering tailored for stunning portraits.
Check PriceThe Fujifilm XF 56mm f/1.2 R is a standout prime on the X-series that feels like a portraitist’s secret for tattoos. On APS-C bodies it behaves roughly like an 85mm full-frame lens, so it gives flattering compression and a comfortable working distance for arm, chest, and shoulder pieces.
Its very fast f/1.2 aperture is invaluable in dim studio light, letting you shoot with natural or continuous lighting without cranking ISO. That wide aperture also creates creamy bokeh that separates ink from skin and background, which is perfect when you want the tattoo to pop in a portrait-style frame.
Optically it’s sharp and renders color richly — exactly the qualities you want when showing saturation and linework. In practice you’ll find it excellent for detail shots and artist-portfolio portraits where subject isolation and tonal richness matter most.
There are trade-offs: because of the effective 85mm field of view you’ll need to step back for full-back pieces or large compositions, and the lack of zoom means less framing flexibility on the fly. If you mostly shoot client portraits, mid-sized pieces, or need flattering compression and background separation, this lens is a compelling choice for Fujifilm shooters.
For working tattoo photographers it often serves as a go-to prime for studio sessions and low-light environments, but be prepared to pair it with a wider option if you regularly capture full-body or very large tattoos.
- Stunning sharpness and bokeh
- Excellent low-light performance
- Vibrant color rendition
- Compact, solid build
- Narrow field of view for large tattoos
- Prime lacks zoom flexibility
Minimizing Glare in Tattoo Photography
Glare is the nemesis of tattoo photography. Skin is naturally reflective, and specular highlights can wash out linework and color, so controlling reflections is as important as choosing the right lens.
My first move is usually polarization: fit a circular polarizer on the lens and add linear polarizing film to the light source for cross-polarization. Rotate the CPL while watching live view until hotspots disappear — cross-polarization kills specular shine while preserving ink saturation and contrast.
Diffusion is your best friend. Large softboxes, LED panels with diffusion or window light through a sheer curtain smooth harsh points and reveal texture without ugly hotspots.
Avoid direct on-camera flash whenever possible; it creates bright, unattractive reflections. If flash is necessary, go off-camera, use a large modifier or bounce the light, and put flags or black cards between the light and the shiny spots to shape the falloff.
Angle the light and the camera deliberately. A small step to the left or right often moves a reflection off the tattoo without changing composition. Take a quick test shot, tweak positions, and lock in what hides the glare while keeping the ink crisp.
Prep the skin carefully: a tiny amount of moisturizer can bring out color, but too much gives a mirror finish. Keep blotting papers or translucent powder on hand to tame excess oil during long sessions.
If you shoot tattoos often, consider anti-glare kits like the Sniper Tattoo Photography Set or InkSoul — they bundle polarizers, diffusers and gels for faster setups. Post-processing can help with stubborn highlights (Lightroom’s Dehaze, highlight recovery, selective cloning or AI touch-ups), but nothing beats getting the light under control in-camera. If you work on location, pack a compact CPL, a collapsible softbox and a couple of black cards — they’ll solve most glare problems quickly.
Choosing the Right Lens for Tattoo Photography
Lens choice starts with the size of the tattoo and what you want to show. For most shoots I pack a macro and either a mid-range prime or a moderate wide zoom. The 35–90mm range is a sweet spot — flexible, undistorted, and great for composition.
Macro lenses in the 90–105mm class are my go-to for linework and texture. They give life-size reproduction without compressing the skin, and that working distance keeps clients comfortable. A 1:1 macro will reveal dot placement, edge crispness and color saturation like nothing else.
For mid-distance shots a 50–85mm lens balances subject isolation with context. It’s perfect for arm, shoulder and chest shots where you want both the ink and the person in frame. On APS-C bodies remember a 56mm or 50mm feels more telephoto, so step back if you need coverage.
When you need to capture very large pieces, a moderate wide like 35mm is ideal. It captures coverage without the stretching you get from ultra-wides. If space is tight, a 24–70mm zoom gives you options, but watch for edge softness at the widest end.
Aperture is about intention. Wide apertures (f/2.8 and faster) are lifesavers in dim studios and help separate the tattoo from the background. For full-piece clarity though, stop down to around f/3.5–f/5 so the entire design reads sharp in camera.
Prioritize lenses that render color accurately and resolve fine detail. Stabilization is handy for handheld work, and lighter lenses keep long sessions from becoming tiring. If you want one-lens convenience, a quality 24–70mm f/2.8 covers most bases without constant swapping.
Think about working distance, client comfort, and the story you want the image to tell. I usually bring a macro and either a 35mm or a 50–85mm depending on venue and subject. Match lens choice to tattoo size, and you’ll spend less time fixing problems in post and more time making great images.
What People Ask Most
What lens is best for tattoo photography?
There is no single best lens; the right choice depends on the size and detail of the tattoo. Choose a lens that balances sharpness and working distance for the type of shots you need.
What focal length is best for tattoo photography?
Medium focal lengths are commonly preferred because they offer flexibility and natural perspective. Use a longer focal length for tight detail and a wider option for full-coverage shots.
Is a macro lens necessary for tattoo photography?
A macro lens is not always necessary but it is ideal for close-up detail and texture of ink. For full-piece or large-area images, a macro can be overkill and a different lens may be more practical.
Is a 50mm lens good for tattoo photography?
A 50mm-style lens can be very useful as a versatile mid-distance option that balances subject separation and ease of use. It works well for many portrait-style and mid-sized tattoo shots.
What aperture should I use for tattoo photography?
Wider apertures help in low light and create subject separation, but stopping down improves overall sharpness for detail shots. Choose the aperture based on the depth of field you need and the available light.
Should I use a prime or zoom lens for tattoo photography?
Primes often deliver strong sharpness and wider apertures, while zooms provide framing flexibility and reduce lens changes. Pick the type that best fits your workflow and shooting environment.
What lens do professional tattoo photographers use?
Professionals typically choose lenses that prioritize sharpness, color accuracy, and a comfortable working distance for the shot. Many favor dedicated detail lenses for close work and medium telephoto or versatile zooms for larger coverage.
Conclusion for Best Lenses for Tattoo Photography
Choose the right lens to match the tattoo’s size and the shot’s intent: use close‑focusing optics for fine linework and moderate wide-to-telephoto options for larger coverage, while weighing sharpness, stabilization, and portability tradeoffs.
Pay equal attention to glare control and aperture decisions so you can preserve color accuracy and overall detail without losing context to shallow depth of field.
Combine careful lens selection with diffused lighting, polarizing techniques, and steady shooting practices to minimize reflections and produce faithful, high‑detail images.
If you want to keep improving your tattoo photography workflow and post-processing, explore more of our site’s practical guides and gear advice to build your skills.
Have a question or a sample to share? Leave a comment below — we usually reply within a few hours.

0 Comments