
Want to make tiny trinkets, delicate jewelry, or gadgets look like they belong in a glossy catalog? A proper lightbox removes distracting shadows, balances color, and gives small subjects a clean, professional stage. This guide will walk you through how to choose the best lightbox for photography and get consistently polished results.
We evaluated five versatile lightboxes spanning compact, medium, and large formats to suit different subjects and budgets. Each entry includes real-world use notes, user feedback, and straightforward pros and cons so you can compare quickly.
You’ll also find compact lighting tips on diffusion, multi-source setups, and small adjustments that tame hotspots and harsh shadows. Practical sizing advice helps you match the box to your subject’s scale and build a setup that’s future-friendly.
Whether you shoot on a smartphone or a full-frame camera, control, color accuracy, and workflow integration matter. We weigh portability, setup speed, and light quality so you can choose a lightbox that fits your routine and goals.
The tone is practical and visual — think quick wins rather than jargon. There’s a short FAQ to answer common setup and compatibility questions without burying you in tech details. Read on and you’ll know which lightbox will make your products pop while matching your space, budget, and skills.

NEEWER LP40 40cm (16in) Light Box 144 LEDs 5600K Dimmable with 4 Backdrops
1. Pulu’s Upgrade Light Box and Softbox

PULUZ 16x16in Light Box 480 LEDs Dimmable with 4 Backdrops
Ultra-bright adjustable light table with hundreds of LEDs and included backgrounds for crisp, shadow-free product and macro photography.
Check PriceAs a product photographer I reach for Pulu’s Upgrade Light Box and Softbox when I need clean, consistent results for jewelry, electronics and small accessories. It doubles as a studio and a softbox, which makes it especially strong for reflective-product shooting where you need both wrap and control.
The light quality is one of its biggest selling points — exceptional color accuracy (CRI 95+) means what you see in-camera matches reality, and the dimmable LED lighting (1%–100%) gives very fine control over brightness. That range lets you dial in exposure without over-relying on gels or extra modifiers.
It comes with four durable PVC backdrops (white, black, orange, green), so you can switch moods quickly without extra purchases. The folding design and included carry bag make setup fast and the whole kit genuinely portable for on-location product sessions.
I also value the three openings for multi-angle shooting; being able to shoot from different angles without awkward rigging opens creative possibilities and accelerates workflow. The compact, folding design keeps it practical for studio and travel work alike.
There are a few caveats to bear in mind. The unit sits at a higher price point, so it’s better suited to professionals or serious hobbyists rather than someone buying their first lightbox. In softbox mode you’ll need to spend a little time positioning lights and subjects to avoid hotspots and slight shadows from the LED beads.
Overall, if you need accurate color, nuanced dimming and portability for small-product work, Pulu’s box is a very capable tool that rewards attention to light placement.
- Exceptional color accuracy (CRI 95+)
- Dimmable LED lighting (1%–100%)
- Four durable PVC backdrops (white, black, orange, green)
- Compact, folding design for easy assembly and transport
- Higher price point; less accessible for beginners
- Softbox mode can require careful positioning to avoid hotspots
2. HAVOX HPB80XD Photo Studio Light Box

FOSITAN 32x32in Bi-Color Dimmable Light Box Kit 2 LED Bars 252 LEDs with 5 Backdrops
Versatile bi-color panel kit with dual bars, dimming control and multiple backdrops for accurate color rendering and studio-quality shots.
Check PriceThis HAVOX HPB80XD is built for photographers who shoot larger products and need flexible lighting. At 32x32x32 inches it gives you room to photograph bulky items without crowding the frame.
The LED ramp system is the standout — you can shape and adjust light to tame reflections and highlight texture. Multiple openings (front and top) make creative angles and overhead shots easy to compose.
It’s solidly built, which is why e-commerce shooters favor it for repeatable results. That sturdiness comes with weight; it’s noticeably heavier and less portable than smaller boxes.
Setup takes longer because of the number of parts and the LED ramp components. Expect a bit of a learning curve to master the ramp and to assemble everything so it sits perfectly square.
Practically, plan sessions rather than quick grab-and-shoot jobs. Use the top opening for product flatlays and the front opening for detail work, and spend extra time dialing the LED ramp to avoid hotspots.
If you’re shooting primarily at a desk or studio and want a durable, roomy box that gives you real control over light, this is a strong choice. If you travel a lot or need something grab-and-go, be ready for the trade-offs.
- Fully adjustable LED lights for customized setups
- Multiple openings enable creative and overhead shots
- High-quality materials for durability and stability
- Large size (32x32x32 inches) accommodates bigger products
- Lengthy setup process due to multiple parts
- Heavy and less portable than smaller models
3. Neewer Studio Light Box
NEEWER LP40 40cm (16in) Light Box 144 LEDs 5600K Dimmable with 4 Backdrops
Portable circular light box delivering daylight-balanced illumination, adjustable brightness, and included backgrounds for flawless macro and product images.
Check PriceAs a product photographer, I appreciate a lightbox that gives you real control over your highlights and shadows — the Neewer Studio Light Box does exactly that. Its micro-scale lighting adjustment dial is frequently called a game-changer because it lets you fine-tune illumination in very small increments, which is invaluable when shooting reflective or detailed items.
The included cloth background gives a nicely diffused base light, helping to minimize harsh reflections and create even falloff across most small to medium subjects. You also get four backdrop options, which makes quick style changes easy without extra purchases, and the unit is generally easier to set up than more complex rigs—so you can start shooting faster.
That said, this model leans toward studio use rather than run-and-gun work. The box is bulky and not ideal for travel; it’s not collapsible and can be cumbersome to carry and maneuver. The micro-adjust dial, while brilliant for control, can be sensitive and benefits from careful handling. It’s also positioned at a higher price point, so it’s a better investment if you need precise lighting control regularly rather than for occasional hobby shoots.
- Fine-tune lighting down to a micro scale
- Easier setup than more complex models
- Balanced lighting throughout minimizes shadows
- Four backdrop options for versatility
- Expensive; less accessible for casual users
- Not collapsible, limiting portability
4. Godox LST40 Portable Photo Studio Box
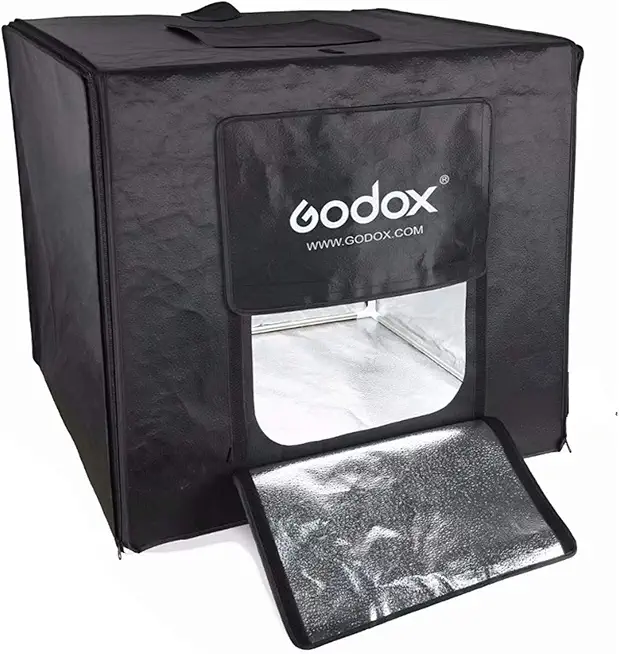
GODOX LST40 Light Box Triple LED Light Source
Three-source LED system providing even, controllable lighting and effortless setup for professional tabletop photography and live streaming.
Check PriceIf you shoot small products — jewelry, toys or consumer electronics — the Godox LST40 is a practical, no-nonsense choice. It’s widely used for small-item work because the box is compact and includes carrying handles, so I’ll take it on location without fuss.
Lighting is the real selling point: a silver interior plus three LED strips with diffusers gives a soft, even wrap that minimizes harsh shadows. The LEDs are daylight balanced at 5600K, so colors render naturally under typical studio or window light and require less color correction in post.
For product detail and compositional variety, two ports let you shoot from multiple angles without disassembling the setup — very handy when you need close-ups and detail shots in the same session. The overall package is optimized for small subjects; it’s portable, predictable, and fast to work with compared to full studio rigs.
It’s not perfect: setting up and swapping backdrops inside the box can be fiddly, and some users report the backdrop clips don’t always hold securely. Also, the LST40’s light output can feel a bit weak for anything much larger than pocket-sized items, and the box isn’t collapsible, so storage takes a bit more room.
- Compact, portable design with handles
- Soft LED light for even illumination and reduced shadows
- Accurate color temperature (5600K) for daylight-balanced shots
- Two ports enable multi-angle shooting
- Backdrop setup inside the box is difficult
- Backdrop clips not always secure
5. Glendan Portable Photo Studio Light Box
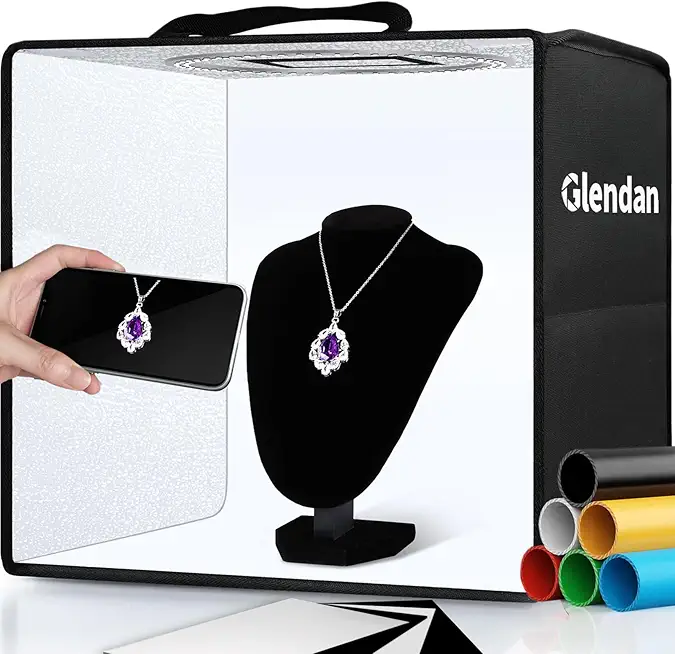
Glendan 12x12in Light Box 112 LEDs Dimmable with 6 Backdrops
Compact dimmable studio cube with abundant LEDs and multiple backdrop options to showcase jewelry, gadgets, and small crafts perfectly.
Check PriceAs a product photographer who shoots a lot of small items, I appreciate the Glendan Portable Photo Studio Light Box for what it is: a compact, budget-friendly solution sized at 12×12 inches that’s perfect for jewelry, small electronics and accessories. It’s clearly aimed at beginners and anyone who needs a travel-ready setup without a big investment.
What wins me over is the lighting quality — Glendan uses LEDs with a high CRI (95+), so colors render accurately and details stay crisp. The unit also avoids strobe-style lighting, so you won’t get flicker that can ruin frames when shooting handheld or with smartphones.
Practicality is another strong suit: the box is lightweight, folds small, and the multiple-angle shooting design plus the lightning-fast assembly (≈5 seconds) mean you can set up and shoot quickly on location or at home. Six included backdrop colors give you creative flexibility without hauling extra fabrics or cards.
That said, it does have limits. The 12×12 size obviously won’t handle medium or large products, and the PVC construction isn’t as rugged as higher-end materials — treat it gently if you travel with it. Also, be mindful of light placement; like most compact boxes, lighting can go uneven if you don’t position your subject carefully.
- High CRI (95+) for accurate color reproduction
- No strobe lighting prevents flicker in photos
- Six backdrop colors for creative flexibility
- Fast, easy assembly (≈5 seconds)
- Reports of switch failures after brief use
- PVC material less durable than higher-end models
Lighting Techniques for Professional Results
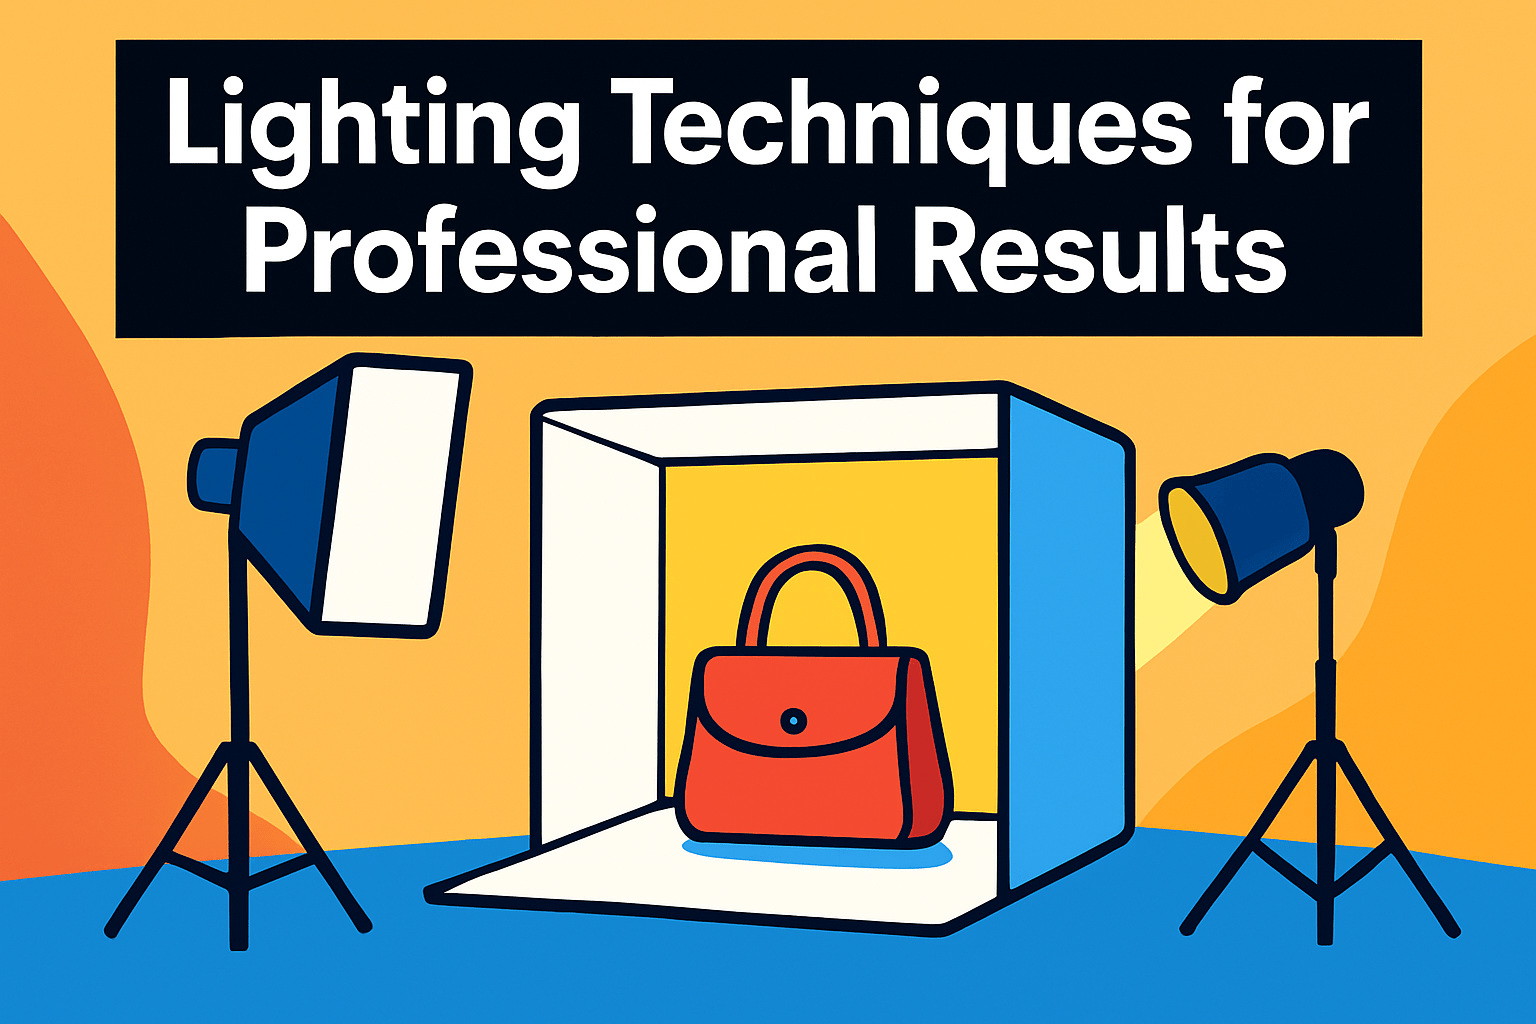
Good light starts with intention: decide where you want shadows and where you want detail to pop. For most product work I begin with two side lights at roughly 45 degrees to the subject, then add a top or fill light for three-dimensional pieces to control separations and bring out texture.
Diffusion is your best friend. Even if your lightbox has illuminated walls, adding an extra layer of diffuser or a sheer fabric in front of the LEDs will remove hotspots and give that soft, product-photography look without losing contrast.
Angle and height change everything. Raising a light softens and lengthens shadows; lowering it tightens and deepens them. Don’t be afraid to move lights a few inches at a time — small adjustments often yield big improvements.
Use reflectors and flags to sculpt the scene. A white foam-core reflector will gently fill shadow areas, while a small black card (flag) can create a crisp separation and add visual depth where needed.
Keep color honest by matching your lights: daylight-balanced LEDs around 5,500K make post-processing much easier. Set a custom white balance or shoot a neutral gray card; if your lights are dimmable, dial intensity to avoid blown highlights before you touch exposure settings.
Natural light can be an ally when used carefully. Combine a window with diffusers on sunny days for a warm, soft fill, but always control direction and consistency so your shots match across a series.
Finally, be systematic. Mount the camera on a tripod, take test shots, and lock exposure/white balance. Once you find a setup that works, document distances and settings so you can reproduce professional, consistent results every time.
Choosing the Right Light Box Size
Size matters more than most beginners realize. The box you choose controls how light wraps, how shadows fall, and how much negative space you have for composition. Pick a size with the subject and the intended crop in mind, not just what fits on your workbench.
As a practical rule, small items like jewelry, watches and tiny electronics shoot best in 12–24″ boxes. Medium products — mugs, shoes, larger electronics — live comfortably in 24–36″ setups. Anything taller or bulky, or items you want to shoot full-length, belong in 36″+ boxes or walk-in tents.
Don’t underestimate shape. Bulky or irregular items need extra room so they don’t press against the walls and create unwanted reflections or harsh shadows. Aim to leave several inches of clear space around the subject — roughly 6–12″ where possible — so the light can wrap evenly and you have room to adjust angles without reworking the whole scene.
Think about how you’ll light and shoot the product. Overhead or three-quarter shots require top access and clearance for the lens and any modifiers. If you plan to use reflectors, multiple light sources, or want to change backdrops often, choose a size that gives you working space, not one that just fits the object exactly.
Portability and storage are real trade-offs. Smaller boxes are easier to move and store, while larger boxes give flexibility for future projects. When in doubt, opt for a slightly larger, collapsible or modular solution so you don’t outgrow it when your product range or creative ambitions expand.
Before you commit, test. Place the actual subject in the box, set up your camera and lights, and take a few test shots. That quick rehearsal will reveal fit, lighting issues and whether you need a different size — and it’ll save you a lot of surprise reshoots down the road.
What People Ask Most
What is the best lightbox for product photography?
There is no single best model; the right choice depends on your subject size, budget, and need for portability or precise lighting control. Look for a box that offers even, adjustable lighting and accurate color reproduction.
How do I choose a lightbox for photography?
Match the box to the types of products you shoot and consider portability, build quality, and how much control you need over lighting. Prioritize even diffusion, multiple backdrop options, and adjustable lights for greater versatility.
What size lightbox do I need for photography?
Choose a box that leaves breathing room around your subject so light can wrap evenly and you can compose without crowding. Consider smaller boxes for compact items and larger or modular options if you plan to shoot bigger or bulkier products.
How do you set up a lightbox for photography?
Place a clean backdrop, position your lights to minimize harsh shadows, and use diffusers or the box walls to soften illumination. Use reflectors or black cards to fill or deepen shadows and take test shots to fine-tune placement.
What lighting is best for a photography lightbox?
Daylight-balanced lighting that produces even, diffuse illumination works best to keep colors accurate and shadows soft. Adjustable intensity and the ability to add a top or fill light help shape the look of three-dimensional subjects.
Can I use a lightbox with a smartphone camera?
Yes, a smartphone can produce excellent results when paired with a lightbox if you stabilize the camera and use consistent lighting. Use a tripod, tap to set exposure and focus, and take test shots to adjust composition and brightness.
What is the difference between a lightbox and a light tent?
A lightbox usually integrates rigid sides, fixed backdrops, and built-in lighting for compact product work, while a light tent emphasizes full, wraparound diffusion and can be larger or more open. The choice depends on the level of control and the size of items you need to photograph.
Conclusion for Best Lightbox for Photography
In short, the guide highlights a range of lightboxes that suit different needs — from foldable softbox-style units for reflective goods, to larger, sturdier tents with adjustable lighting, to compact and budget-friendly options that are great for travel or quick setups.
Choose by matching the box to your subject size, desired portability, and how much hands-on lighting control you need; the right balance will save setup time and improve consistency in your product shots.
Remember the core lighting tips—use multiple light sources, diffuse and reflect to tame shadows, and keep camera and settings consistent—these techniques matter as much as the box itself.
If you want to keep improving your product-photography skills, explore more articles on the site for deeper tips, gear comparisons, and step-by-step workflows to refine your process.
Have questions or want advice on a specific setup? Leave a comment below and we usually reply within a few hours.

0 Comments