Need help to apply effects uniformly across your Premiere Pro project? Are you tired of making edits clip by clip?
Adjustment layers are the perfect solution.
In this easy-to-follow beginner’s guide, you’ll learn:
- What are adjustment layers, and why do they streamline editing
- A simple step-by-step process for adding one to your timeline
- How to extend the layer over your clips
- Tips for adding effects and color correction
- Best practices for organizing and reusing your adjustment layers

Adjustment layers can save you time and headaches if you’re a video editing novice or a seasoned pro.
Implement this versatile tool today to level your Premiere Pro skills and take your projects to the next level!
Let’s dive in and master adjustment layers in just a few simple steps.
Step 1: Open your Premiere Pro project and click on the Project panel on the bottom left. This is where you’ll create the adjustment layer.
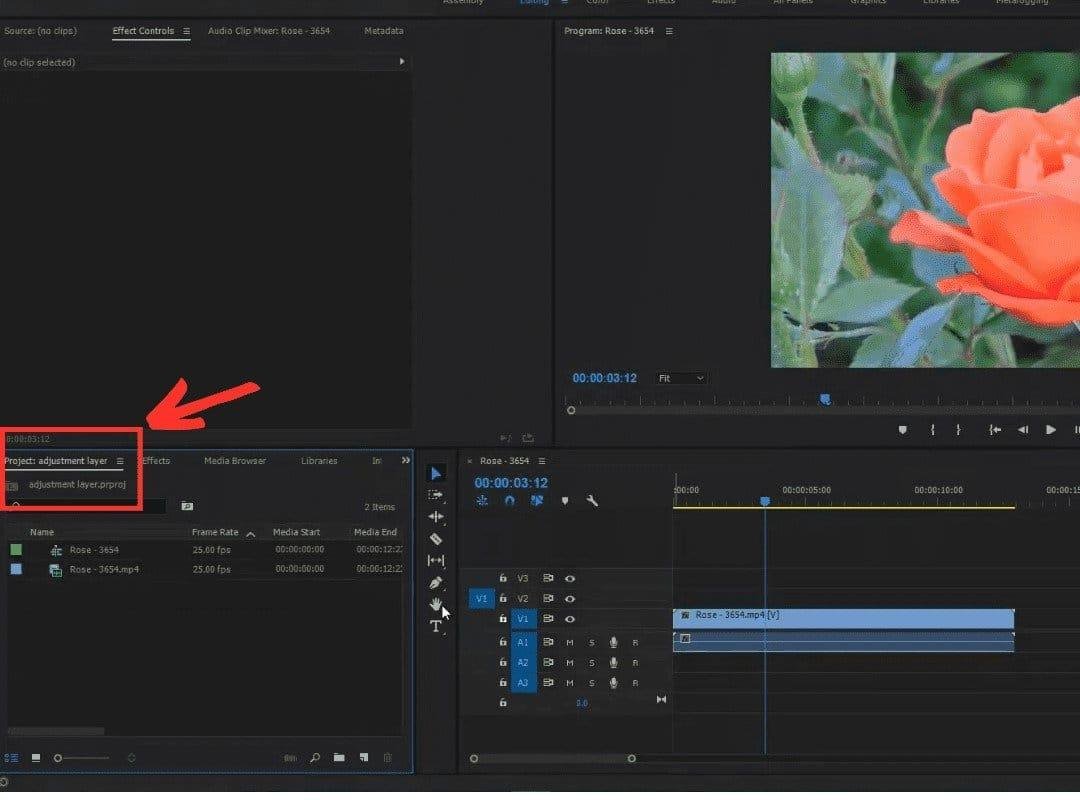
Step 2: Click on the “New Item” button at the bottom of the Project panel. It looks like a small piece of paper with a folded corner.
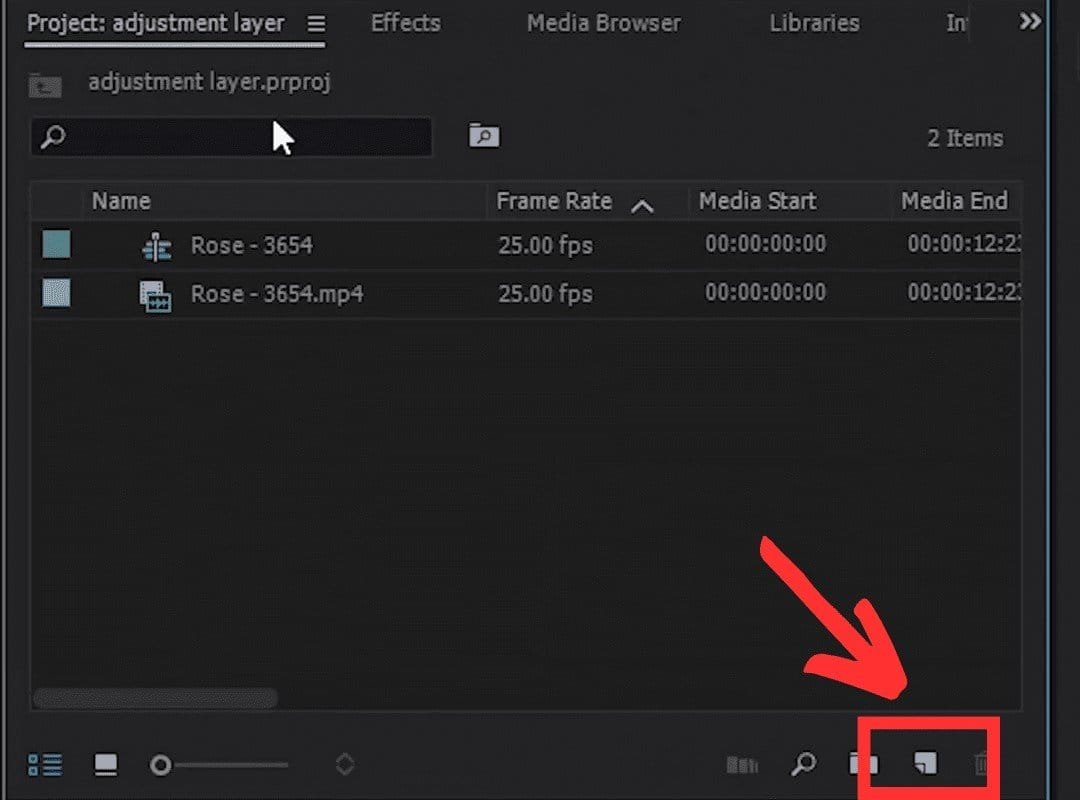
Step 3: When the menu pops up, select “Adjustment Layer.” This creates a new transparent layer you can use across clips.

Step 4: In the Adjustment Layer Settings window, name your layer something descriptive like “Color Correction.”
Step 5: Ensure the settings match the sequence settings of your project and click OK.

Step 6: You’ll now see the new adjustment layer in your Project panel. Drag it up onto a track above your video clips in the timeline.
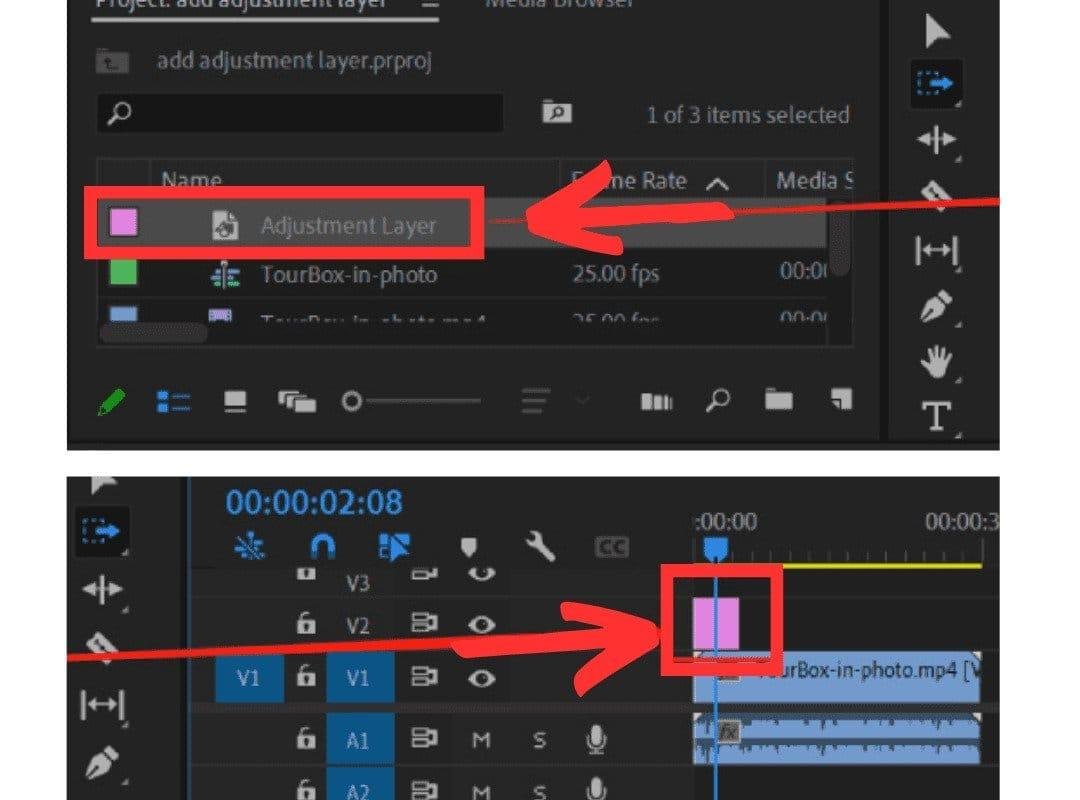
Step 7: Extend the ends of the adjustment layer over the clips you want to affect. If there are gaps, those parts of the clips won’t have the effects applied.
Step 8: With the adjustment layer selected, go to the Effects panel and drag your desired effect onto the layer.

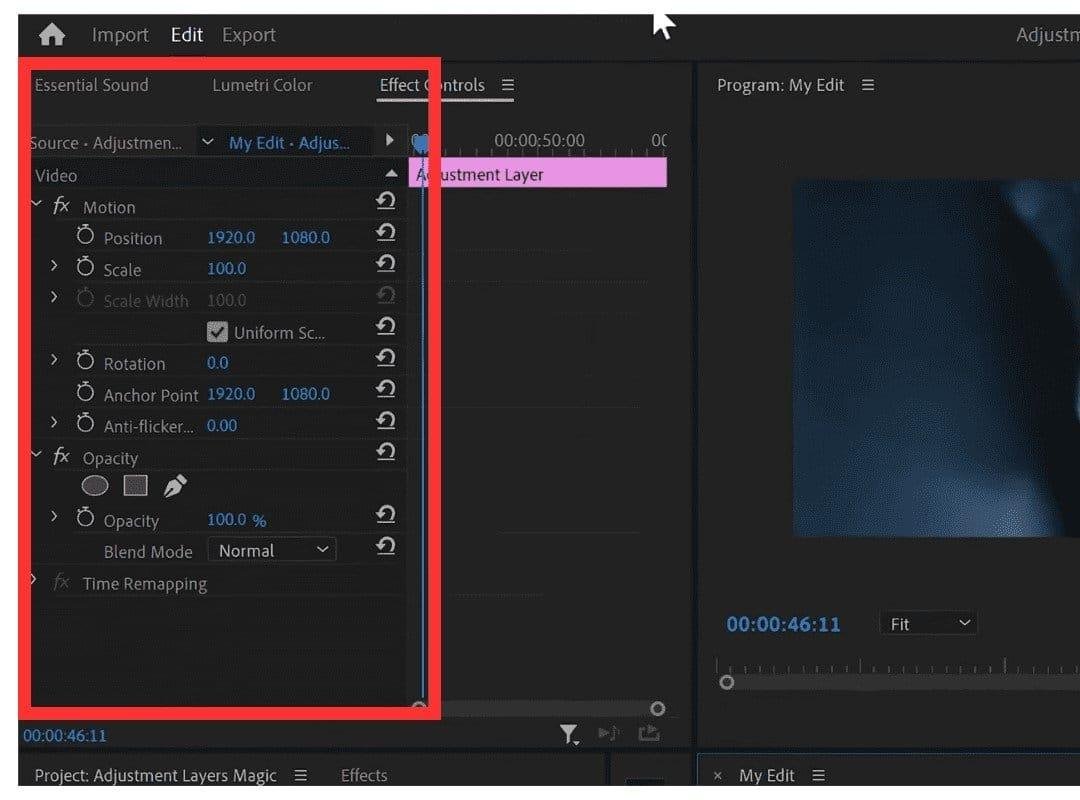
Step 9: Use the Effect Controls panel to adjust the effect settings like opacity, blur amount, etc.
Step 10: Continue adding and adjusting effects until you achieve the desired result across your clips!
Tips for Using Adjustment Layers
Use Multiple Layers: Don’t limit yourself to just one adjustment layer. Create separate layers for different effects like color grading vs visual effects. This helps organize your workflow.
Adjust Opacity: If an effect is too strong, reduce the adjustment layer’s opacity to make it more subtle.
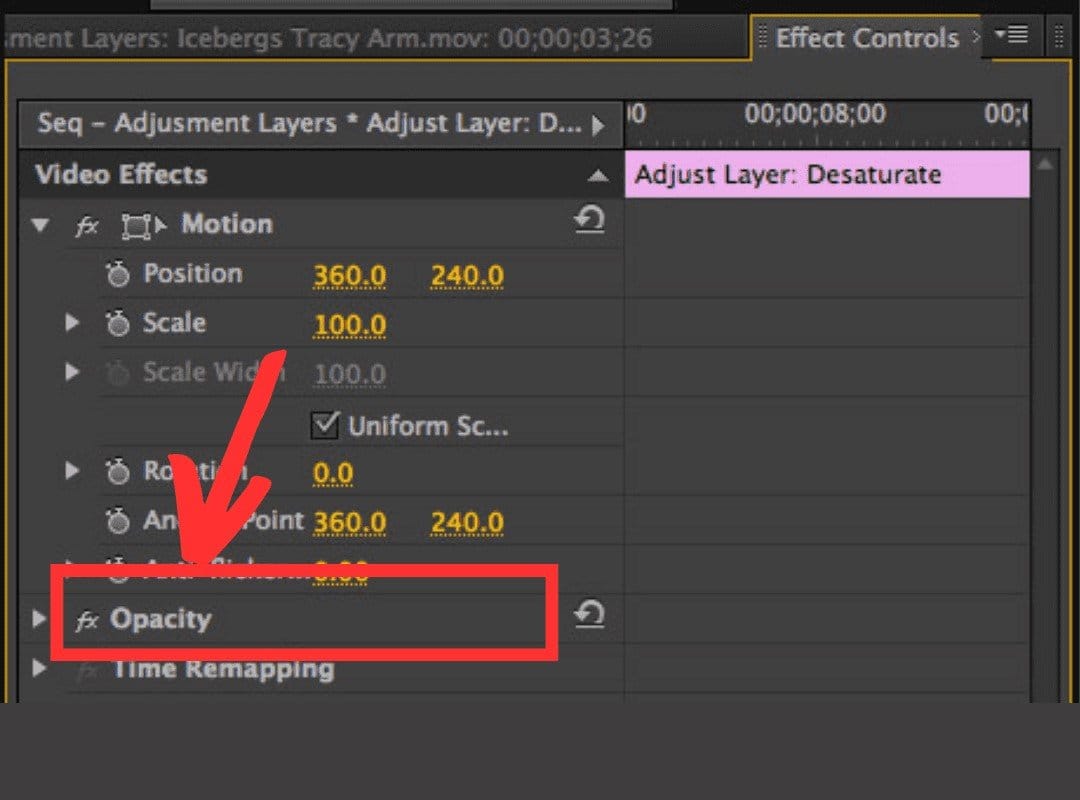
Use Masks: Masks let you limit effects to some regions of the frame. Try using an inverted mask to remove an effect from part of the image selectively.

Reuse Layers: Save functional adjustment layers in your Project panel to reuse for future timelines and projects.
Name Layers: Give your adjustment layers descriptive names like “Film Grade” or “Vignette.” This keeps your timeline organized.
Color Correct First: Correct color like white balance on clips before applying Lumetri color grading on an adjustment layer for best results.
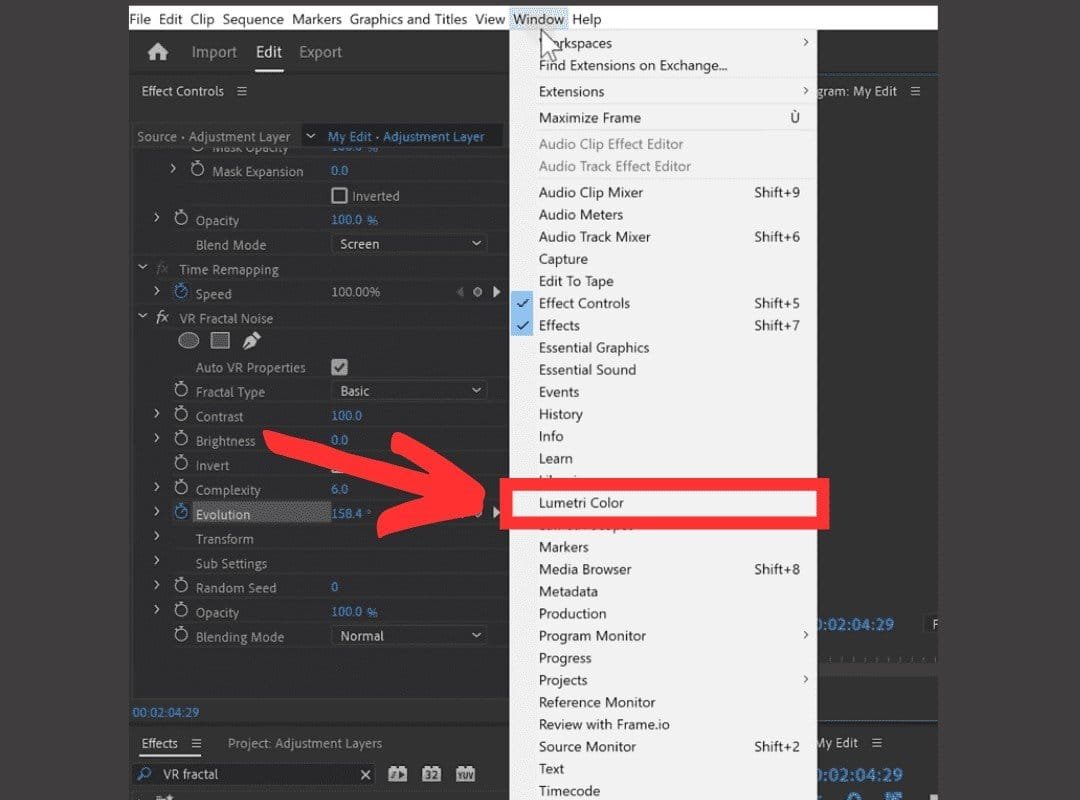
Use Keyframes: Animate effect values like blur amount over time using keyframes on the adjustment layer.
Save as Preset: If you create a complex effect, save the layer as a preset to reuse it quickly.
Conclusion
After following this easy tutorial, you should feel empowered to use adjustment layers like a pro in Premiere Pro.
In this guide, you learned:
- How to easily add adjustment layers to your timeline
- Step-by-step instructions to apply effects across multiple clips
- Tips for organizing, saving, and reusing layers
- Best practices for seamless color grading and corrections
Adjustment layers will take your video editing skills to the next level. Try applying some unique effects or creating a library of useful presets.
The possibilities are endless when you utilize this versatile tool to its full potential. Spend less time on tedious edits and more time being creative.
Get out there and leverage adjustment layers to enhance your Premiere Pro projects!



0 Comments