
Ever had your glasses flash like stadium lights during a crucial Zoom call, masking your eyes and distracting everyone?
It’s a frustratingly common problem for remote workers, presenters, and creators who rely on a clear on-camera presence.
This guide cuts through the noise with five lighting options proven to minimize lens glare and flatter faces on video.
Options span compact USB desk lights and subtle ring setups to larger panels and soft, diffused lanterns that tame hotspots.
Each approach balances trade-offs like portability, desk footprint, and how lenses reflect light back to the camera.
We based recommendations on real-world user feedback, hands-on testing, and expert reviews with glasses wearers in mind.
The goal was simple: reduce distracting reflections without washing out skin tones or introducing harsh shadows.
You’ll find practical pros and cons for each lighting style to help match gear to your workspace and needs.
Beyond gear, the guide offers straightforward placement and diffusion tips that work with any light source.
Those small adjustments often matter more than raw brightness when you’re trying to keep eyes visible behind lenses.
Think of this as a practical, magazine-style primer for clearer, less distracting video presence.
Whether you want plug-and-play convenience or camera-ready control, this guide will save time and frustration.
Keep reading to find the lighting approach that finally lets your eyes do the talking—not your reflections.
1. Rotolight NEO 2 Video Conferencing Kit

Rotolight NEO 2 Bi-Color LED Ring Light Kit
Compact bi-color LED kit delivering soft, flicker-free illumination for interviews, portraits, and on-the-go content creation.
Check PriceThe Rotolight NEO 2 Video Conferencing Kit is a compact, desktop-friendly panel that delivers bright, natural illumination while preserving skin tones. With a color temperature range of 3150K–6300K and a high CRI of 96, it gives true-to-life color rendering—critical when you want your face to look accurate on camera and avoid color shifts that make glasses reflections more noticeable.
Its soft diffusers and flattering output help minimize harsh reflections and eye strain, so viewers can see your eyes clearly without distracting hotspots on lenses. The included desktop stand and 360° ball head make positioning easy; combined with the adjustable color temperature you can angle the light to sit slightly off-axis and reduce glare on glasses.
Setup is genuinely quick—under 5 minutes—so it’s practical for professionals who need a reliable conferencing rig without fuss. The unit is compact enough for small desks yet versatile enough to dial in warmth or coolness depending on ambient light and your skin tone.
The only real trade-offs are power and connectivity preferences. It runs on six AA batteries, which keeps it portable but means recurring battery costs or swapping for mains options. There’s also no Bluetooth or app control, so adjustments are done on the unit rather than from a phone or computer.
- High CRI 96 for accurate skin tones
- Adjustable 3150K–6300K reduces reflections
- Soft diffusion minimizes glare and eye strain
- Quick setup—under 5 minutes; desktop-friendly
- Requires six AA batteries
- No Bluetooth/app control
2. Logitech Litra Glow
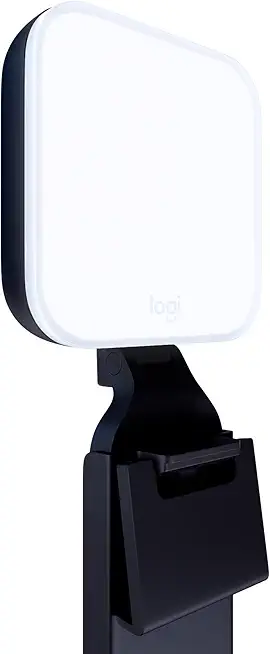
Logitech Litra Glow LED Streaming Light with Adjustable Mount
Adjustable mount provides flattering, customizable glow to enhance livestreams, video calls, and makeup tutorials with natural-looking skin tones.
Check PriceAs a photographer who shoots people for a living, I appreciate small, reliable lights that solve real-world problems — and the Logitech Litra Glow does exactly that for glasses wearers. It’s a compact non-ring LED featuring TrueSoft technology that mimics daylight, so skin tones look natural on camera without harsh hotspots on lenses.
The Litra Glow’s soft, even output really helps reduce reflections on glasses. Users report it’s gentle on the eyes during long calls, and that softer light translates to fewer distracting glare spots while preserving color accuracy thanks to its good color rendering.
It’s USB powered and plug-and-play, which makes setup effortless on a laptop-centric desk. The small footprint is ideal for cramped workspaces where a big panel or 18″ ring light would be overkill or simply won’t fit.
There are trade-offs: it doesn’t match the brightness or coverage of larger ring lights or panels, so if you need wide, punchy illumination across a big desk or background, it may fall short. Adjustability is also limited — you won’t get the same range of angle and position tweaks you’d find on larger mounts.
Bottom line: if you work from a small space, wear glasses, and want a daylight-balanced, low-glare solution that’s easy to use, the Litra Glow is an excellent, unobtrusive choice. If you need broad coverage or flexible positioning, consider something larger.
- Compact, small footprint
- TrueSoft daylight-mimicking light; good color rendering
- Soft, even light reduces reflections and eye strain
- USB powered, plug-and-play
- Less brightness/coverage than larger ring lights or panels
- Limited angle/position adjustments
3. UBeesize 10″ Ring Light Kit

UBeesize 10
Portable 10-inch circular light with tripod and phone clamp for stable vlogs, selfies, and flawless close-up lighting anywhere.
Check PriceAs a photographer, I appreciate the UBeesize 10″ Selfie Ring Light for what it is: a compact, USB-powered kit that gets you noticeably better lighting on Zoom without fuss. Its 10″ diameter, included tripod, and phone holder make it a true plug-and-play upgrade for short setups and mobile work.
The light’s size is just right to illuminate your face evenly without creating an overwhelming hotspot on glasses, so with careful placement you’ll reduce ring-shaped reflections. Because it’s USB-powered, it’s convenient to run from a laptop or USB adapter, which is great for freelancers or people who move between workspaces.
Setup is quick and intuitive — ideal if you’re not a gear head and need something that works immediately. That said, the output is intentionally modest; it won’t match studio-grade panels, so expect softer, less intense illumination that’s perfect for head-and-shoulders Zoom framing but not for lighting larger rooms.
In short, pick this if you want an affordable, portable step up from ambient room lighting that improves skin tones and reduces obvious glare when positioned correctly. If you need very high brightness or a big soft source, this isn’t it, but for most remote workers and casual creators it’s a practical and user-friendly choice.
- 10″ size — compact and portable
- USB-powered — plug-and-play convenience
- Includes tripod and phone holder
- Affordable, beginner-friendly, compact
- Not powerful enough for larger rooms
- Reflections on glasses can persist if poorly positioned
4. Godox LR150 LED Ring Light

GODOX LR120 12
Versatile 12-inch bi-color illumination offering precise color temperature control and secure phone mounting for professional-looking content.
Check PriceThe Godox LR150 is an 18″ ring light that runs on either USB or AC power, with adjustable brightness and color temperature. Its larger diameter gives a broad, even wash of light across the face, which is great for video calls and content creation. As a photographer, I appreciate the control the adjustable settings provide for matching room light and skin tones.
In real use the LR150 produces bright, balanced illumination with broad coverage, so you won’t get uneven hotspots on one side of your face. The even spread helps reduce harsh shadows and makes your eyes and expression read clearly on camera. That said, ring lights can still show reflections in glasses unless handled deliberately.
The trade-off is size and placement. The LR150 requires more desk space and a larger footprint than compact LEDs, so you’ll need to plan your setup accordingly. Users commonly pair it with softboxes or diffusers to soften the direct ring reflection and further cut glare on lenses.
This is a solid pick if you’re an experienced remote worker or creator with room to spare who wants versatile, powerful lighting. With careful positioning—slightly off-axis and combined with diffusion—you get pleasing, camera-friendly light and fewer distracting reflections. If you’re tight on desk space or want plug-and-play minimalism, consider how the LR150’s size fits your workflow first.
- 18″ large diameter for even coverage
- USB/AC power options
- Adjustable brightness and color temperature
- Bright, balanced broad illumination
- Larger footprint requires more desk space
- Needs careful positioning to avoid glasses reflections
5. Godox 65cm Lantern Softbox With SL60W

GODOX CS-65D 65cm Bowens Mount Lantern Softbox
Large 65cm lantern-style softbox creating even, wraparound light with Bowens compatibility for studios, portraits, and product photography.
Check PriceI rely on diffused light for meetings where I wear glasses, and the Godox 65cm lantern softbox paired with the SL60W is one of my go-to choices. The lantern produces a large, soft spread that flatters skin tones and dramatically reduces harsh reflections compared with direct LEDs or ring lights.
Because it’s a true lantern-style softbox, the output wraps around your face more evenly, so you avoid the obvious hotspots that make glasses sparkle on camera. The kit’s compatibility with the Godox SL60W means you get a camera-friendly, continuous LED source that’s easy to balance for skin tones.
Be aware this is not a tiny desktop fix — the 65cm size needs space and a proper stand, and setup is a little more involved than a plug-and-play ring light. For a dedicated home office or small studio it’s worth the extra effort, but it’s not ideal if you need maximum portability or a one-minute setup.
If your priority is looking natural on Zoom while eliminating distracting glare, this softbox delivers. It’s best for professionals who can dedicate some room to lighting and want the softest, most flattering illumination for glasses wearers.
- Softest, most flattering light for glasses wearers
- Significantly reduces glare
- Compatible with various LED bulbs for color-temp control
- Produces diffused, camera-friendly light that flatters skin tones
- Larger and bulkier; less portable
- Setup more complex than ring lights
45° Light Positioning for Glasses Glare
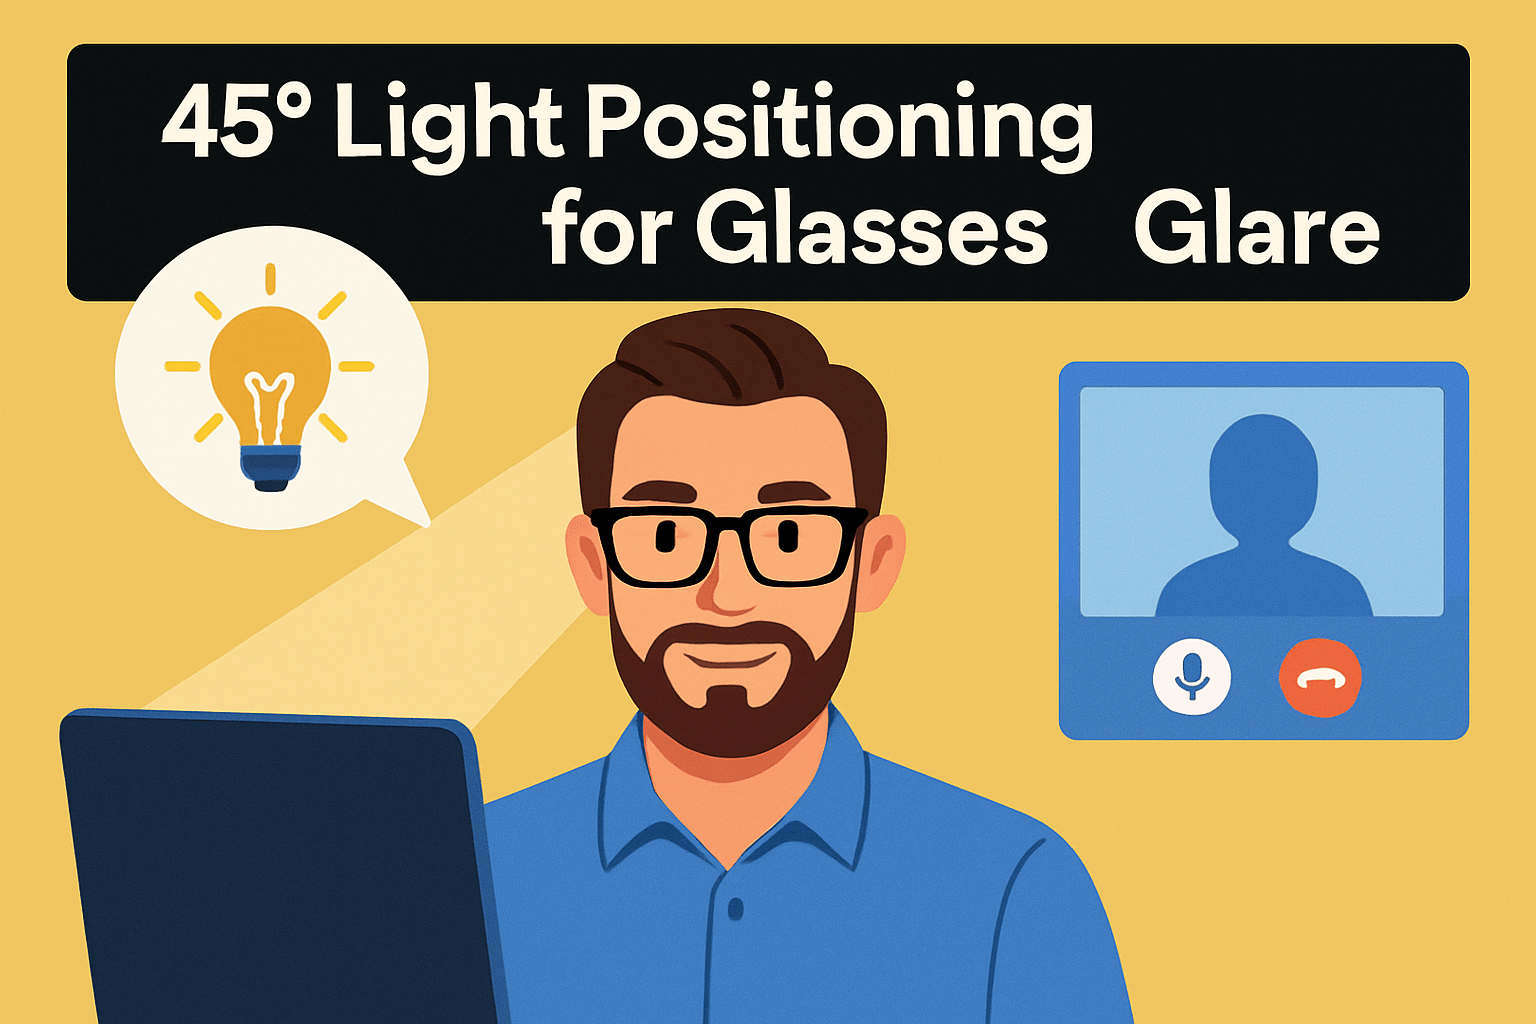
Glasses glare is simply a specular reflection of your light source hitting the lens and bouncing back to the camera. The easiest way to fight it is geometry: move your lights out of that reflection path by positioning them roughly 20–45° off-center horizontally and about 35–45° above eye level.
Think of a 45° rule of thumb—angle the lights about 45° away from your camera line of sight and tilt them downward toward your face. Raising the lights above head height and angling them down softens the shadows on your cheeks and forehead while steering bright hotspots off the glass.
When possible use two lights, one on each side, mirrored at the same 45° angle. That balance keeps your face evenly lit without creating a single frontal hotspot on the lenses. If you only have one light, place it at 45° and use a white card or reflector on the opposite side to fill shadows without reintroducing glare.
Small adjustments to your eyewear and posture help a lot. Tilt your glasses down just 5–10° by loosening the nose pads or lowering your chin a touch so the lenses sit slightly steeper to incoming light. It’s subtle, but that little change often removes the stubborn reflections without making you look odd on camera.
Always check the effect through your webcam or phone, not in the room light. Move the light a few degrees at a time and watch the monitor; most problems disappear after minute tweaks to height and horizontal placement.
Aim to preserve a small catchlight in the top third of the iris—this reads as sparkle to viewers while still keeping lenses clean. If you still see glare, nudge the lights farther off-axis or reduce intensity until the lenses behave and your face stays flattering and natural.
Use Diffused Lighting to Reduce Glare
If you wear glasses on Zoom, hard light creates distracting reflections that can hide your eyes. Diffused lighting tames those bright specular highlights. It keeps your eyes readable so viewers focus on your face rather than hotspots.
Diffusion spreads light across a larger surface before it reaches your lenses. That lowers the intensity of any single reflection and turns sharp hotspots into a soft wash. The overall effect is a more natural, flattering look.
Softboxes, lantern softboxes, or panels with fabric diffusion are my go-to choices. They produce broad, even illumination that avoids ring-shaped or concentrated reflections on glasses. Larger sources also let you drop power while maintaining coverage.
For desktop setups, place the diffuser about two to four feet from your face for an even wash. Keep the light slightly above eye level and off-axis so reflections miss the camera. If you want shape, add a gentle fill opposite the key light.
No softbox? No problem — household items can work as quick scrims. Stretch tracing paper, parchment, or a white shower curtain over a lamp to soften a harsh LED. Sheer curtains on a window will tame direct sun into a flattering key light.
Don’t over-diffuse and flatten your features; preserve some modeling with a subtle rim or hair light. If hotspots persist, dim the light or move it farther back, and watch camera exposure so highlights don’t clip. Keep color temperature consistent for natural skin tones.
Quickly test on camera and tweak distance or diffusion thickness until your eyes read clearly. Polished, soft lighting is the single biggest upgrade for glasses wearers on video. It helps you look natural and keeps the conversation focused on your words.
If you use a ring light, add a diffusion disc or a thin layer of fabric to eliminate the circular reflection. When in doubt, choose a larger, softer source — it flatters skin and reduces glare more effectively than a small, harsh lamp.
What People Ask Most
How do I reduce glare on my glasses during Zoom calls?
Use soft, diffused lighting placed off to the side and slightly above eye level to steer reflections away from the lenses. Adjust the tilt of your glasses and the position of your lights until reflections are minimized.
What is the best lighting setup for Zoom calls if I wear glasses?
A soft, broad light source with diffusion and off-center placement produces flattering, low-glare illumination. Balanced side lighting helps even out shadows without creating strong hotspots on lenses.
How should I position lights to avoid reflections on my glasses during video calls?
Place lights to the side and a bit above your face so the light does not reflect directly into the camera. Tilt lights downward gently and use diffusion to soften any remaining hotspots.
What color temperature is best for Zoom calls when wearing glasses?
Choose a neutral, natural-looking color temperature that flatters your skin tones and avoids harsh contrast. Avoid extremes in warmth or coolness that can exaggerate reflections or color casts.
How can I eliminate reflections in my glasses on camera?
Combine diffuse lighting and off-center positioning with small adjustments to your glasses angle to reduce visible reflections. Using anti-reflective coatings or changing the light quality can further minimize glare.
Should I wear anti-reflective coating glasses for Zoom meetings?
Anti-reflective coatings can reduce on-camera reflections and improve the visibility of your eyes. However, lighting placement and diffusion remain important factors in minimizing glare.
How do I light my face evenly for video calls with glasses?
Use a large, diffused key light or balanced lighting from both sides to create even, flattering illumination. Position the lights to avoid direct reflections while softening shadows for a natural look.
Conclusion for Zoom Lighting With Glasses
The simplest takeaway is that combining side‑angled lighting with soft diffusion will dramatically cut glare and produce a more flattering, less distracting Zoom appearance for glasses wearers.
Choose a lighting solution that fits your desk space, portability needs, and the level of glare control you want, balancing convenience against how soft and even you need the illumination to be.
Small setup choices — position lights slightly to the side and above eye level, use diffusers or softboxes, and nudge your glasses downward a few degrees — make big differences in reducing reflections and improving eye visibility.
If you want to build on these basics and sharpen your on‑camera presence, read more articles on the site to explore tips, setups, and troubleshooting ideas that match your workflow.
Have a question or want feedback on your setup? Leave a comment below and we usually reply within a few hours.


0 Comments