
What is diffraction in photography and why do your images sometimes lose fine detail when you stop the lens down? In short, what is diffraction in photography: it is the bending and interference of light as it passes the aperture, which can blur the finest detail at very small apertures.
This article will explain how diffraction works in plain English and show simple tests you can run at home. You will see the Airy disk idea, a short formula with a worked example, and side‑by‑side photo crops to compare.
We will cover the visible effects on photos, how aperture size and sensor pixels interact, and when diffraction truly limits sharpness. Then you will get practical ways to minimize it, like choosing the right f‑stop, focus stacking, and smart sharpening.
Whether you shoot landscapes, macro, or portraits, you will learn quick rules to find your lens’ sharpness sweet spot. Read on for step‑by‑step checks, visual examples, and field tips you can use right away.
What is Diffraction in Photography?
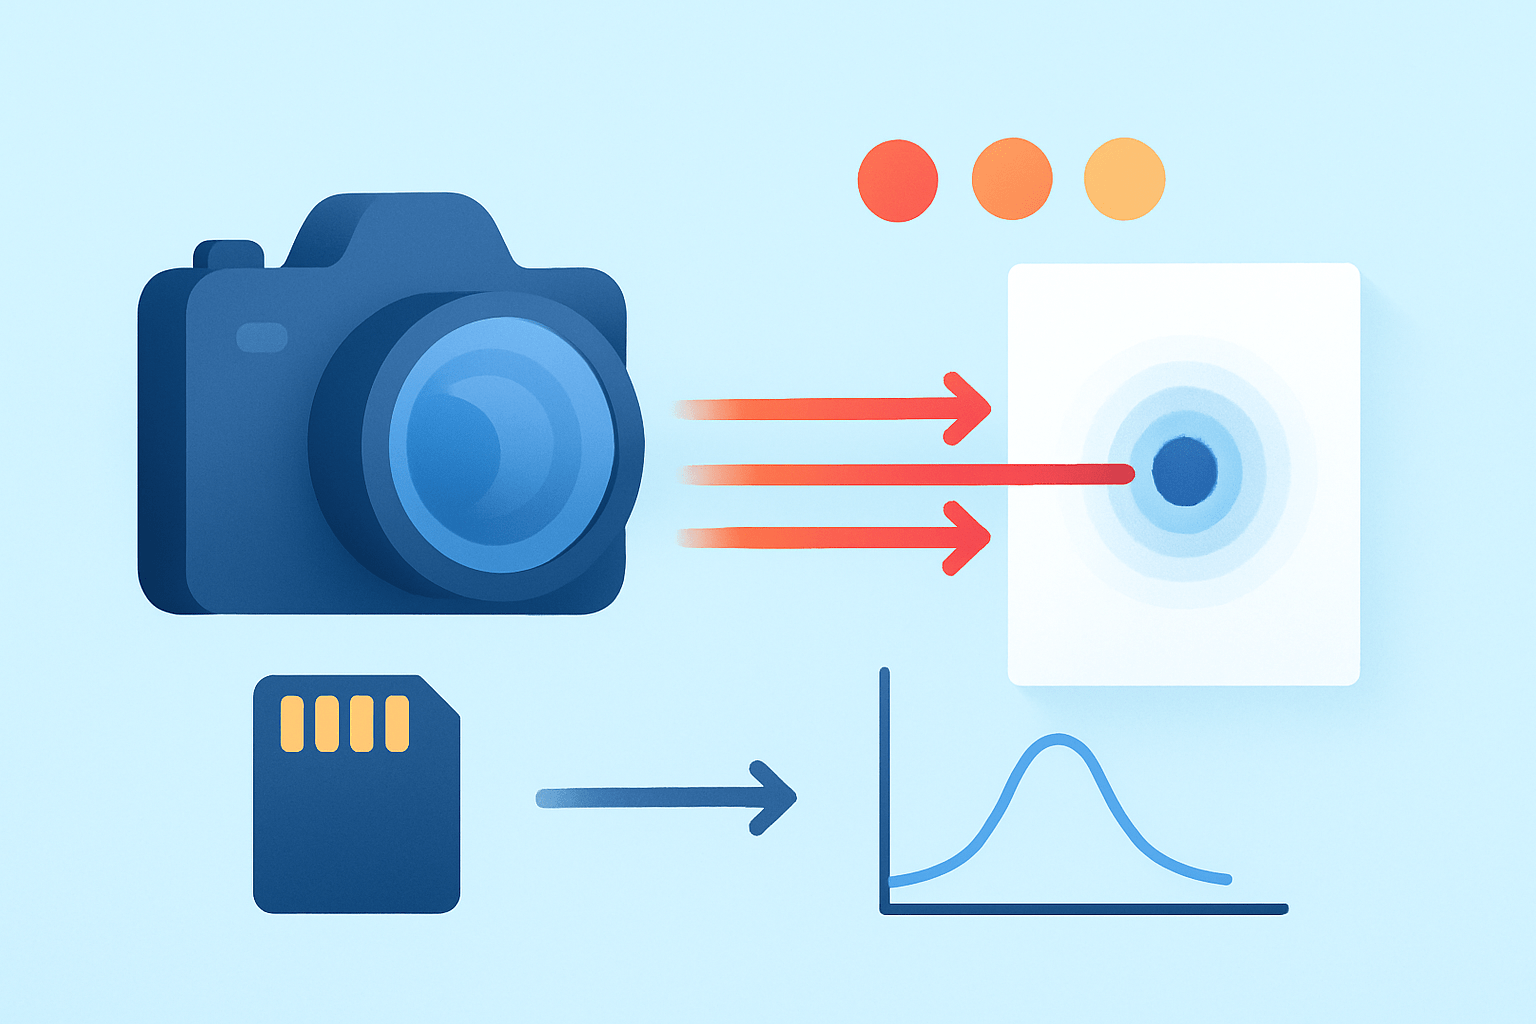
What is diffraction in photography? It is the spreading and interference of light waves as they pass the edges of the aperture, which softens the finest detail and reduces resolving power, especially at small apertures.
Light behaves like a wave, so when it squeezes through the round opening in your lens, it bends and fans out. Those bent waves overlap and interfere with one another. Your sensor then records a slightly spread-out spot rather than a perfectly crisp point, and that’s the essence of aperture diffraction.
Diffraction isn’t a lens defect — it’s physics. Every lens shows it when you stop down enough. Good technique helps you see when softness is from diffraction and when it’s from something else entirely.
Do not mix up diffraction with focus error. If your subject is soft at wide apertures and sharper after refocusing using live view at 100%, it’s a focus issue, not diffraction. Checking one static scene on a tripod and using magnified manual focus is the fastest way to isolate focus problems.
Motion blur also looks soft, but it has a direction and streaks. If a faster shutter or a tripod fixes the softness, that was motion, not diffraction. Stabilization can help with shakes, but it can’t cancel aperture diffraction.
Lens aberrations are another source of softness and show more near the edges or wide open. If your lens gets sharper when you stop down from wide open to f/4 or f/5.6 and then slowly softens again at f/16 or f/22, that U‑shaped pattern screams aberration first, diffraction later.
Sensor and processing can add their own look too. Heavy noise reduction or over-aggressive sharpening can smudge fine detail. If identical RAW files look different after different processing, the problem isn’t optical.
Try a simple visual test. Photograph a high-detail subject from a tripod at your lens’s widest aperture, mid aperture, and smallest aperture. Compare 100% crops from the center and look for the point where detail stops improving and starts softening again as you stop down.
You’ll notice diffraction sooner in landscapes with tiny textures like distant foliage, in macro scenes where magnification is high, and when you crop heavily. It also shows up in large prints where every pixel matters.
If you want a quick crash course before going deeper, skim this short primer and return with your camera to run the test above. Seeing it yourself is more convincing than any chart.
How it works
Think of water waves curling around a rock. Light does something similar when it passes the edge of an aperture blade. Waves bend, spread, and form a pattern that’s bigger than the actual opening.
That pattern is called the Airy pattern. It has a bright central disk surrounded by faint rings. In a perfect, circular aperture, a single point of light doesn’t land as a pixel-sized dot but as that central Airy disk with soft rings fading outward.
There is a handy rule for the size of that central disk. Airy diameter is about 2.44 × λ × f‑number. For visible light, λ is around 0.55 micrometers, so a practical version is Airy diameter in micrometers ≈ 1.342 × f‑number.
Let’s work some numbers. At f/4, Airy diameter is roughly 1.342 × 4 = 5.37 µm. At f/8, it’s roughly 1.342 × 8 = 10.74 µm. Those are real sizes you can compare to your camera’s pixel pitch.
Many 24 MP full‑frame sensors have pixels around 6 µm. So at f/4, the airy spot is a little smaller than a pixel. At f/8, it’s much larger than a pixel, and fine detail starts to merge because several pixels sample the same airy blob.
When do two fine points become one mushy point? The Rayleigh criterion says they blur together when their Airy disks overlap heavily. In practice, once the airy diameter approaches the pixel pitch and especially when it exceeds it, diffraction begins to cap the system’s resolution.
Real lenses add something else: aberrations. Wide open, many lenses are aberration‑limited, which means imperfections in the glass reduce contrast at fine detail before diffraction does. As you stop down, aberrations ease, and the lens gets sharper.
Keep stopping down and you pass the sweet spot. Past that point, diffraction grows faster than aberrations shrink. That’s why you often see peak sharpness somewhere around mid apertures, and a slow decline at very small apertures. This is exactly the balance behind “diffraction‑limited” versus “aberration‑limited.”
Macro complicates the story with effective aperture. At high magnification, the effective f‑number grows as N_eff = N × (1 + m). At 1:1 magnification, f/8 behaves like f/16 for diffraction, so softness arrives sooner than you expect.
Color has a tiny role too. Blue light has a shorter wavelength than red, so its Airy disk is slightly smaller. In practice, this means very fine blue detail can look a hair cleaner than red at the same aperture, but the difference is modest in real scenes.
None of this means you should fear stopping down. It means you should choose apertures on purpose. If your goal is maximum detail, keep an eye on when the airy spot size starts to rival your pixels. If your goal is depth of field, you may accept a little extra diffraction for a sharper overall scene.
Effects of Diffraction on Photos
Diffraction reduces microcontrast and erases the most delicate textures. It doesn’t usually destroy a photo, but it lowers the crispness you see when you zoom to 100% or make a large print.
Edges look less crisp and fine patterns blur together. When a scene is rich with tiny high‑frequency detail, the change is easy to spot as you stop down past the sweet spot.
Point sources turn into discs with faint rings. You might also notice starbursts around lights when you close the aperture, which is diffraction interacting with aperture shape. The more you stop down, the more defined those rays become.
Diffraction shows most at small apertures, high magnification, heavy crops, and on cameras with very small pixels. It also becomes obvious when you print big or sit close to a high‑resolution screen.
Here’s a practical rule. Diffraction begins to limit resolution as the Airy diameter approaches the sensor’s pixel pitch. Use the quick formula Airy ≈ 1.342 × N.
For a full‑frame 24 MP sensor with ~6 µm pixels, Airy equals pixel around f/4.5. For a high‑MP full‑frame at ~4.3 µm, the match happens near f/3.2. For a Micro Four Thirds sensor with ~3.3 µm pixels, it’s close to f/2.5.
Those numbers are not hard limits. You often won’t notice real‑world softness until a stop or two later, because subject detail, viewing distance, lens contrast, RAW processing, and sharpening all play a role. Still, the math gives you a sense of where the slope turns.
Good demos include a resolution chart and a textured scene shot at f/2.8, f/5.6, f/8, f/11, f/16, and f/22. Inspect 100% crops from the center and the corners. You’ll see clarity peak and then recede as the aperture gets very small.
Sometimes you want diffraction. Starbursts from streetlights at night can be a beautiful stylistic choice. For small web images, you may prefer the deeper depth of field of f/16 even if pixel‑level detail softens, because viewers will never zoom in enough to see that loss.
If you like to dive deeper into how all this interacts with sensors, explore this explanation on pixel size and Airy disks and then test on your own camera. Numbers help, but your output size and taste matter more.
Always remember the core trade. Stopping down can improve depth of field but can reduce the finest detail. Use that lever with intention rather than fear it.
Impact of Aperture Size
Aperture size sets the size of the Airy disk in a straight line. Double the f‑number and you double the airy diameter, so f/16 makes a spot twice as wide as f/8.
This creates a very real tradeoff. Stopping down increases depth of field, but it increases diffraction too. You gain sharpness across distances while slowly giving up microcontrast and the very finest details.
Finding your lens’s sweet spot is practical and quick. Shoot the same scene on a tripod from wide open down to the smallest aperture, keeping ISO and focus fixed. Compare 100% crops in the center and the corners and pick the aperture that looks best for your usual output size.
Many full‑frame primes shine between f/4 and f/8. High‑megapixel sensors tend to push the best compromise toward slightly wider apertures because their smaller pixels reveal diffraction earlier. Zooms often like a similar range, but each lens tells its own story.
Aperture geometry also plays a part in the look of your photos. The number and shape of aperture blades changes how starburst rays appear and how bokeh highlights look. When you close down, those rays become more defined, and that’s a creative use of diffraction, not a flaw.
Macro needs special care. Remember N_eff = N × (1 + m). At 1:1, f/8 behaves like f/16 for diffraction, so many macro shooters avoid going past f/8–f/11 on full frame unless they accept a softer look or plan to stack focus.
As a rule, favor the largest aperture that still gives you the depth of field you truly need for the shot. If you need more front‑to‑back sharpness without sacrificing micro detail, the next section shows smarter ways to get it.
Techniques to Minimize Diffraction
The fastest win is simple. Use the widest aperture that still delivers enough depth of field for the subject, then raise ISO or use a faster shutter to protect sharpness. A touch more noise is usually easier to clean than lost microcontrast from aperture diffraction.
Sometimes you can recompose for depth. Step back a little, or choose a slightly longer focal length from a bit farther away to keep the same framing at a wider aperture. The geometry of depth of field can work in your favor when you change distance.
Focus stacking is the most powerful fix for landscapes and macro. You shoot several frames at a wider, sharper aperture, each focused at a different plane, and blend them for a crisp frame front to back. The result preserves micro detail without needing f/16 or f/22.
A typical stacking workflow is straightforward. Lock the camera on a sturdy tripod, switch to manual exposure, and keep the same white balance and aperture for all frames. Move focus in small, overlapping steps from the front to the back of the scene and blend the images later.
Blending can be done in Helicon Focus, Zerene Stacker, or Photoshop. Each tool has different strengths, but all can deliver natural blends when you feed them consistent exposures and enough overlap. For macro work with shiny subjects, consider diffused light to avoid highlight artifacts.
Test your own lens and sensor combination to set expectations. Photograph a detailed subject or a resolution chart from wide open down to your smallest aperture on a tripod, with the same processing applied to every file. Check center and corners at 100% and note the first aperture where gains stop and the one where losses start.
That test becomes your playbook. You’ll know when your lens is aberration‑limited and when it becomes diffraction‑limited. With that knowledge, you can choose apertures by intent rather than habit.
System choices matter too. Lenses that resolve well at wider apertures give you more room to avoid stopping down. Sensors with larger pixels will show diffraction a bit later, while very tiny pixels reveal it sooner, so consider pixel pitch when picking a camera for detailed landscapes or macro.
Post‑processing can claw back some crispness. Deconvolution sharpening, clarity, and modern AI tools can restore a measure of microcontrast, especially if you start from clean RAW files. They can’t recreate true high‑frequency detail that never reached the sensor, so set expectations accordingly.
Apply sharpening with a light touch. Mask flat areas to avoid halos around edges, and tailor output sharpening to your final viewing size. For prints, test small strips at different sharpen settings before committing to a large piece.
Macro shooters should lean on stacking rather than f/22. Astrophotographers should use faster optics to avoid bloated stars and, if possible, use tracking to allow shorter exposures at wider apertures. In both cases, avoiding tiny apertures protects the pinpoint detail you want.
There are moments to embrace diffraction too. If you crave bold starbursts in a cityscape, stop down until the rays look the way you like. Art often beats absolute resolution, and a controlled softening can suit the mood.
Before every important shoot, run a quick mental checklist. Confirm a stable camera position or tripod, choose the widest workable aperture, and set ISO and shutter to avoid motion blur. Decide if the scene needs a focus stack and shoot RAW with a test frame around your known sweet spot.
If you want a refresher with illustrations and comparisons, browse this overview of lens diffraction and try the same series on your own gear. Nothing builds confidence like seeing your results improve shot by shot.
By now you should not be asking what is diffraction in photography as a mystery, but using it as a tool. You know when it appears, why it matters, and how to negotiate the tradeoffs. With a few habits and a practiced eye, you’ll hold onto detail where it counts and spend less time fighting softness later.
What People Ask Most
What is diffraction in photography?
Diffraction in photography is the softening of image detail that happens when light bends around the edges of the lens aperture. It makes photos look less sharp at very small apertures.
How does diffraction affect image sharpness?
Diffraction spreads light and lowers fine detail, so images can look softer even if focus is correct. The effect increases as you use smaller apertures like f/11, f/16, and beyond.
Can diffraction ever be useful in photos?
Yes — a little diffraction can create a gentle, pleasing softness for portraits or dreamy scenes. It can also produce starburst effects on bright points of light with small apertures.
How can I tell if softness is caused by diffraction or focus?
Diffraction causes an overall loss of fine detail across the frame, while focus errors usually make only parts of the image soft. Zooming in on sharp areas and checking different apertures helps identify the cause.
What are simple ways to reduce diffraction in my photos?
Use a slightly wider aperture (larger f-number like f/5.6–f/8) when you need maximum sharpness, and avoid stopping down more than necessary. You can also increase ISO or use a tripod to allow a wider aperture without motion blur.
Is diffraction the same as lens softness or blur from motion?
No — diffraction is a physical effect from small apertures that reduces detail evenly, while lens softness may come from optical flaws and motion blur comes from camera or subject movement. Each problem needs a different fix.
Does diffraction only affect certain cameras or lenses?
All cameras and lenses experience diffraction, but the visible impact varies with sensor size and lens design. Smaller sensors and very small apertures usually show diffraction sooner than larger sensors.
Final Thoughts on Diffraction in Photography
Understanding diffraction helps you protect the fine detail you care about, whether you’re pixel‑peeping or planning prints. For example, when you inspect images at 270 PPI you’ll notice softening from small apertures sooner, and the piece showed why that happens and how to test for it. We began by defining diffraction as light spreading through the aperture, then explained the Airy disk, f‑number math, sensor interaction, and simple fixes.
Armed with that knowledge you’ll be better at choosing an aperture that preserves microcontrast or deciding when to use focus‑stacking and higher ISO instead. Be realistic: stopping down will give more depth but will eventually soften the finest detail, and tiny‑pixel sensors will show that limit earlier. Photographers who shoot landscapes, macro, or high‑resolution work will benefit most from the tests and techniques described.
We answered the opening question by giving a clear definition and repeatable steps to measure and manage diffraction so you won’t be surprised by softness. Keep experimenting with apertures, test crops and stacking — you’ll find the sweet spot that fits your style and gear.




0 Comments